Forward:
This document assumes that you have purchased (either new or second hand) a Sophos SG (or XG) hardware appliance and are looking to use the Sophos SG UTM 9, with the LCD front panel remaining functional, all on the free Home license (for home use of course).
Requirements:
You will need:
- USB DVD Drive (burner if your PC/Mac doesn’t also have a DVD burner installed)
- Blank DVD disk
- USB keyboard
- VGA / HDMI screen (VGA / HDMI depending on the Sophos appliance you have – SG2xx has VGA, SG3xx has HDMI for example)
- Home license of UTM9 – sign up for an account at myutm.sophos.com
- ISO file for Sophos hardware appliance – obtain from here (official), or here (unofficial mirror – Australia only)
We’re going to freshly reinstall the UTM OS so you obtain a free 30-day trial license which will allow you to get the appliance up & running…
Burn the ISO to the blank DVD
Connect the USB DVD drive to the Sophos USB port and insert the disk
Power on and boot from the DVD
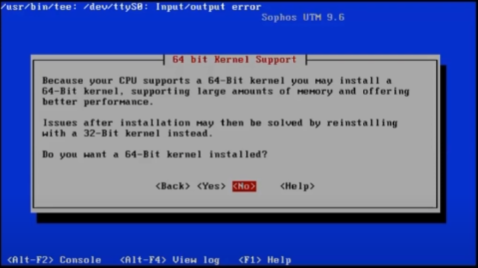
If your appliance has or will have more than 3.5GB RAM, always install the 64bit kernel when prompted.
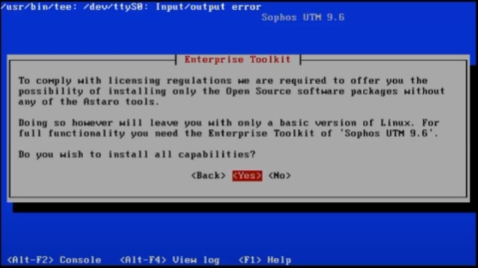
When prompted to install all capabilities or only Open Source software, always choose to install all capabilities.
Go through and follow the steps to complete the installation. Once done, it will reboot and you want to make sure it boots from the internal disk – not the DVD.
Post Installation Configuration:
Get to the point where the Sophos has booted from the internal drive with the freshly installed SG UTM OS
Connect your computer to the LAN interface, set a static IP address in the same range as the IP address displayed on the Sophos console screen, but don’t choose the same IP address as the Sophos on your PC.
Open a browser and point it to the https port 4444 of the Sophos IP, so if the IP address of the Sophos is 192.168.2.100, then in the browser, point to: https://192.168.2.100:4444/
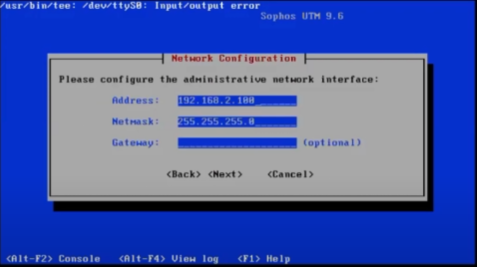
Hint, the IP address was also set during the OS installation as seen here:
Set a hostname, organisation name, city, country, admin password and admin email address.
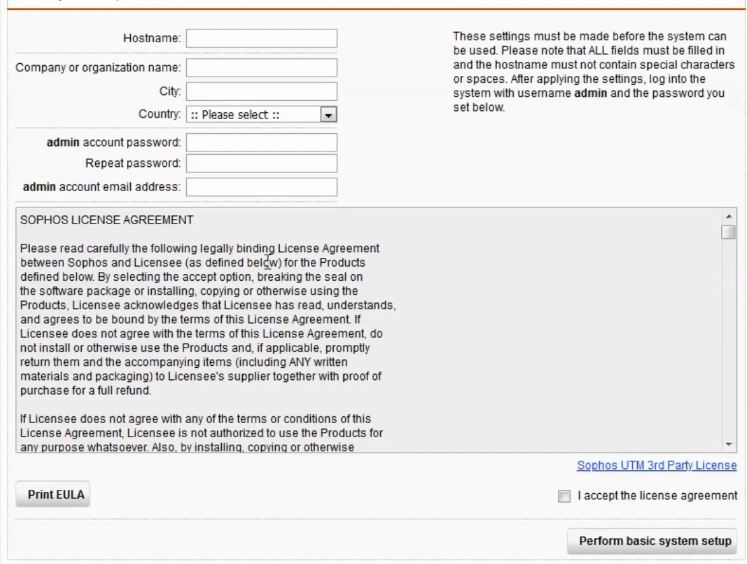
The organisation name, city, country, etc., are used to generate a self-signed certificate and nothing really beyond this.
Hint, a DNS resolved fully qualified host name makes life easier.
Once you’ve done, this the Sophos will log out, generate a new self-signed SSL certificate, and reload the admin page.
Your browser will kick up a small fuss about the SSL not being valid, proceed anyway
Login using admin as the user name and the password you just specified
You have the choice to Continue as a new setup or restore from backup.
Choose to setup as a new appliance (select Continue), as there are a couple of caveats when restoring from backup
Next screen is important, its where you would normally upload to install your license – BUT DON’T – instead, just click next to use a 30 day trial license.
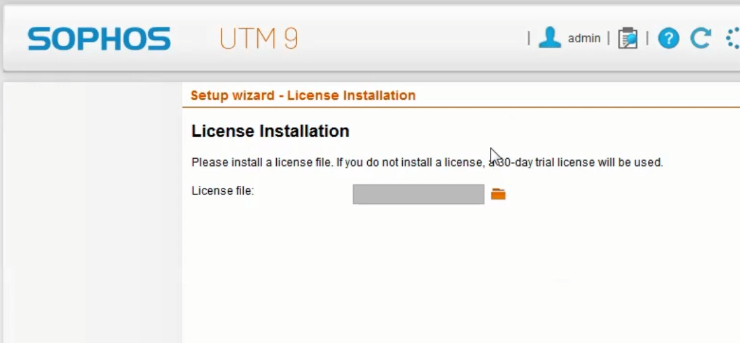
If you try to upload your home license, it will detect that you’re using a hardware appliance & will not let you use it. The reason we freshly installed the OS is to obtain a new 30 day trial license, which otherwise would not have been made available to us.
At the next screen, you can confirm or change the LAN IP of the appliance, and also enable & configure a DHCP server on this interface.
Next it will want you to configure the WAN interface
Then it will ask about the services to enable & configure – leave this as defaults and click Next
Once you get through the basic setup screens, click Finish and you’ll be at the management home screen
Enable SSH and set the loginuser and root passwords:
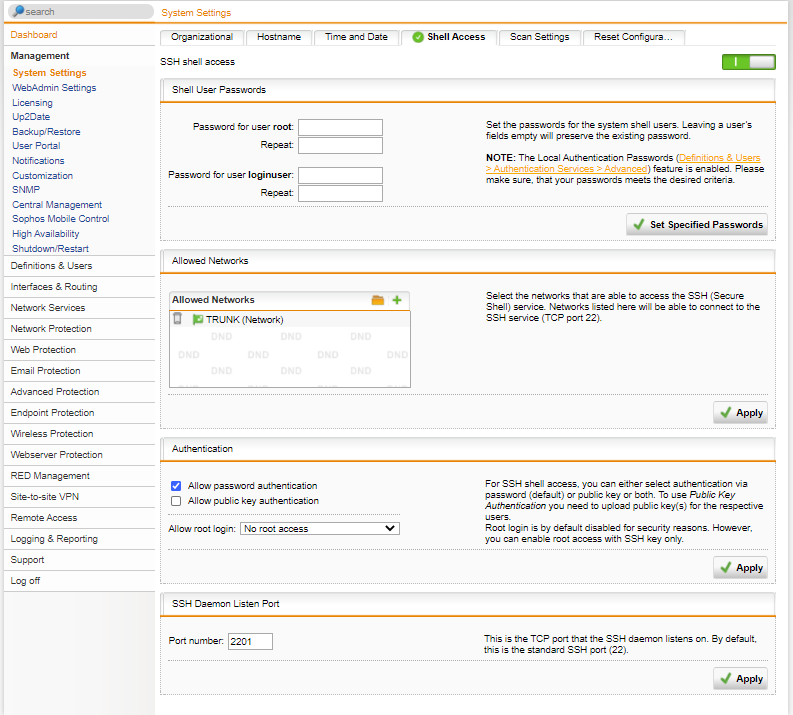
- From the left menu, click Management > System Settings
- From the top, select the Shell Access tab
- Click the switch to ON to enable shell access

- Set a password for both the loginuser and root accounts, then click Set Specified Passwords
- Next, under Allowed Networks, add in the LAN (Network) and click Apply
- Next, under Authentication, tick Allow password authentication and click Apply
- Finally, change the SSH port to something else, like 2222, or 2201, or something like this, and click Apply (if the firewall is online or you intend on retaining SSH access) as SSH ports are constantly being scanned.
Edit System Configuration Files:
Either using the connected console (keyboard & display) or SSH from Putty or Terminal, login to the Sophos using the account: loginuser
If you changed the port number above, then use that when connecting in via SSH.
Once logged in, you’re about to do something often frowned upon:
sudo sh
Enter the root password
Now enter the following commands:
rename /etc/asg /etc/asx
mv /etc/asg /etc/asx
vi /etc/asx
Take note of the contents of this file – you’re looking to note down these three lines:
ASG_VERSION=
LCD4LINUX_HW=
ASG_SUBTYPE=
Exit VI.
Now create a new file: /etc/asg
vi /etc/asg
Add in the following (again setting the appliance model & revision appropriately noted down before), in my case:
ASG_VERSION="310"
LCD4LINUX_HW="LCD-SERIAL380"
ASG_SUBTYPE="r2"
Save, exit, and reboot the appliance.
Update Appliance License from 30-day Trial to Home Edition:
Now that the above has all been completed, the LCD should still be reflecting current stats (confirm this by monitoring the CPU & RAM usage changes on LCD and comparing them to the management screen in the web UI), we can go ahead and change out the 30-day trial license for the free Home edition license.
Why Sophos locked down the hardware appliances from home license use is a little bizarre and annoying, but the fact that these R1 and R2 appliances are making their way onto the second hand market in giant waves, means that people will snap them up for home use, hit the license restriction, and decide to wipe them & install alternate firewall OSes on them, like pfSense / OPNsense, etc. Really, this is a set back in two ways: 1) Sophos are encouraging eWaste by not permitting home user licenses to re-use old enterprise hardware, and 2) they cause would be home users or enthusiasts to shy away from the Sophos SG/UTM firewall product as they can’t use it on the actual hardware appliance, so they opt for alternatives. /rant
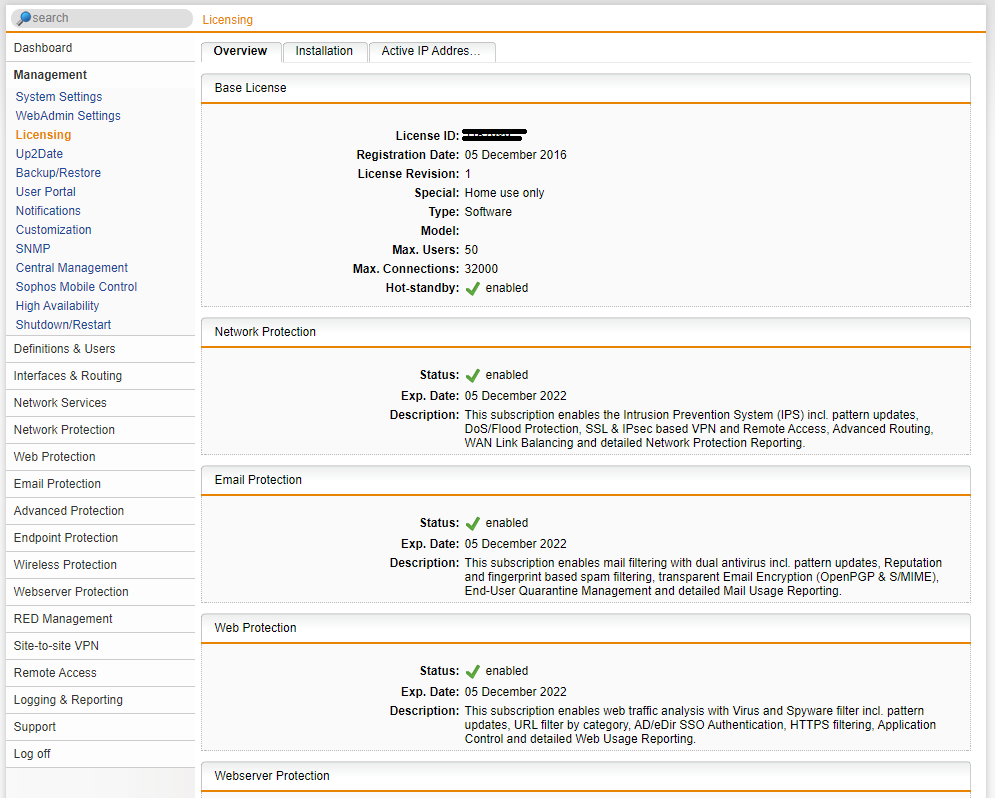
Download your home license file from your myutm.sophos.com account, and upload this into the Sophos in Management > Licensing > Installation
The Home license will activate many useful features for basic and advanced home labs, and will need to be renewed every (I believe) 2-3 years
.
Something to note, Sophos SG UTM Home License edition has a user device limit of 50 issued IP addresses that are allowed to traverse the firewall. For many home environments with small families, this is probably substantial. There’s also a 10% tolerance on this 50 IP limit, so realistically, 55 devices.
However, larger families, where each family member has at lease 2-3 internet connected devices (say phone, tablet, and laptop), plus a few TVs, game consoles, WiFi access points, etc, you’ll soon run out of IP addresses very quickly. My home is in this larger category, there are currently seven of us living here, multiple “cloud-managed” switches, access points &and security cameras, two Xbox consoles, three Apple TVs, every person has at least three devices, and we are well over our limit. On top of this, I have a home IT lab with over 20 virtual machines, two physical servers, and additional workstations & laptops (all for lab / test use). I have NEVER had this pose an issue – every device is still able to connect to the internet, despite having well over 100 IPs assigned. I’m not sure why this is the case for me – maybe because there are VLANs in place???
At the end of the day, what Sophos offer out of the box for a free three-year home license is a very generous offering. It would be nice if there was a home-premium style license, where you retained all the same features, but the IP limit was lifted to either 500 or unlimited, and you paid something like US$100 every three years.
What some users out there with Sophos UTM have done to overcome this is to have a second basic router behind the main Sophos – all WiFi devices and family devices would sit behind this second router – leaving only essential systems behind the Sophos. I also initially had my network setup like this, but found it was unnecessary (in my case).
Final note: the free home license also provides high availability (HA) so if you have more than one hardware firewall running UTM9, you can set them up in HA which is really handy for installing firmware updates with zero downtime! Again, something I have working in my home environment.


