Scope:
In this post, we cover the steps required to allow Hyper-V VM replication to occur between Hyper-V hosts that are not domain joined, not in a cluster, not managed by anything else, and are completely standalone.
Preparations:
Hostname Changes:
As Kerberos is only available in the active directory domain, we will need to use HTTPS / SSL certificates to authenticate the Hyper-V hosts with one another. We will do this using Self-Signed SSL certificates that are signed by a test CA.
First thing to do is to ensure that each host has a fully qualified domain name (FQDN) even if its a local FQDN, and is resolvable using DNS over IPv4.
Open a command prompt or powershell session, change directory to: C:\Windows\system32
Enter in:
control sysdm.cpl
This will launch the Control Panel’s System CPL file – the legacy version before modern versions of Windows swapped this out for the System page in the Settings app.
Under the Computer Name tab, click the Change button, the in the name change window, click the More button.
In this screen, add a local or private domain name & suffix to the system.
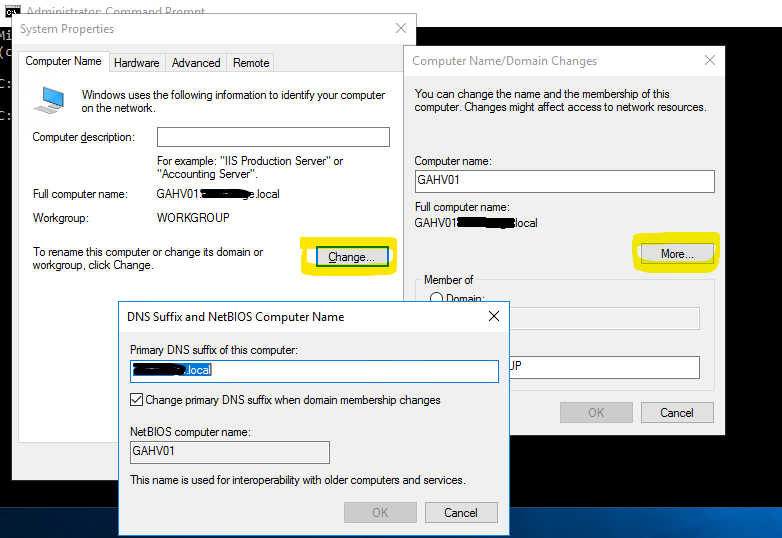
This will require a reboot of the Hyper-V host for the name change to take effect.
Repeat this on the other Hyper-V host(s). Ideally, you want the domain.tld to match across all hosts.
Ensure the ethernet adapters have this domain in the DNS search suffix list and that the local DNS server is aware of these FQDNs & has A records for each hosts entry.
Generate SSL Certificates:
The next step is to generate the SSL certificates for each host. Pick a host – just the one. Using PowerShell, issue the command:
New-SelfSignedCertificate -DnsName "host1.domain.local" -CertStoreLocation "cert:\LocalMachine\My" -TestRoot
- The DnsName in quote marks should be reflective of the FQDN hostname of the server.
- The CertStoreLocation tells the PS SSL generator where to place the generated certificate – we’re installing it in the Personal store on the Computer account.
- The -TestRoot flag is really key to this, as we’re going to use the built in testing CA to co-sign the certs – which will need to be trusted also.
Repeat the same step on the same host to generate a certificate for each other Hyper-V host that you will be using in the replications, so:
New-SelfSignedCertificate -DnsName "host2.domain.local" -CertStoreLocation "cert:\LocalMachine\My" -TestRoot
Now launch mmc.exe
In the File menu select Add/Remove Snapin
Choose Certificates from the list and add
Choose Computer account when prompted
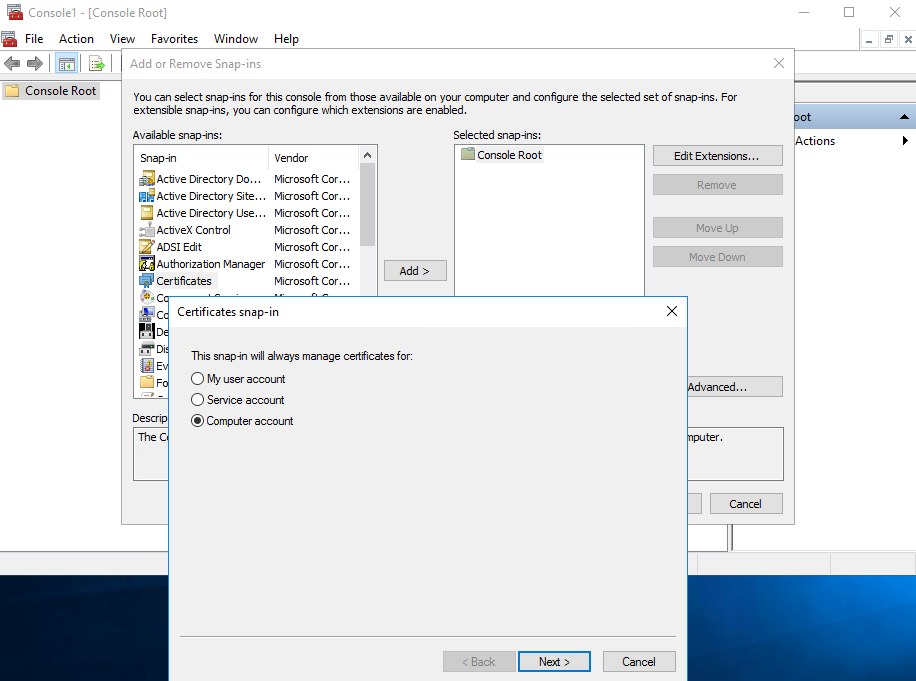
You will see the certs you created listed.
Double-clicking on these will show they’re not signed. This is because we need to move the CertReq Test Root certificate from the folder:
Intermediate Certificate Authorities > Certificates
To:
Trusted Root Certificate Authorities > Certificates

Now that you’ve done this, export each SSL certificate out from the Personal > Certificates folder as PFX files.
- Right-click on each one, All Tasks > Export…
- Yes to exporting the private key…
- Export with all extended properties
- Set a password and save the file.
Repeat for each of the certificates you generated.
Export the CertReq Test Root CA certificate as well – selecing the DER encoded binary X.509 format
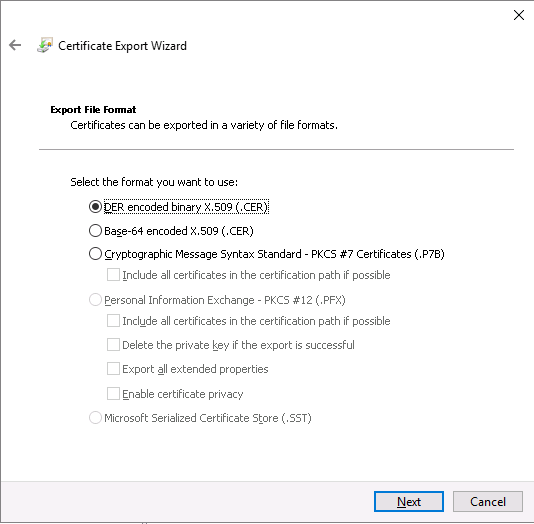
- Copy these files to each of the other Hyper-V hosts
- Import the CA into the same Trusted Root Certification Authorities > Certificates folder on each host
- Import the SSL certificates into the Personal > Certificates folder on each server.
Remember, done from the Computer account, not service or personal accounts.
Opening the self-signed certificates on each host should show up as a valid SSL certificate.
Registry Changes:
We need to tell Hyper-V not to do any revocation checks on the SSL certificates
In an elevated Command Prompt or PowerShell session, enter in:
reg add “HKLM\SOFTWARE\Microsoft\Windows NT\CurrentVersion\Virtualization\Replication” /v DisableCertRevocationCheck /d 1 /t REG_DWORD /f
Enable HTTPS Hyper-V Replication:
Now we can enable Hyper-V replication on each of the Hyper-V hosts.
- Open Hyper-V Manager, select the host, and click on Hyper-V Settings…
- Select Replication Configuration
- Tick to Enable this computer as a Replica server
- Untick Use Kerberos
- Tick Use certificate-based Authentication (HTTPS)
- Click Select Certificate… and, if everything above was done correctly, the Specify certificate box will auto-populate with the details of the certificate of this server.
- Click to allow replication from any authenticated server
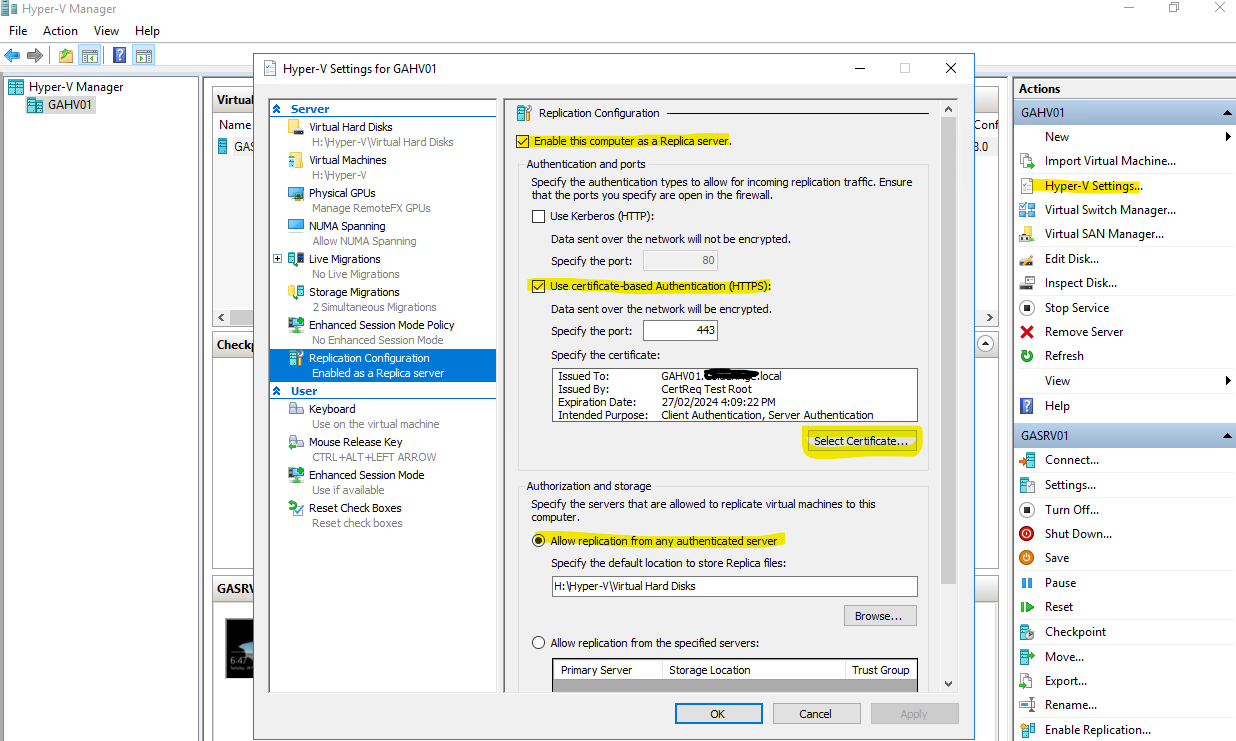
Repeat these steps on the other Hyper-V hosts
Configure Hyper-V Replication:
Right-click on the VM you need to replicate
Specify the replica server with its FQDN (ensure that you can first ping the replica server with its FQDN eg: ping host1.domain.local)
Next, choose certificate based authentication
Select the certificate and it should prompt to auto fill this data
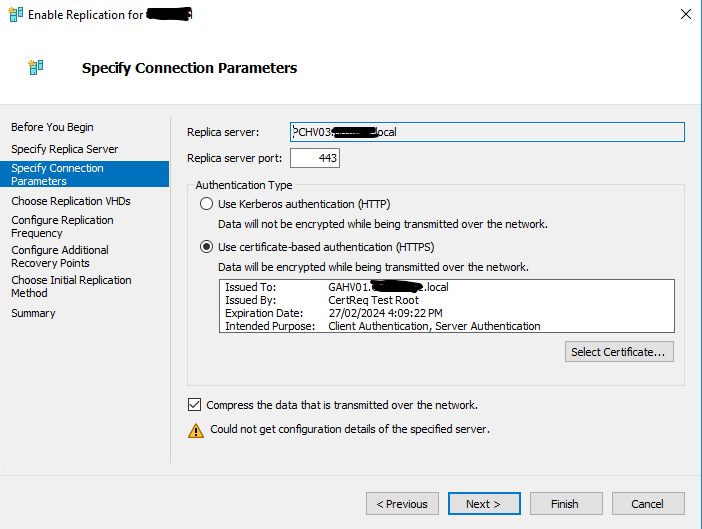
From here, the rest should be pretty straight forward – options such as choosing how often, how many versions to retain, etc.
Hi! Sorry i just curious, what template did you use for your website? I want to use it on my website at https://www.gdiz.eu.org
Hi, thanks, I used AnaLog – see here: https://wordpress.org/themes/analog/