DCDIAG Result – Warning: Attribute userAccountControl of DC is: 0x82020

Issue:

When performing a DCDIAG, you get a warning with output:

Warning: Attribute userAccountControl of DC is: 0x82020 = ( UF_PASSWD_NOTREQD | UF_SERVER_TRUST_ACCOUNT | UF_TRUSTED_FOR_DELEGATION )
Typical setting for a DC is 0x82000 = ( UF_SERVER_TRUST_ACCOUNT | UF_TRUSTED_FOR_DELEGATION )
This may be affecting replication?

Cause:

The computer account was pre-created in Active Directory Users and Computers (ADUC) before being added to the domain and promoted as a domain controller.

Fix 1:

  • Launch ADSI Edit and connect to the Default Naming Context
  • Drill down into the Domain Controllers OU
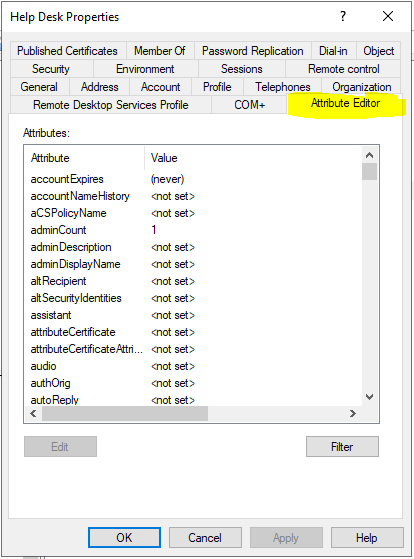
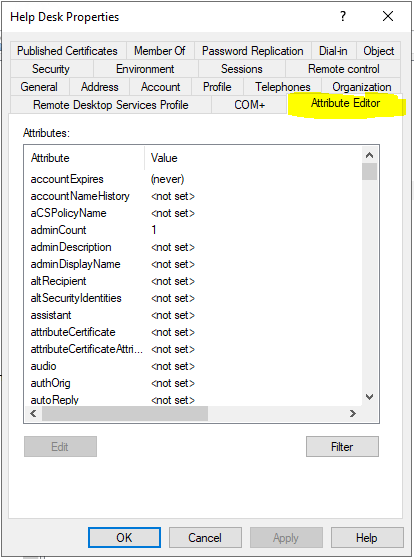
  • Double-click the domain controller and in the Attribute Editor tab, scroll down to userAccountControl
  • You will likely see the value set to something like:
0x82020 = (PASSWD_NOTREQD...
  • Highlight the value and click Edit
  • Change the value in the edit box from 532512 to 532480
  • Click OK and OK again to save the changes

Now running DCDIAG should show this error to have been cleared.

Fix 2:

You can use an elevated PowerShell session to automate the process of the above steps in Fix 1 to all domain controllers in the Domain Controllers OU.

Change the -searchbase criteria in the below and execute:

get-adobject -filter "objectcategory -eq 'computer'" -searchbase "ou=Domain Controllers,dc=domain,dc=tld" -searchscope subtree -properties distinguishedname,useraccountcontrol | select distinguishedname, name, useraccountcontrol | where {$_.useraccountcontrol -ne 532480} | %{set-adobject -identity $_.distinguishedname -replace @{useraccountcontrol=532480} -whatif}

Even if the above command fails to fix the values, it will at least list servers with the incorrect values – handy where there are numerous domain controllers present.

Extra Information:

Some typical values:

  • Standard user: 0x200 (512)
  • Domain controller: 0x82000 (532480)
  • Workstation / member server (non-DC): 0x1000 (4096)


Change the default OU’s in AD for new Users and Computers

By default, when new users & computers are created in active directory where the OU hasn’t been specified at creation, AD defaults to the following OU’s:

  • Users go into: DC=domain,DC=tld\Users
  • Computers go into: DC=domain,DC=tld\Computers

These can be changed to go into OU’s that you choose by issuing the following commands in an elevated PowerShell session / command prompt and change directory to:

cd C:\Windows\System32\

Users:

redirusr “OU=<newuserou>,DC=<domainname>,DC=com”

Computers:

redircmp “OU=<newcomputerou>,DC=<domainname>,DC=com”

Hint: Obtain the OU distinguish name from the advanced properties of the OU itself.

Configure Windows NTP Servers in Active Directory Environment Using Group Policy

Scope:

Setup a fully functional & authorities time service across Active Directory to ensure all AD joined Windows systems are properly time-synced to the domain controller(s) and also to external sources when abroad.

The Primary Domain Controller:

In Active Directory, the PDC Emulator should get the time from an external time source and then all member computers of this domain will get the correct time from the PDC. Since the PDC Emulator can move around, we make sure the GPO is applied only to the current PDC Emulator using a WMI filter.

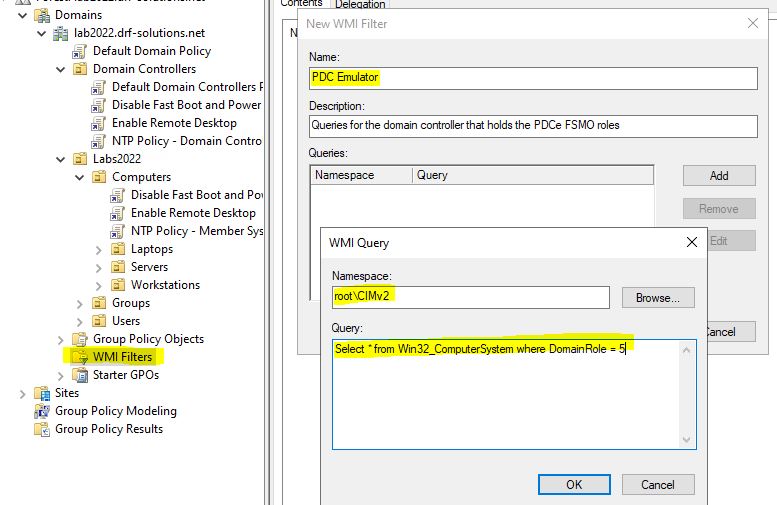
Go to the WMI Filters section in GPMC and create a new filter like the following:

Here’s the query for you to copy’n’paste:

Select * from Win32_ComputerSystem where DomainRole = 5

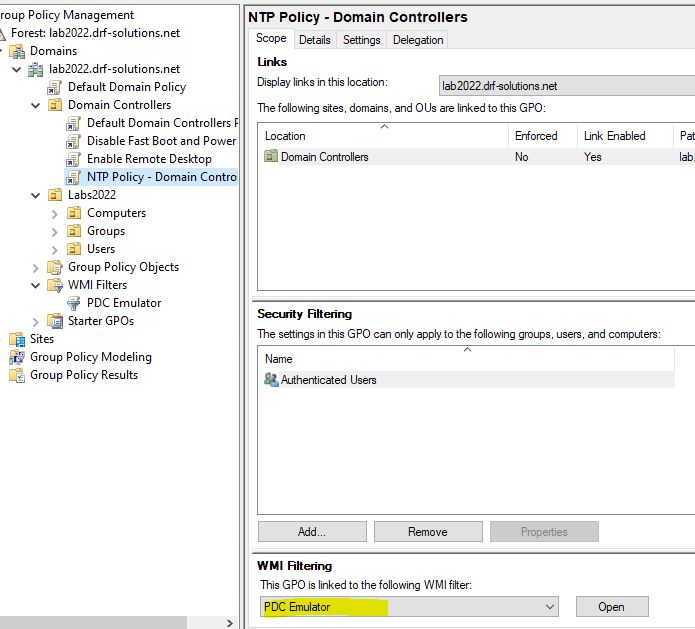
Create a GPO called NTP Policy – PDC and apply it to the Domain Controllers OU

Apply the WMI filter you created earlier

Drill down into:

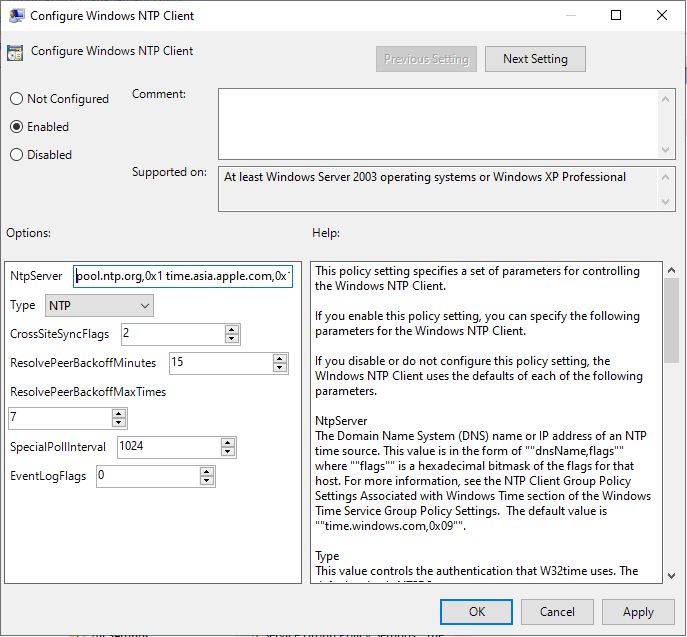
Computer Configuration/Policies/Administrative Templates/System/Windows Time Service/Time Providers

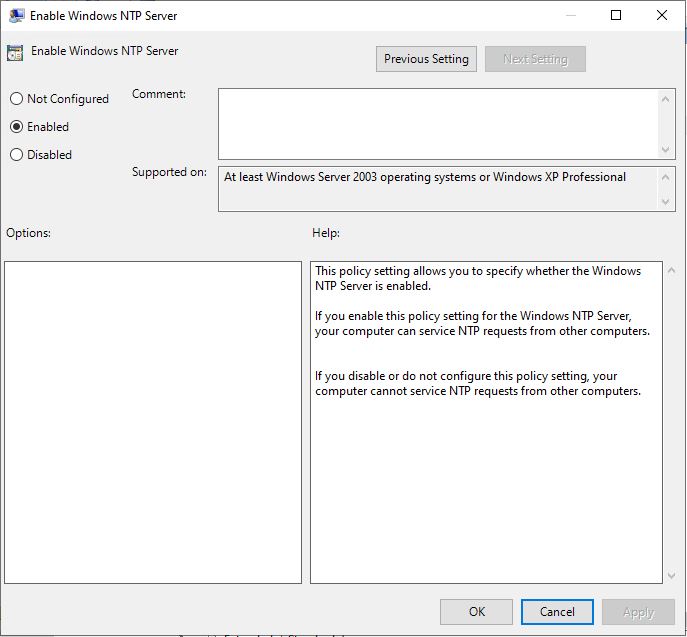
Edit all three policy items in this folder:

Next, we need to allow the NTP requests to hit the domain controller, so drill down into:

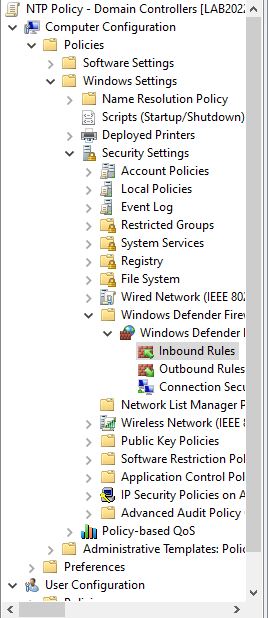
Computer Configuration\Policies\Windows Settings\Security Policies\Windows Defender Firewall with Advanced Security\Windows Defender Firewall with Advanced Security\Inbound Rules

Right-click on the Inbound Rules tree item and select New Rule…

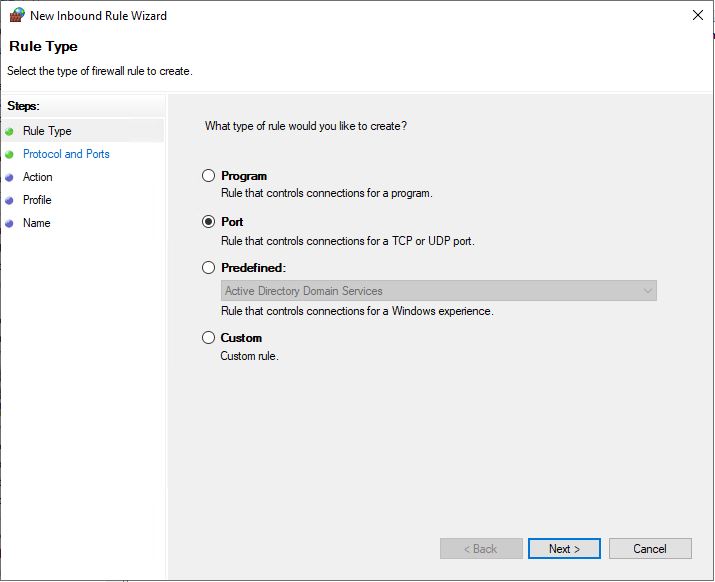
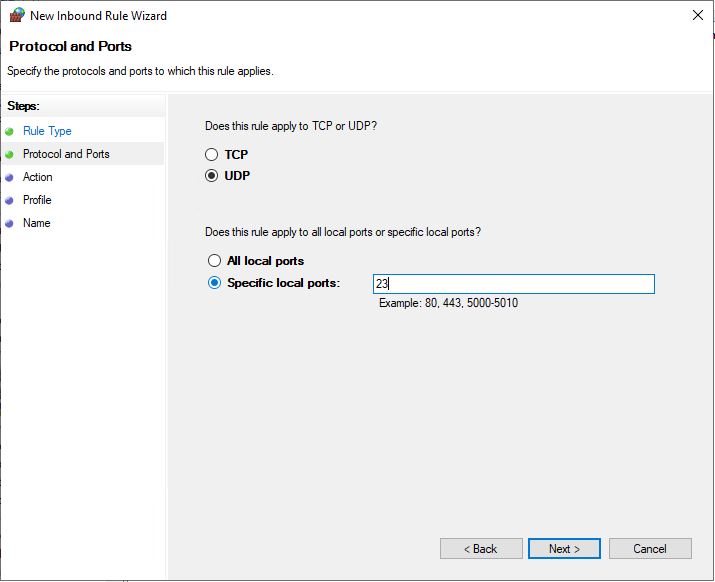
Choose Port and click Next

Select UDP and specify port 23. Click Next

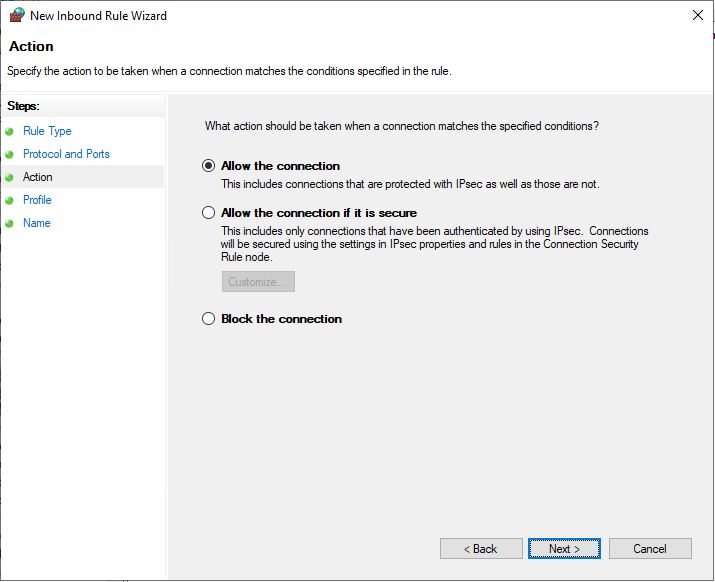
Select Allow the connection and click Next

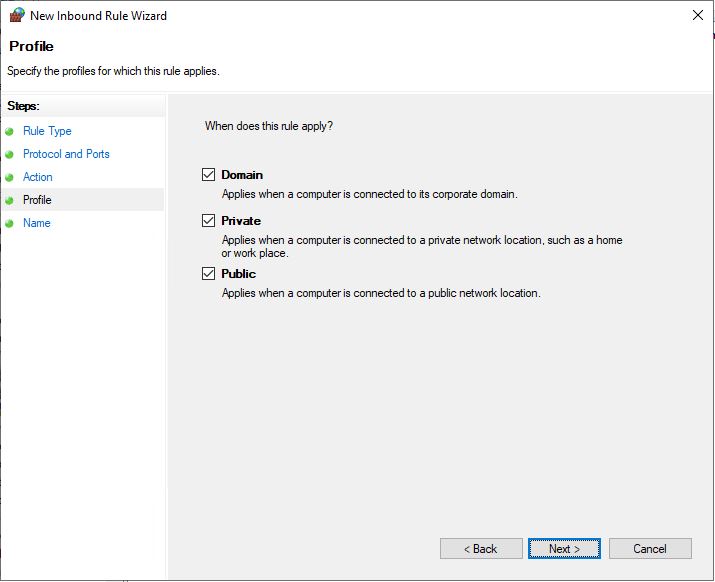
Ensure all network profiles are selected and click Next

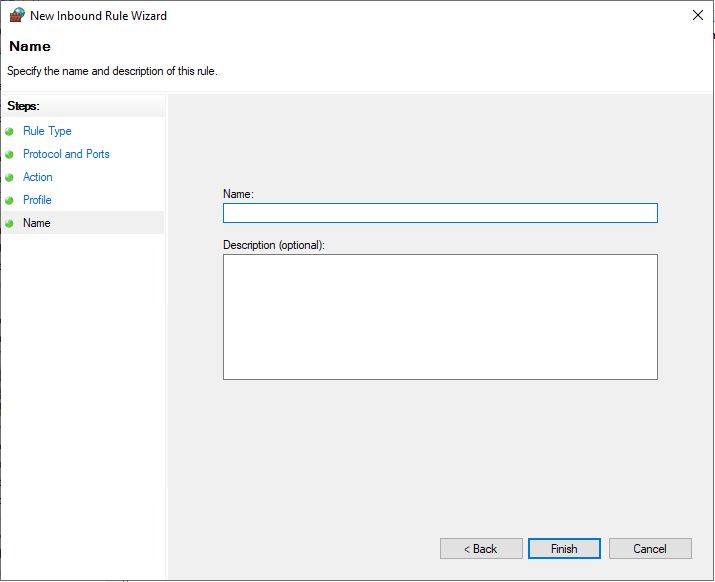
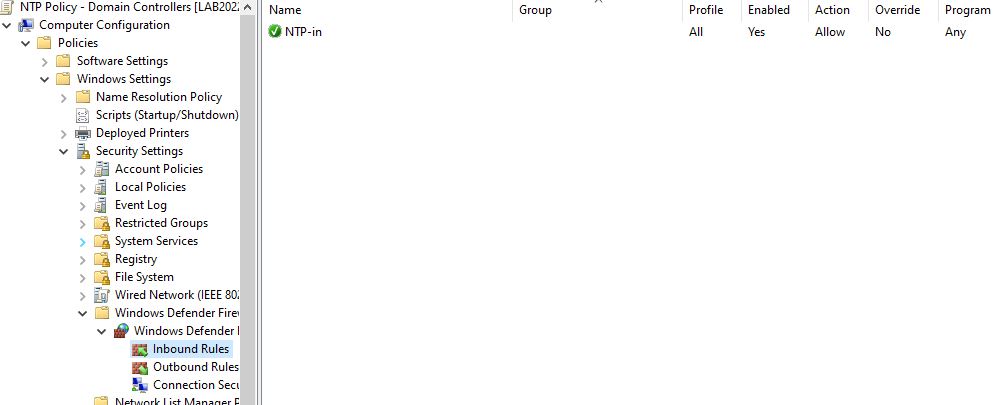
Give the rule a name, such as NTP-in and click Finish

The final result will look something like this:

Additional Domain Controllers:

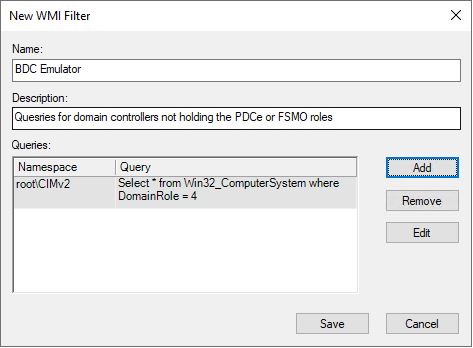
Now we need to create another WMI Filter called BDC Emulator and use the following query:

Select * from Win32_ComputerSystem where DomainRole = 4

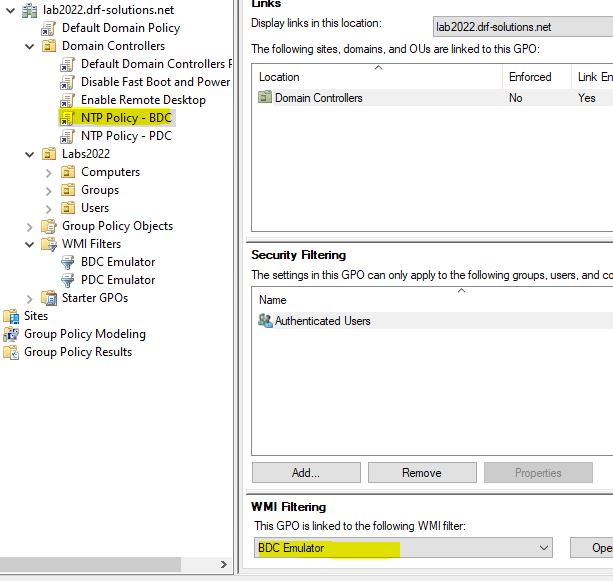
Create a new GPO in the Domain Controllers OU called NTP Policy – BDC

Link the WMI Filter for BDC Emulator

Now edit this GPO and drill down to:

Computer Configuration/Policies/Administrative Templates/System/Windows Time Service/Time Providers

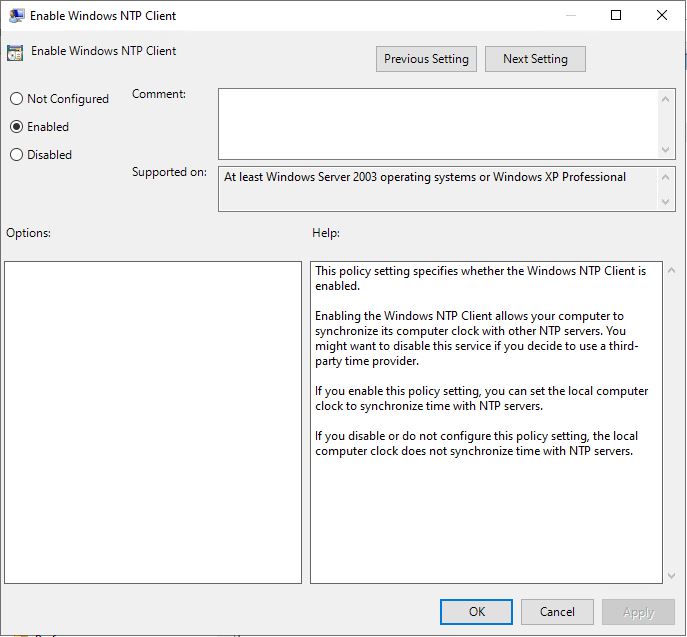
Double-click Enable Windows NTP Client

Set to Enabled and click OK

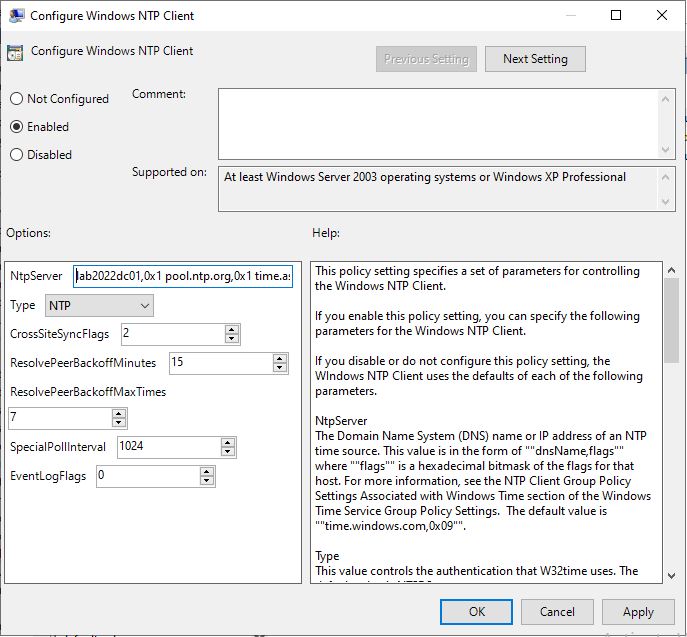
Double-click on Configure Windows NTP Client

Set Type to NTP

Set NtpServer to hold the PDC and also a couple of external time providers that match what you specified in the PDC GPO

Click OK and close that policy

Congratulations! You have configured the NTP GPOs for the domain controllers.

Now we need to configure NTP for the rest of the domain members

Configure NTP for Domain Member Systems:

Finally, create a new GPO and link it to the OU where member servers, laptops, and workstations reside

Call it something like NTP Policy – Member Systems

Again, drill down to:

Computer Configuration/Policies/Administrative Templates/System/Windows Time Service/Time Providers

Double-click Enable Windows NTP Client

Set to Enabled and click OK

Double-click on Configure Windows NTP Client

Set Type to NTP

Set NtpServer to hold the PDC and also a couple of external time providers that match what you specified in the PDC GPO

Click OK and close that policy

Congratulations! You should now have successfully configured full AD NTP sync across the network.

Perform a gpupdate on systems to ensure policies are applying, use gpresult to ensure the policies are being read & applied.

In some cases, you may need to restart the Windows Time Service or reboot systems.


NTP GPO details explained

So what all these settings mean.

Configuring Windows NTP Client: Enabled

NtpServer:

  • Here you specify which NtpServers to use separated by a space but also with a special NTP flag. I decided to use the public ntp.org pools:
0.se.pool.ntp.org,0x1 1.se.pool.ntp.org,0x1 2.se.pool.ntp.org,0x1 3.se.pool.ntp.org,0x1

The NtpFlags are explained in detail here but 0x1 means: “Instead of following the NTP specification, wait for the interval specified in the SpecialPollInterval entry before attempting to recontact this time source. Setting this flag decreases network usage, but it also decreases accuracy.” where SpecialPollInterval is specified in the GPO (in our, case 3600 seconds)

  • The rest of the settings are explained in the GPO Help.

Enable Windows NTP Client: Enabled

  • Is a must, otherwise the computer will not sync with other NTP serves since it’s disabled by default.

Enable Windows NTP Server: Enabled

  • Is a must, otherwise the computer will not allow other computers to sync with it since it’s disabled by default.

Where is the configuration stored?

First, never edit the registry for NTP. If something is not working, clear the configuration and start from scratch and configure NTP using GPO or W32tm.exe. Do this by running the following commands:

Stop-Service w32time

w32tm /unregister

w32tm /register

Start-Service w32time

Still, you might want to check where the configuration is. When using GPO, the configuration is stored here:

HKLM\SOFTWARE\Policies\Microsoft\W32Time\Parameters

Note that this is different if you’re using w32tm.exe, then the configuration is stored here:

HKLM\SYSTEM\CurrentControlSet\Services\W32Time\Parameters

Useful tools when troubleshooting NTP

W32tm is still your friend and here are my favorites:

w32tm.exe /resync /rediscover /nowait

Resynchronize the clock as soon as possible, disregarding all accumulated error statistics. It will not wait for resynchronization and will force redetection of sources.

w32tm /query /peers

Displays all configured peers you have configured

w32tm /query /source

Displays the currently used time source. Note that after a restart of the service, it might show Local CMOS Clock until everything has refreshed properly.

w32tm /query /status

Displays the current status

w32tm /query /configuration

Displays the configuration

w32tm /debug /enable /file:C:\Temp\w32tmdebug.log /size:10485760 /entries:0-300

If you really want to get dirty, enable the debug log

Troubleshooting

Many things can go wrong when configuring NTP. Here are some suggestions:

  • Don’t forget to allow NTP traffic (udp/123) in your firewall(s) – if you have 3rd party firewalls, check them also
  • Enable the debug log and check that the service actually tries to communicate with the NTP serves. You can lower the SpecialPollInterval to 30 seconds to speed up your troubleshooting.
  • Restart the service and maybe even the server, sometimes this has solved it.
  • Also monitor the event log since the service logs there too.
  • If the domain controller is a Hyper-V VM, disable Time Synchronization on the guest

Attachments

This attachment is a client script that can be used to force reconfiguration of the local sync setup of workstations and member servers…

clocksyncupdate.cmd

Active Directory – Missing Attribute Editor in User editor

Issue:

Can’t access the Attribute Editor tab in users and groups


Scope:

Active Directory in Windows Server versions: 2008 R2, 2012, 2012 R2, 2016, 2019, and 2022.


Solutions:

First and foremost, ensure in AD Users and Computers, you have enabled the Advanced Features in the View menu:

For 99% of the issue occurances, this will fix the issue. You may need to close and re-launch the ADUC console.

If the above has been done and you still don’t see the Attribute Editor tab after enabling Advanced Features, first off, log out of the DC or management system from the account you are logged in with. Log back in and try again.

If after logging out and back in the issue persists, then there are some changes that may need to be made by performing the following steps:

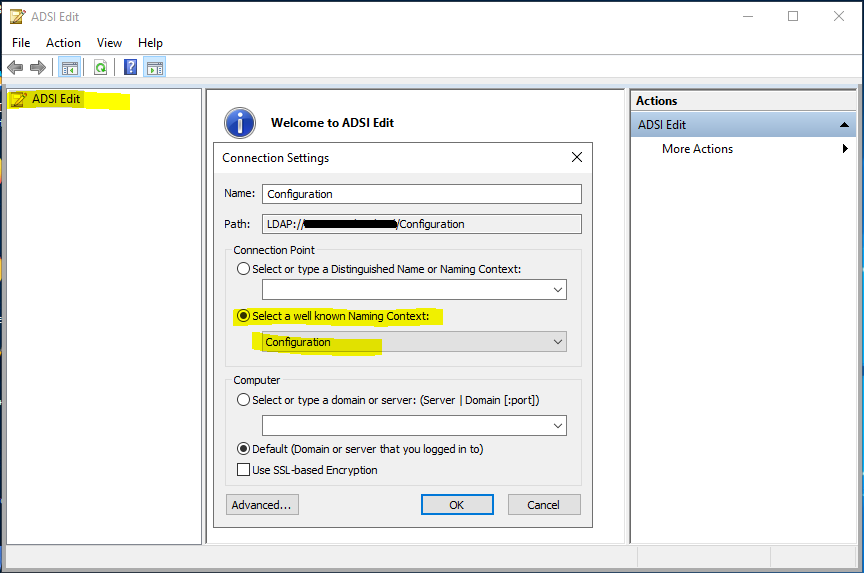
Open ADSIedit.msc

Right-click the upper left most item in the left tree pane and click Connect to

Click the radio button in the Connection point for Select a well known Naming Context, and select Configuration from the drop down list

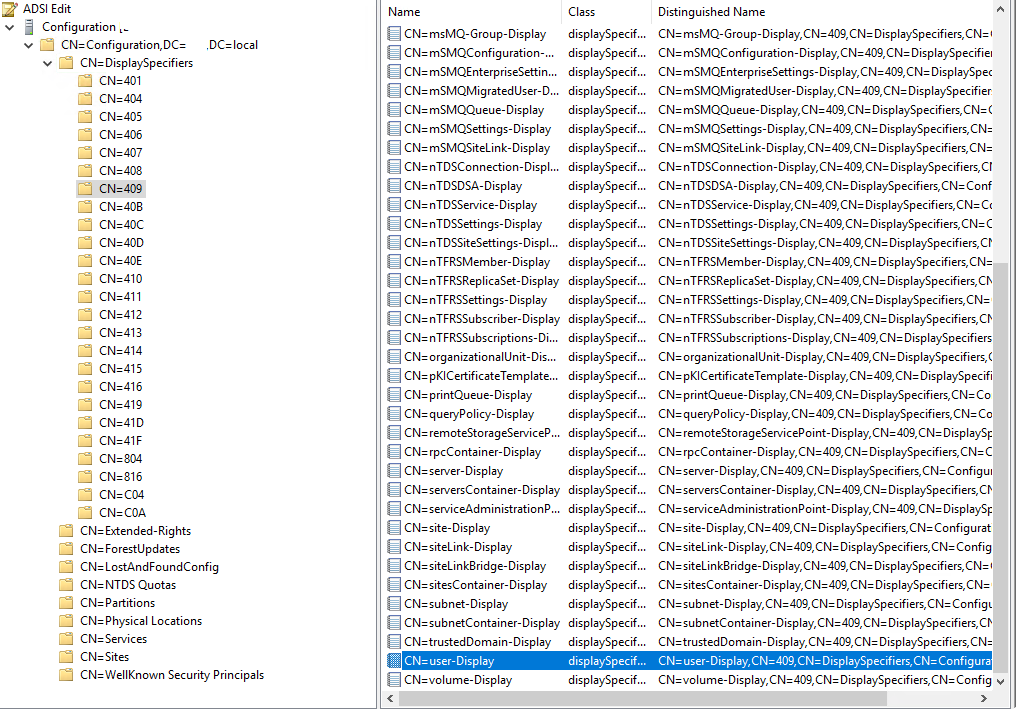
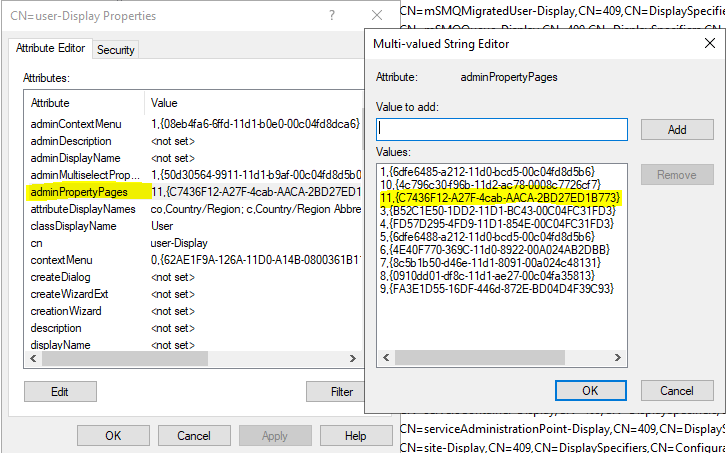
Now drill down through: CN=Configuration > CN=DisplaySpecifiers > CN=409 (409 is for US English, pick the language appropriate to your profile)

Double-click on CN=user-Display

Double-click on adminPropertyPages

Add in the missing value:

11,{c7436f12-a27f-4cab-aaca-2bd27ed1b773}


Once done, OK twice out and re-launch ADUC.

Now the Attribute Editor tab should be availble.


Extra Notes:

This is a common occurence for AD Domains that have been previously migrated from Windows Server 2003 (or older) into newer Windows server versions, and the functional levels raised. Unfortunately raising the domain functional levels doesn’t seem to add in these missing values.

If this is the case for your environment, you may also need to add in other missing values such as:

In the CN=computer-Display > adminPropertyPages

12,{c7436f12-a27f-4cab-aaca-2bd27ed1b773}

In the CN=default-Display > adminPropertyPages

4,{c7436f12-a27f-4cab-aaca-2bd27ed1b773}


Installing & Configuring IP Networked Printers in Windows

Update History:

  • 2017-Feb-09: Initial publication
  • 2019-Mar-12: Include mentions for coverage of Windows Server 2019 and ARM64 architectures
  • 2022-Feb-09: Include mentions for coverage of Windows Server 2022 and Windows 11

This guide applies to:

  • Windows Desktop / Workstation Editions 7, 8, 81, 10, and 11
  • Windows Server Editions 2008 R2, 2012, 2012 R2, 2016, 2019, and 2022

It is intended for environments where the printer is connected to the network, has either a fixed LAN IP address or a DHCP reservation, and is accessible by the target Windows systems. It is assumed that the printer has been freshly setup on the network but not yet installed or configured on any target workstation or servers.

Download and install drivers:

Identify and download the correct drivers for your make & model of printer. Ideally, you want to download the basic / standard drivers and not the full driver package installers. The ideal drivers may be identified as PCL, PS (PostScript), or WHQL drivers.

Typically, there will be multiple drivers – a listed set of drivers for multiple versions of Windows. Typically, most manufacturers will have the exact same driver files that cover many generations of Windows – eg: a driver written for Windows 7 will almost always work on Windows 10, or Server 2019, and Server 2008 R2.

Typically, the only differences in the drivers are:

  • Architecture (as in Windows 32-bit, Windows 64-bit, Windows Itanium, and more recently, ARM64.
  • The drivers communication protocol when communicating with the printer – this is how the computer talks to the printer, so PCL, PS, KX, etc…

You need to be aware of what communication protocol is supported by the printer. By default, FujiXerox DocuCentre machines don’t support PostScript (PS) out of the box, and require installation of additional optional hardware. If you’re looking to set one of these machines up on any Macs, get the PostScript card when ordering (cheaper at time of order than it is after the fact). Most printers will happily work using standard PCL drivers. Note: If you’re deploying Kyocera ECOSYS machines, aim for their KX drivers.

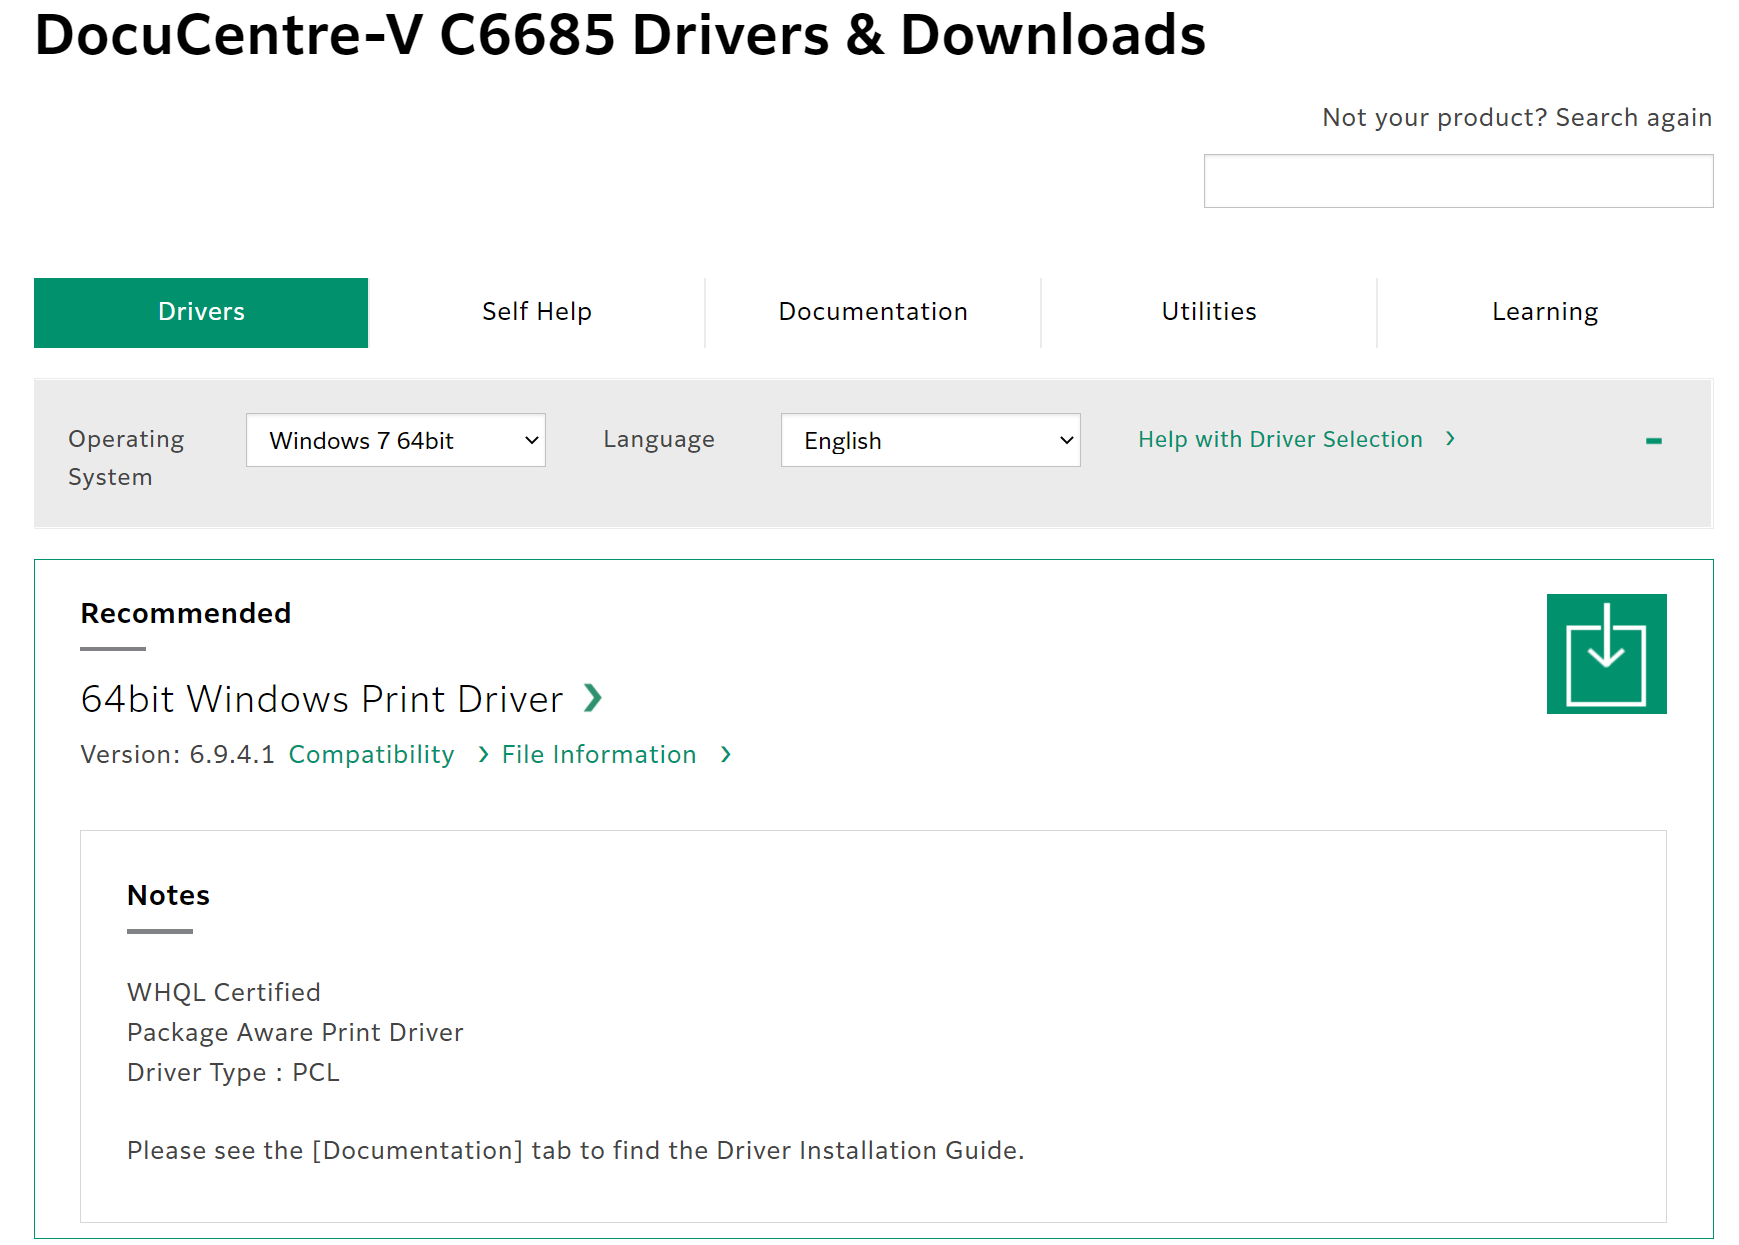
When downloading the drivers for deployment on a Windows server for sharing out to the networked Windows clients, opt to download both the 64bit and 32bit drivers of the same version number or release date, and if available, also the ARM64 drivers. When they are installed and made available to client systems using these different architectures, the user won’t have to go hunting to find drivers, as Windows will supply them to the connecting client during the printer installation.

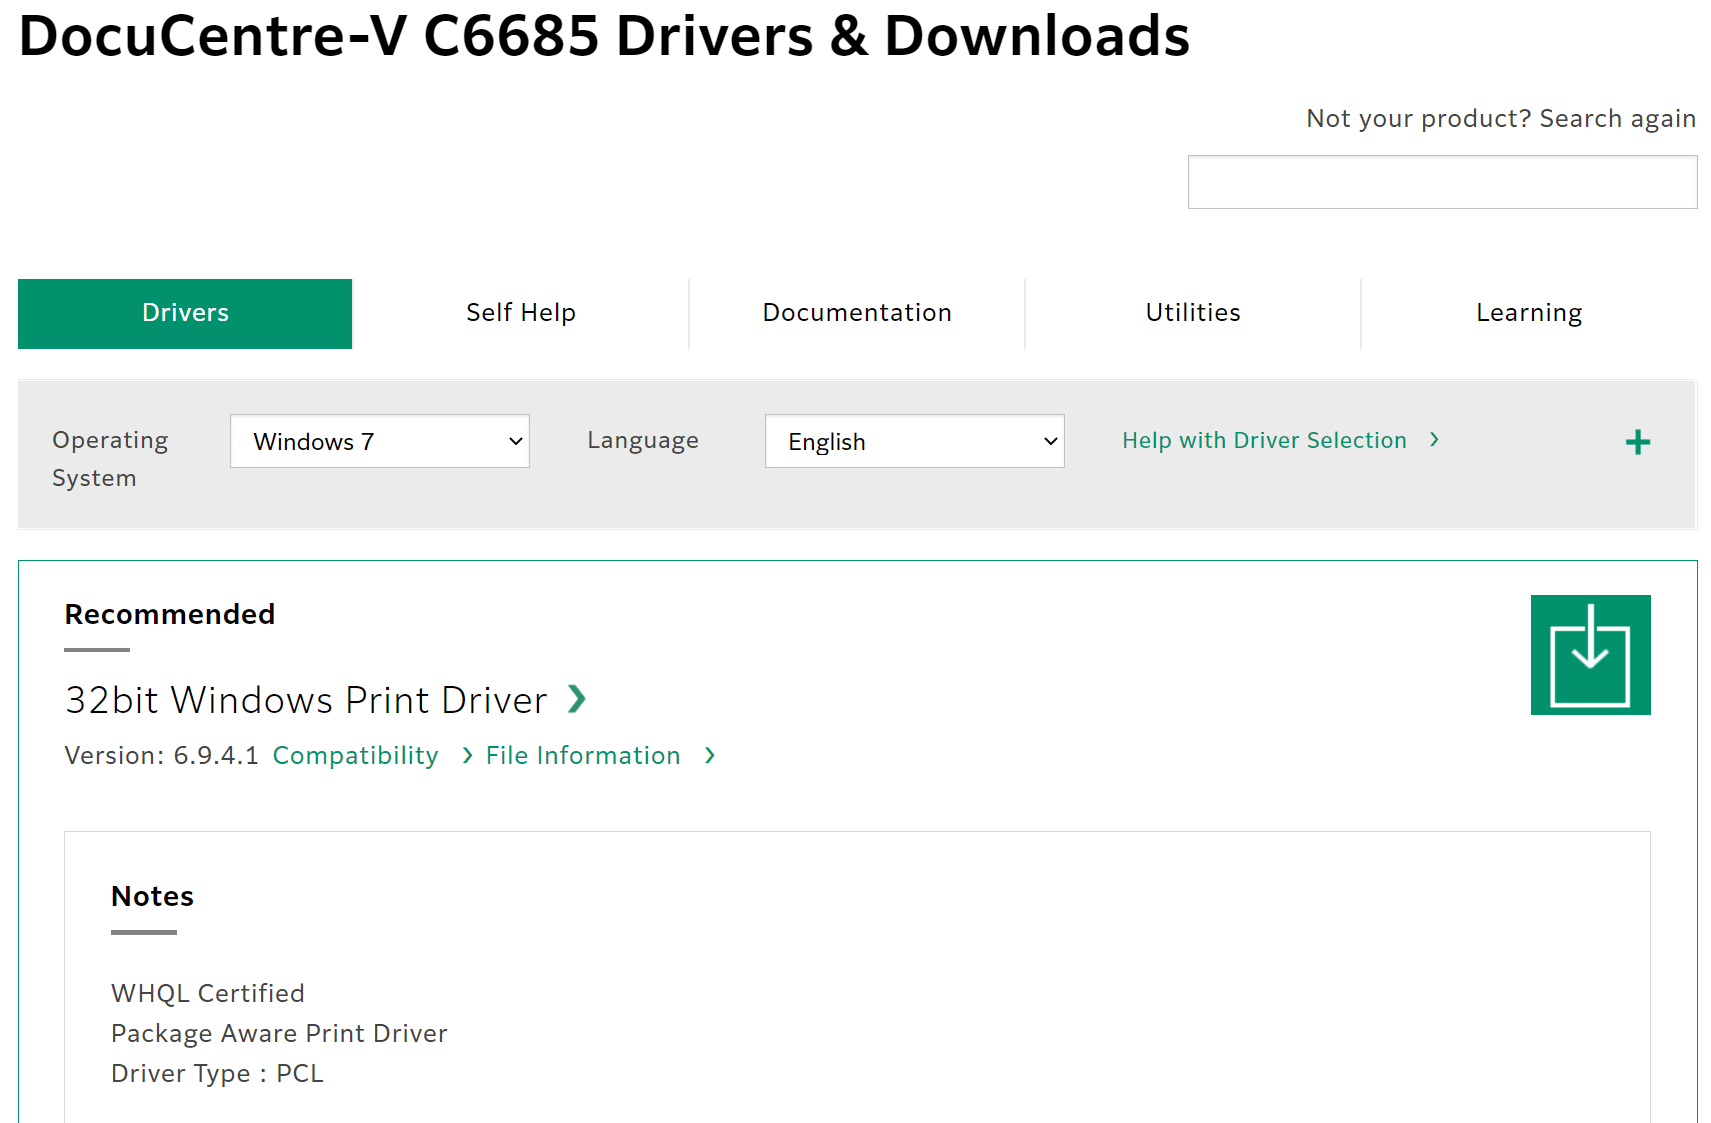
Note here, we are downloading both the Windows 7 64 bit and Windows 7 (aka 32 bit) drivers for deployment:
Windows 7 (32 bit):
Once the drivers have been downloaded, extract them into their own sub folders. The may come as a ZIP file or as a self-extracting application. If the latter, when prompted to commence installation, cancel these operations – you just want the extracted driver files. Take note of where you have extracted them to. Pro-tip: place them in a ClientApps share so they can be accessed over the network at a later date it required.

Open the Control Panel (not Settings) and change the view mode from Category to Small Icons (or Large Icons if your eyes don’t work).
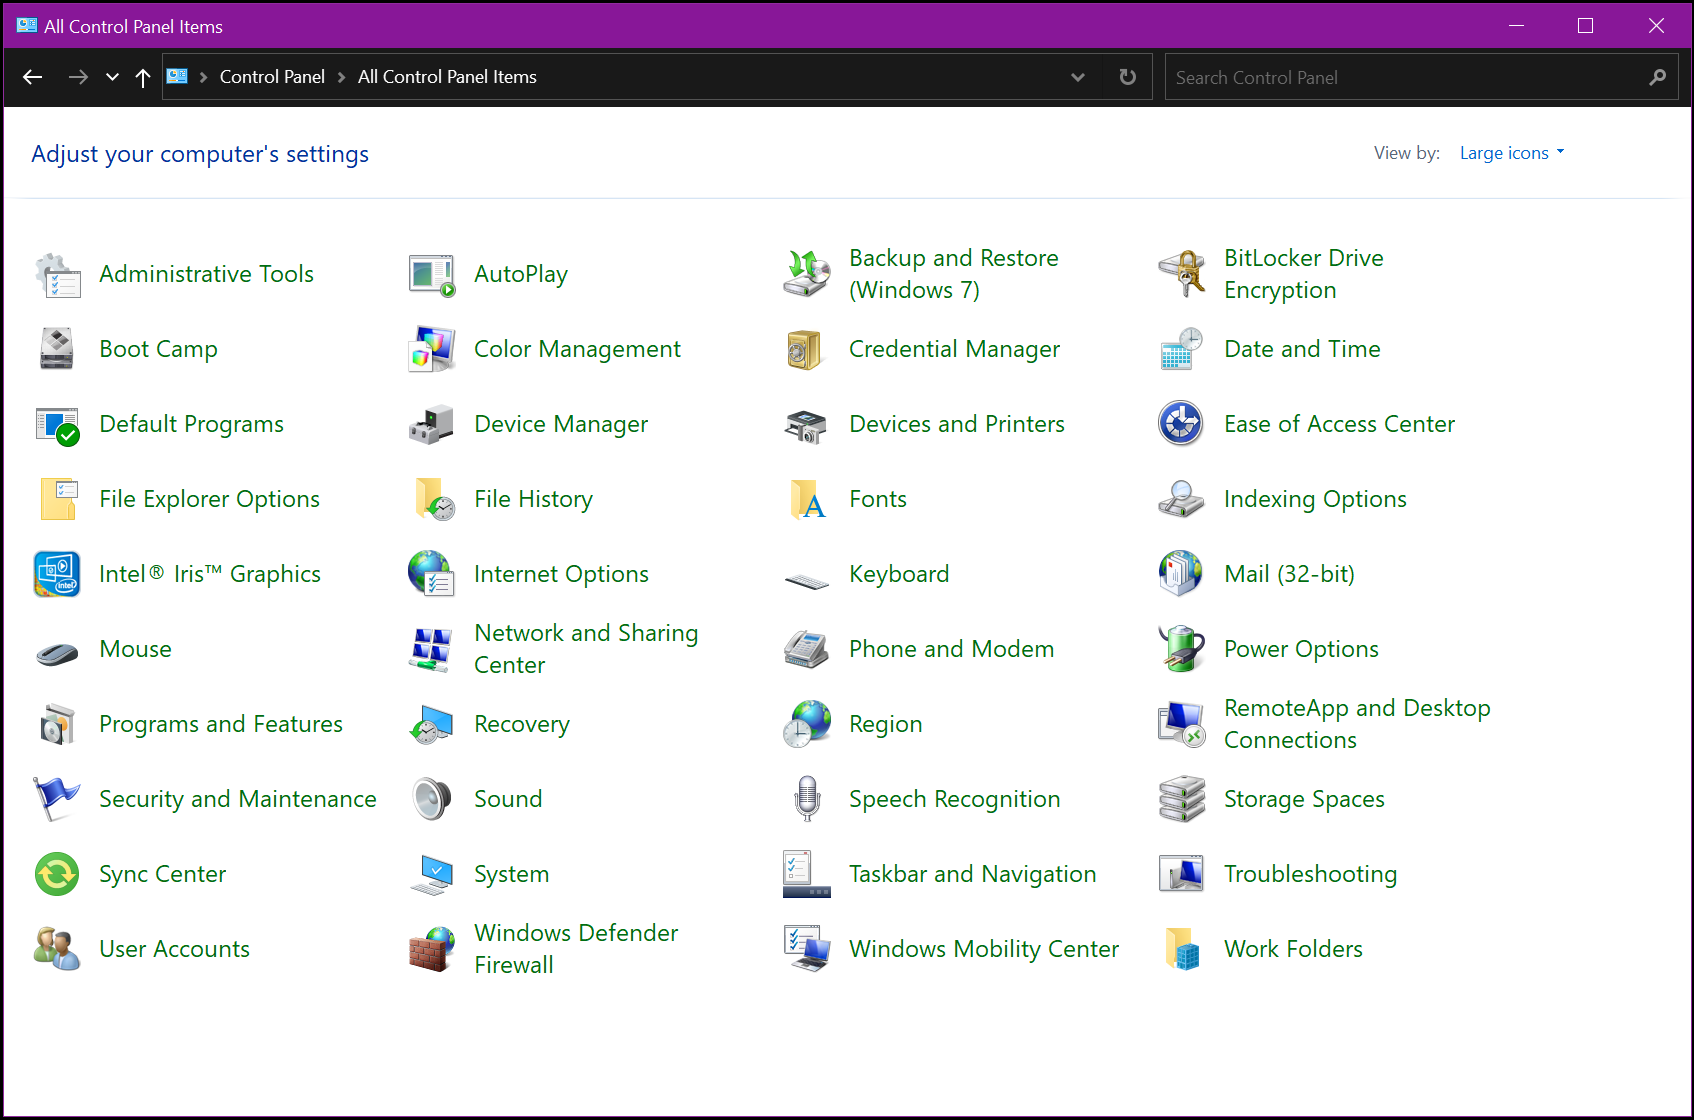
Click on Devices and Printers
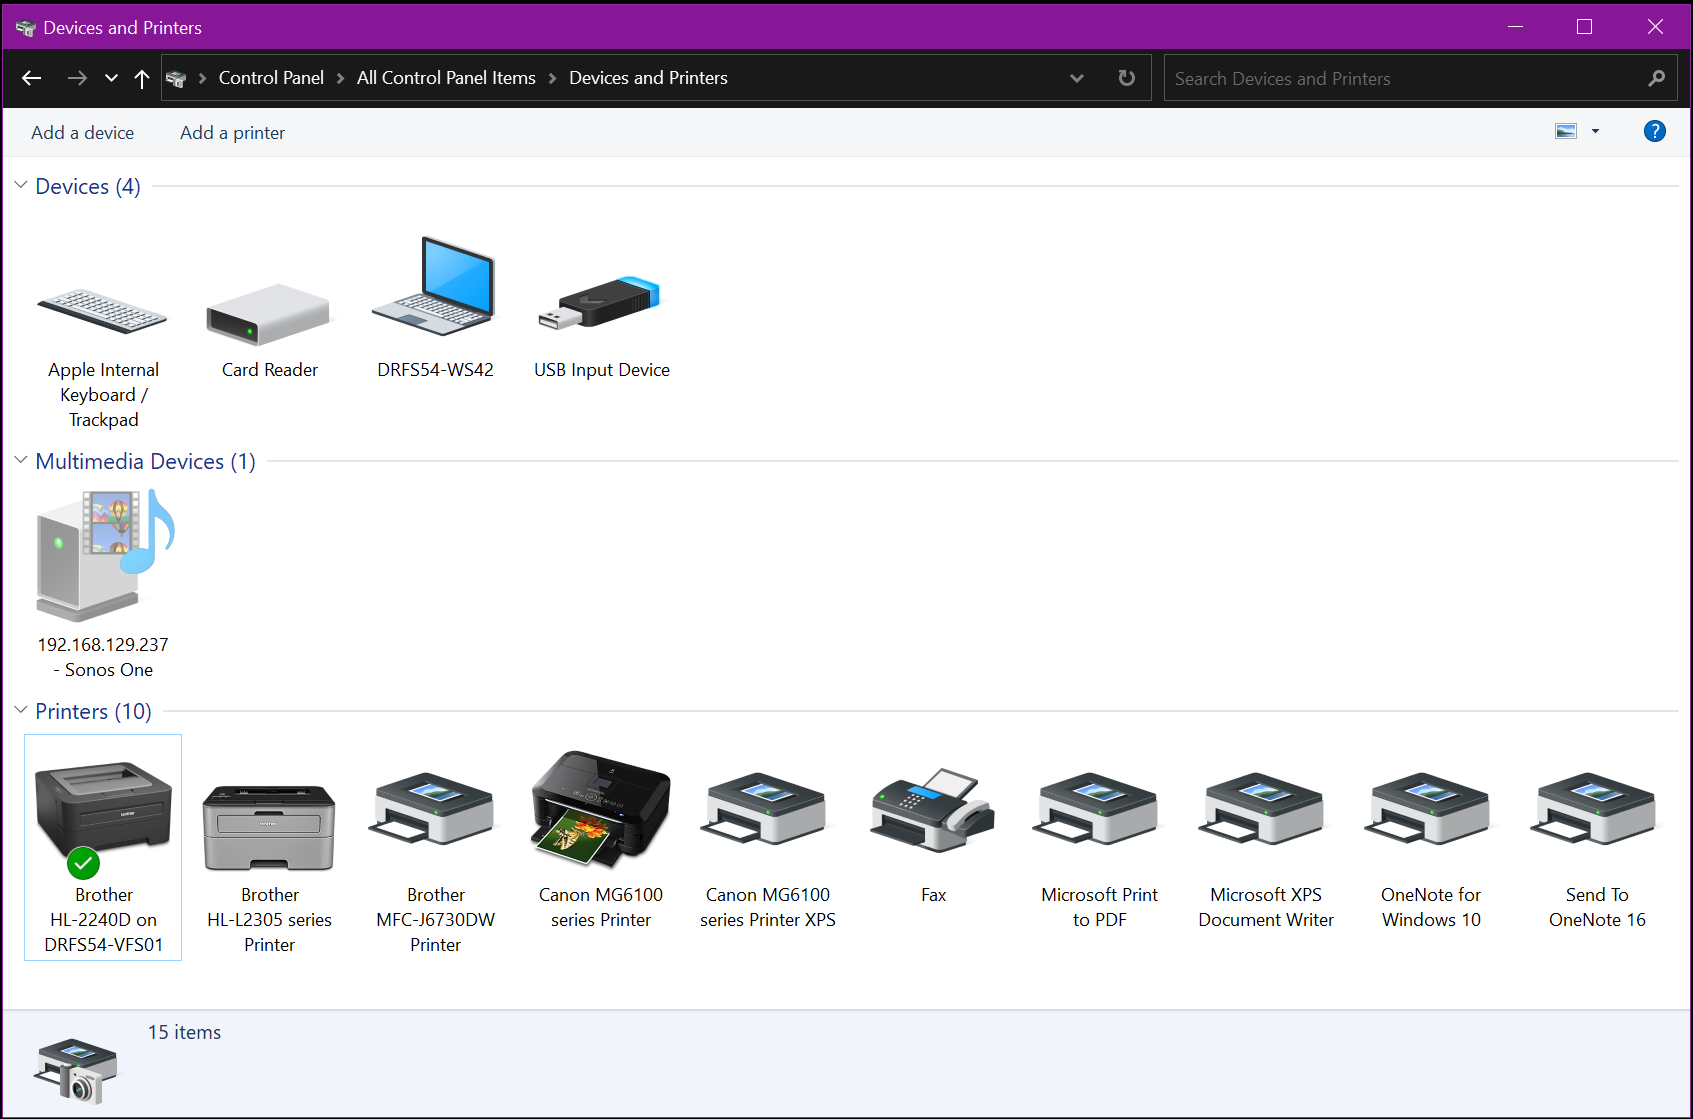
Click on Add Printer in the toolbar

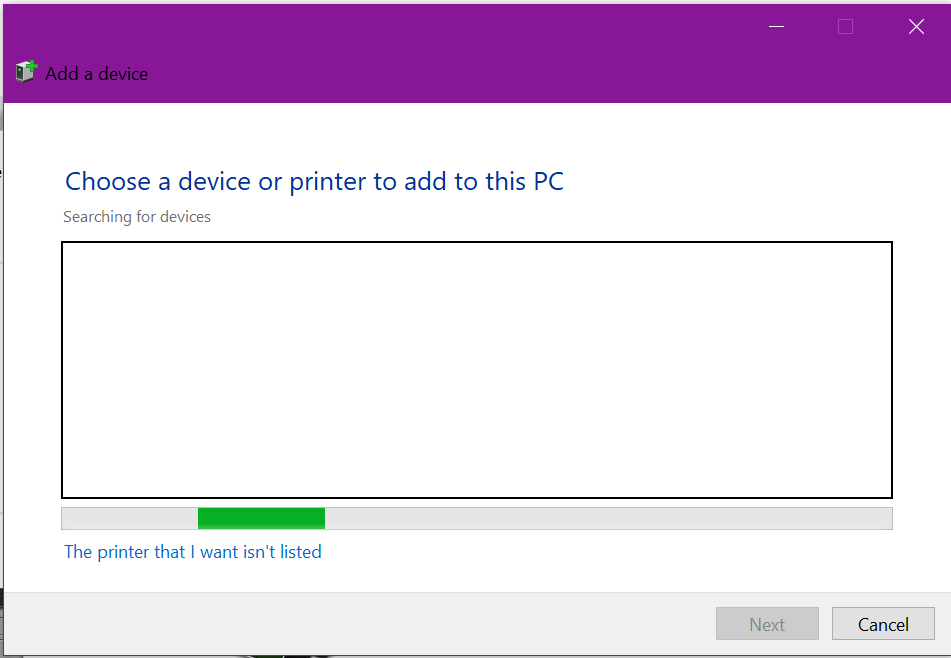
When Windows is scanning for printers, click on “The printer that I want isn’t listed

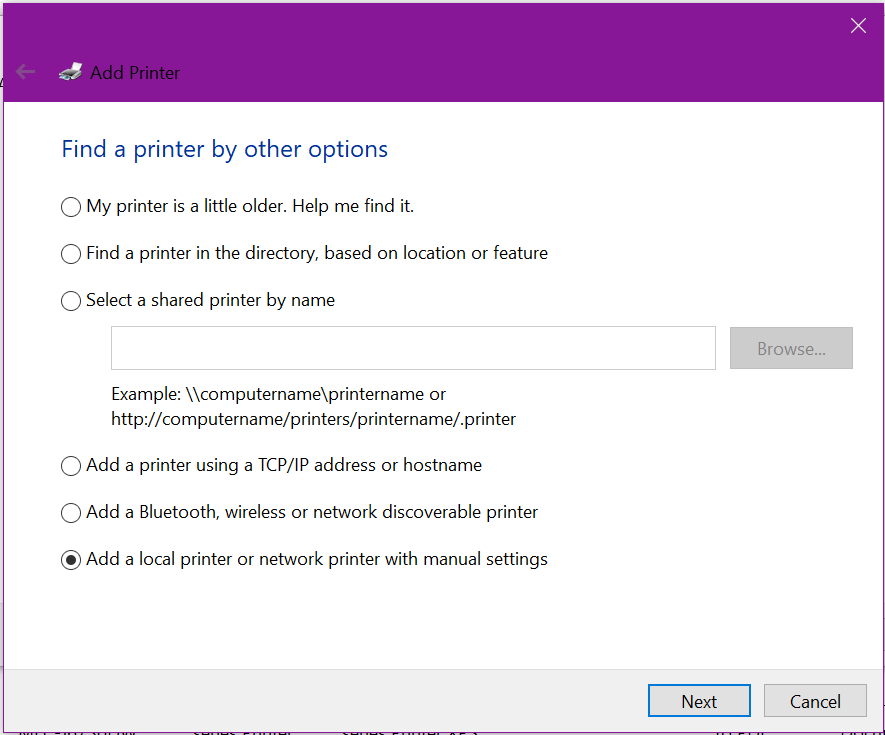
When prompted, select the option to Add a local or network printer with manual settings:
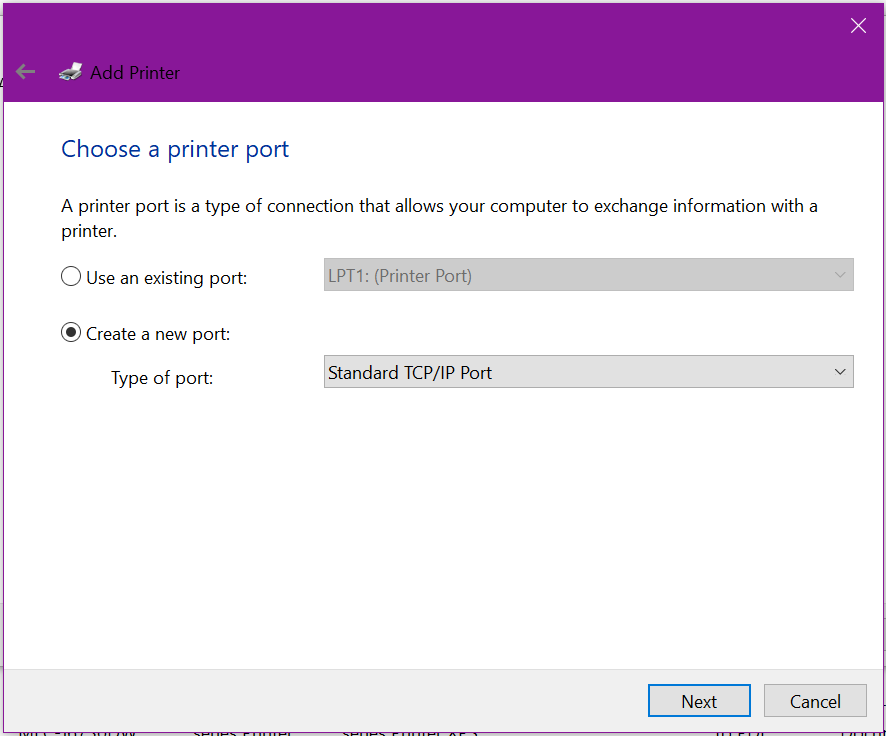
When choosing a printer port, select Create a new port and change the drop down list to Standard TCP/IP Port, click Next
Enter in the fixed or reserved IP address of the printer, and un-tick the Query the printer for automatic installation
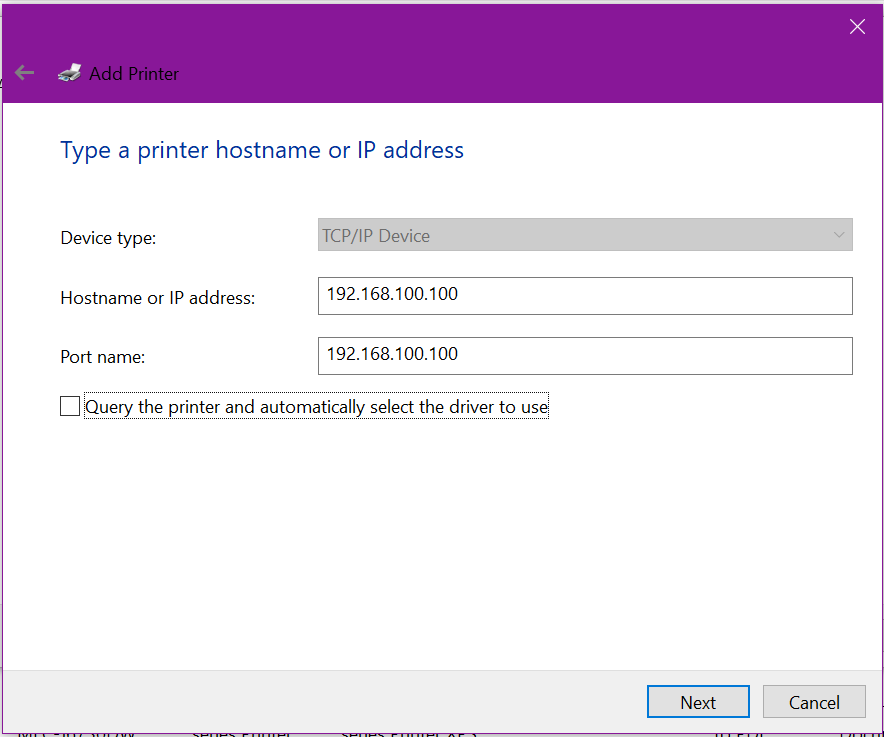
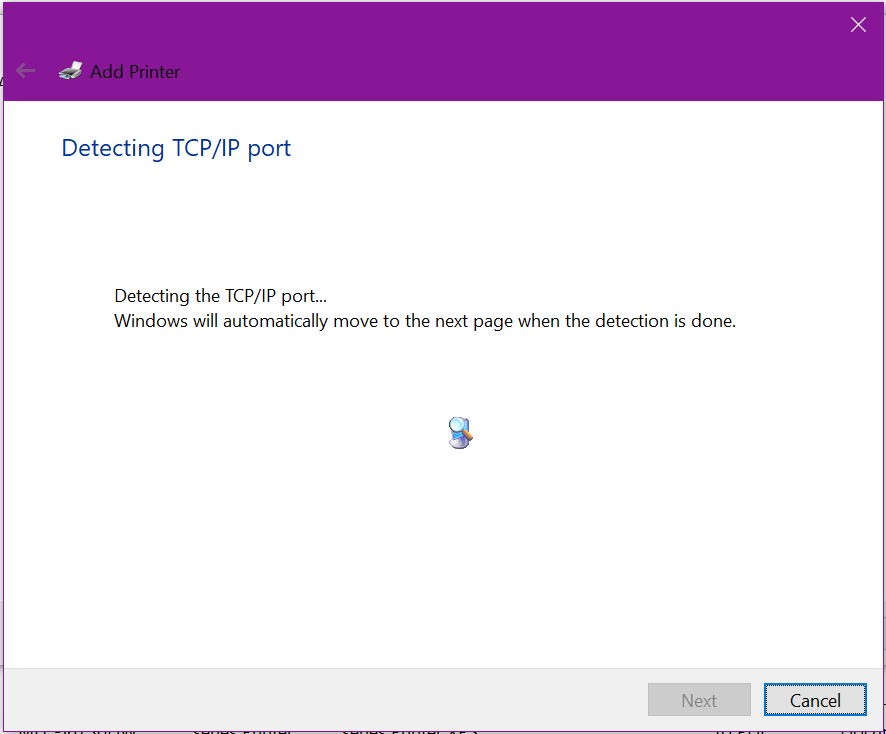
Windows will now check to see if it can communicate with the printer’s network stack and determine the available network protocols (SNMP, HP Discovery, etc).
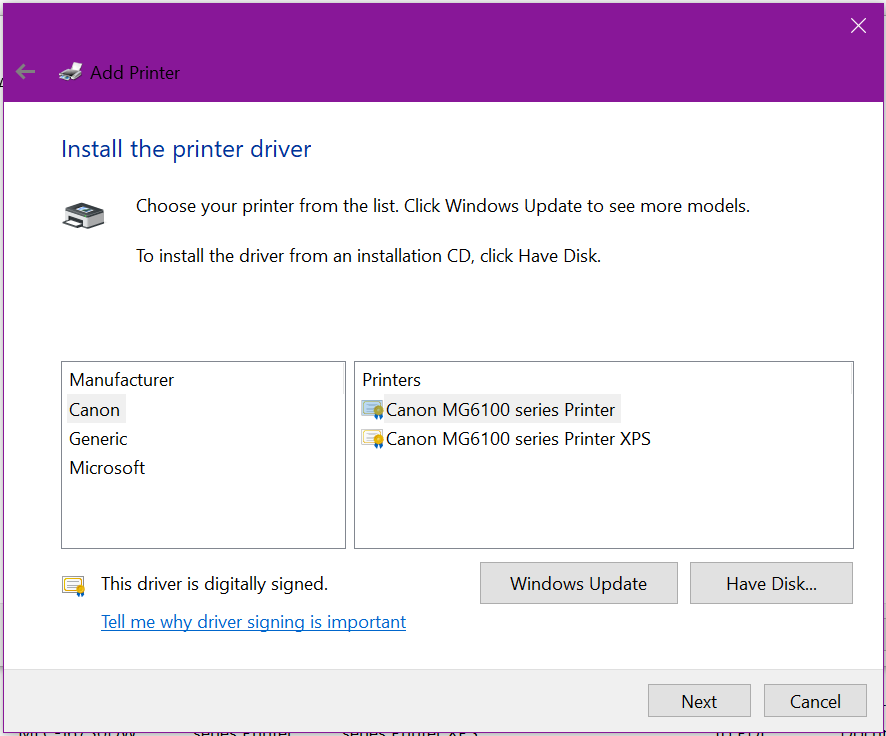
Now we need to install the actual drivers, click Have Disk
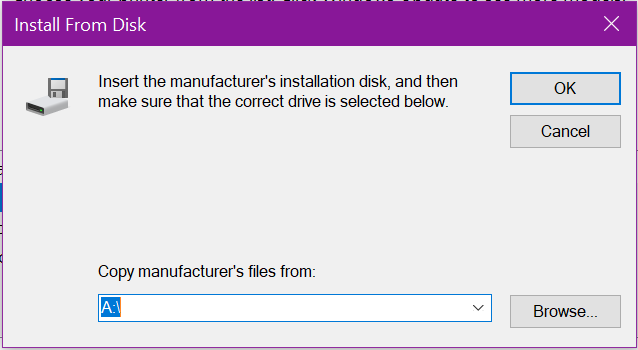
Click Browse and locate the folder where the 64 bit drivers were extracted to
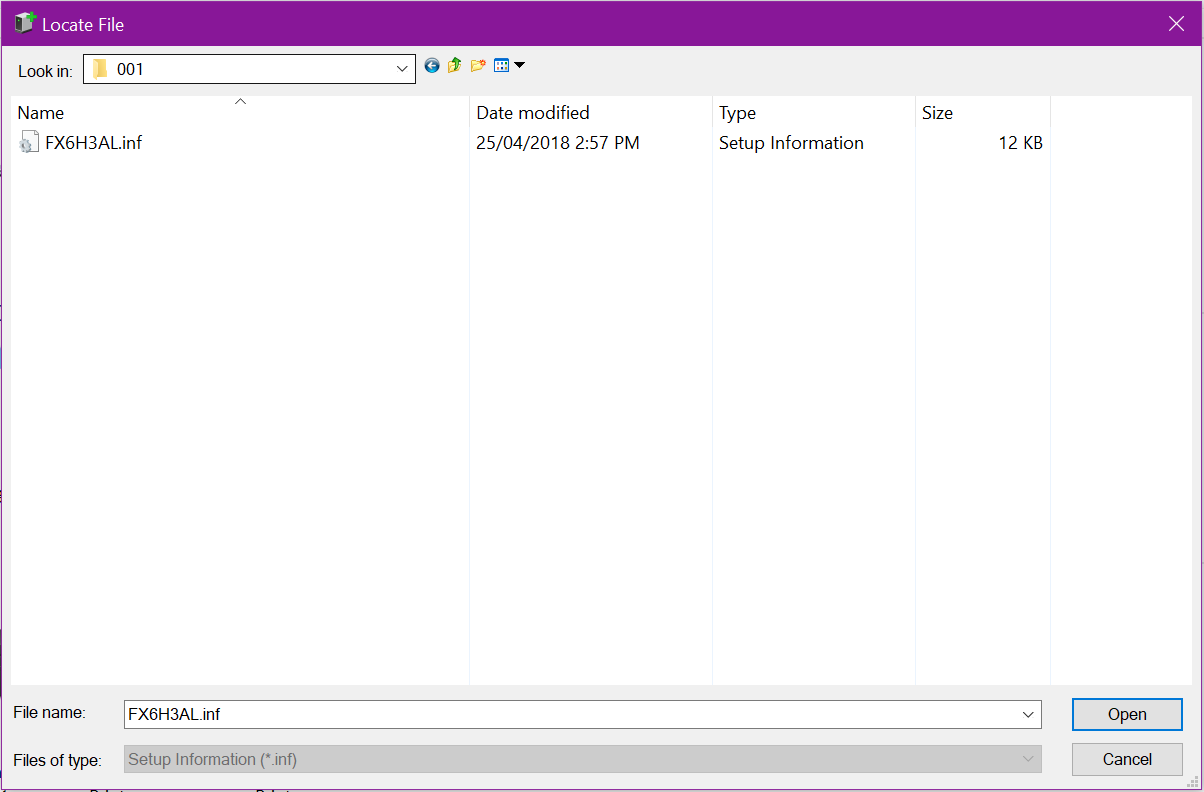
You may need to drill down into a fairly deep folder structure, like in this example to locate the valid driver information (INF) file. Click Open
You will return here, where you can see the file path. Click OK
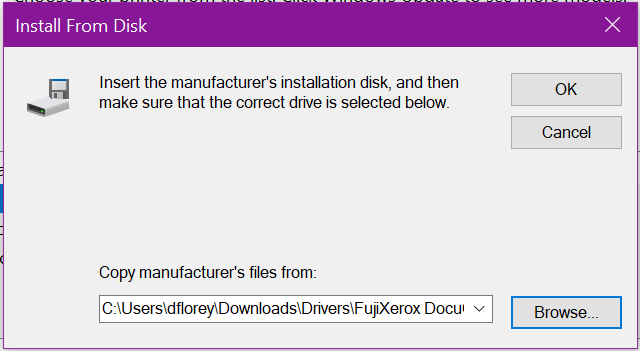
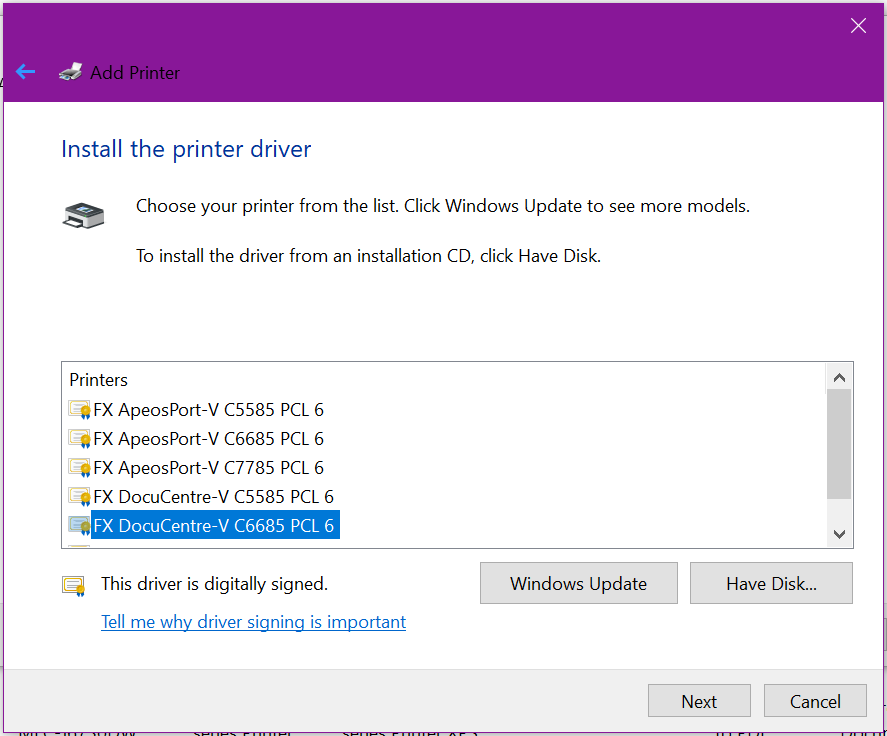
Typically, manufacturers will bundle drivers & support for multiple models of their printer for ease of production, so you will need to select the correct model & revision from the list to ensure you get all the correct features & settings available to your printer. Once selected, click Next
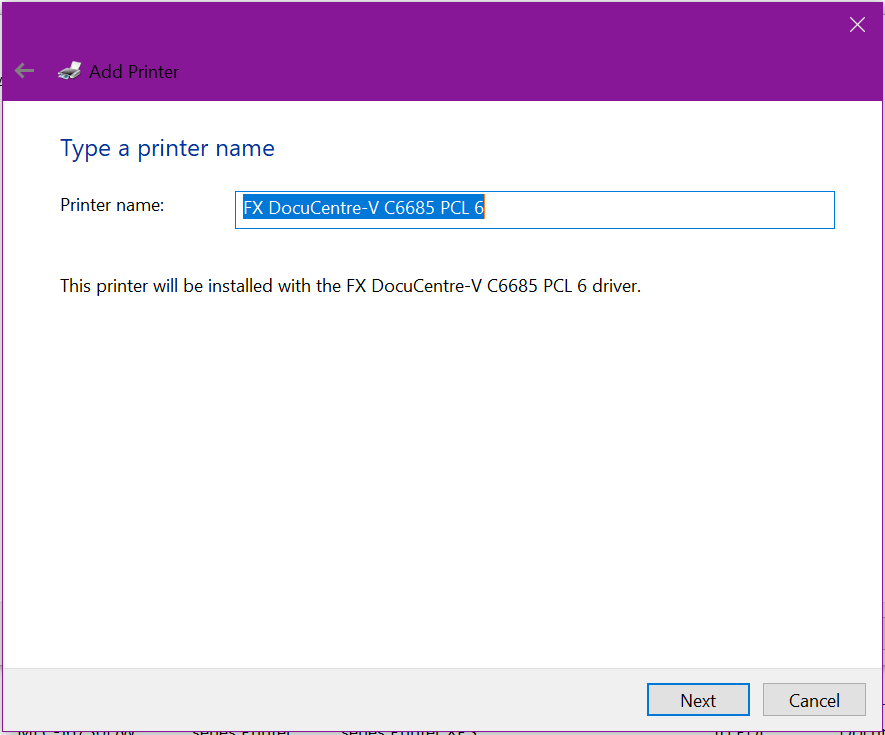
Give the printer a valid & meaningful name. If prompted to Share the printer to the network, un-tick this option as we’re not yet ready for this
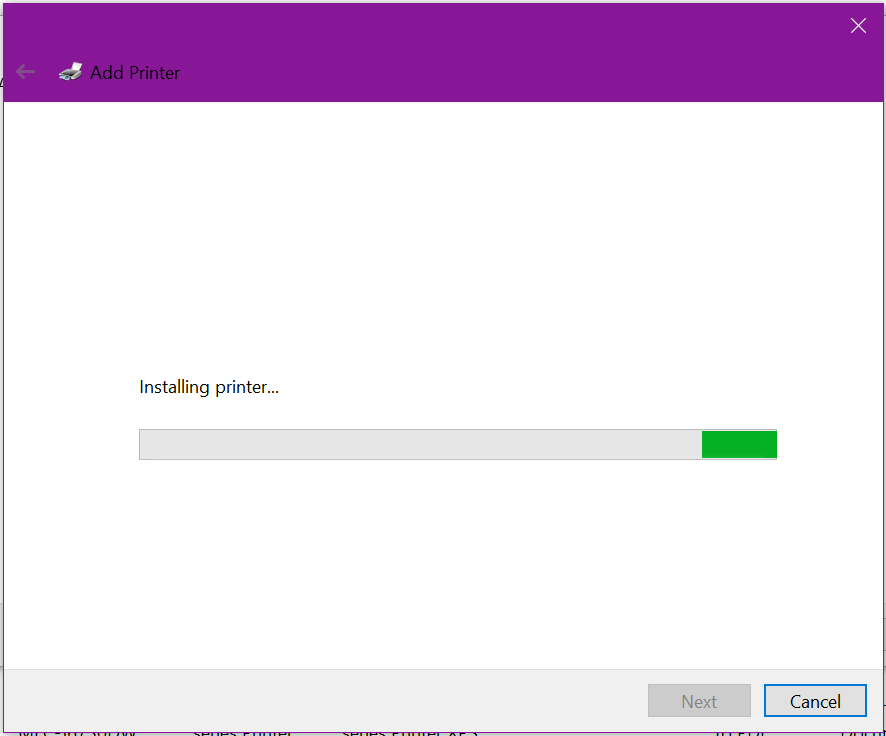
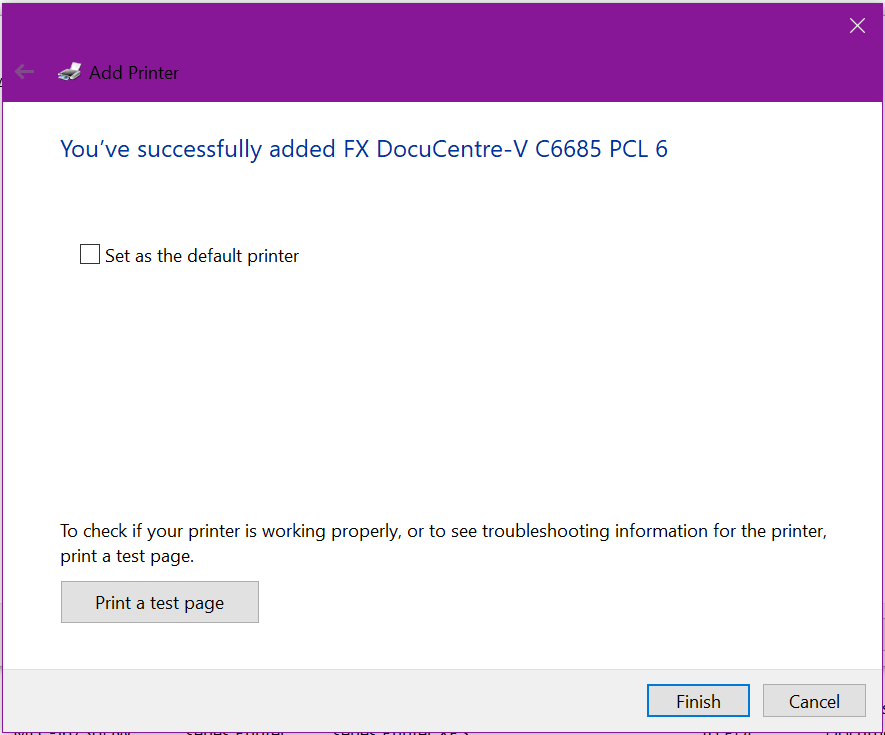
Windows will now install the drivers and add the new printer
From here, click to Print a test page if there’s not many options on the printer, otherwise, click Finish.
 

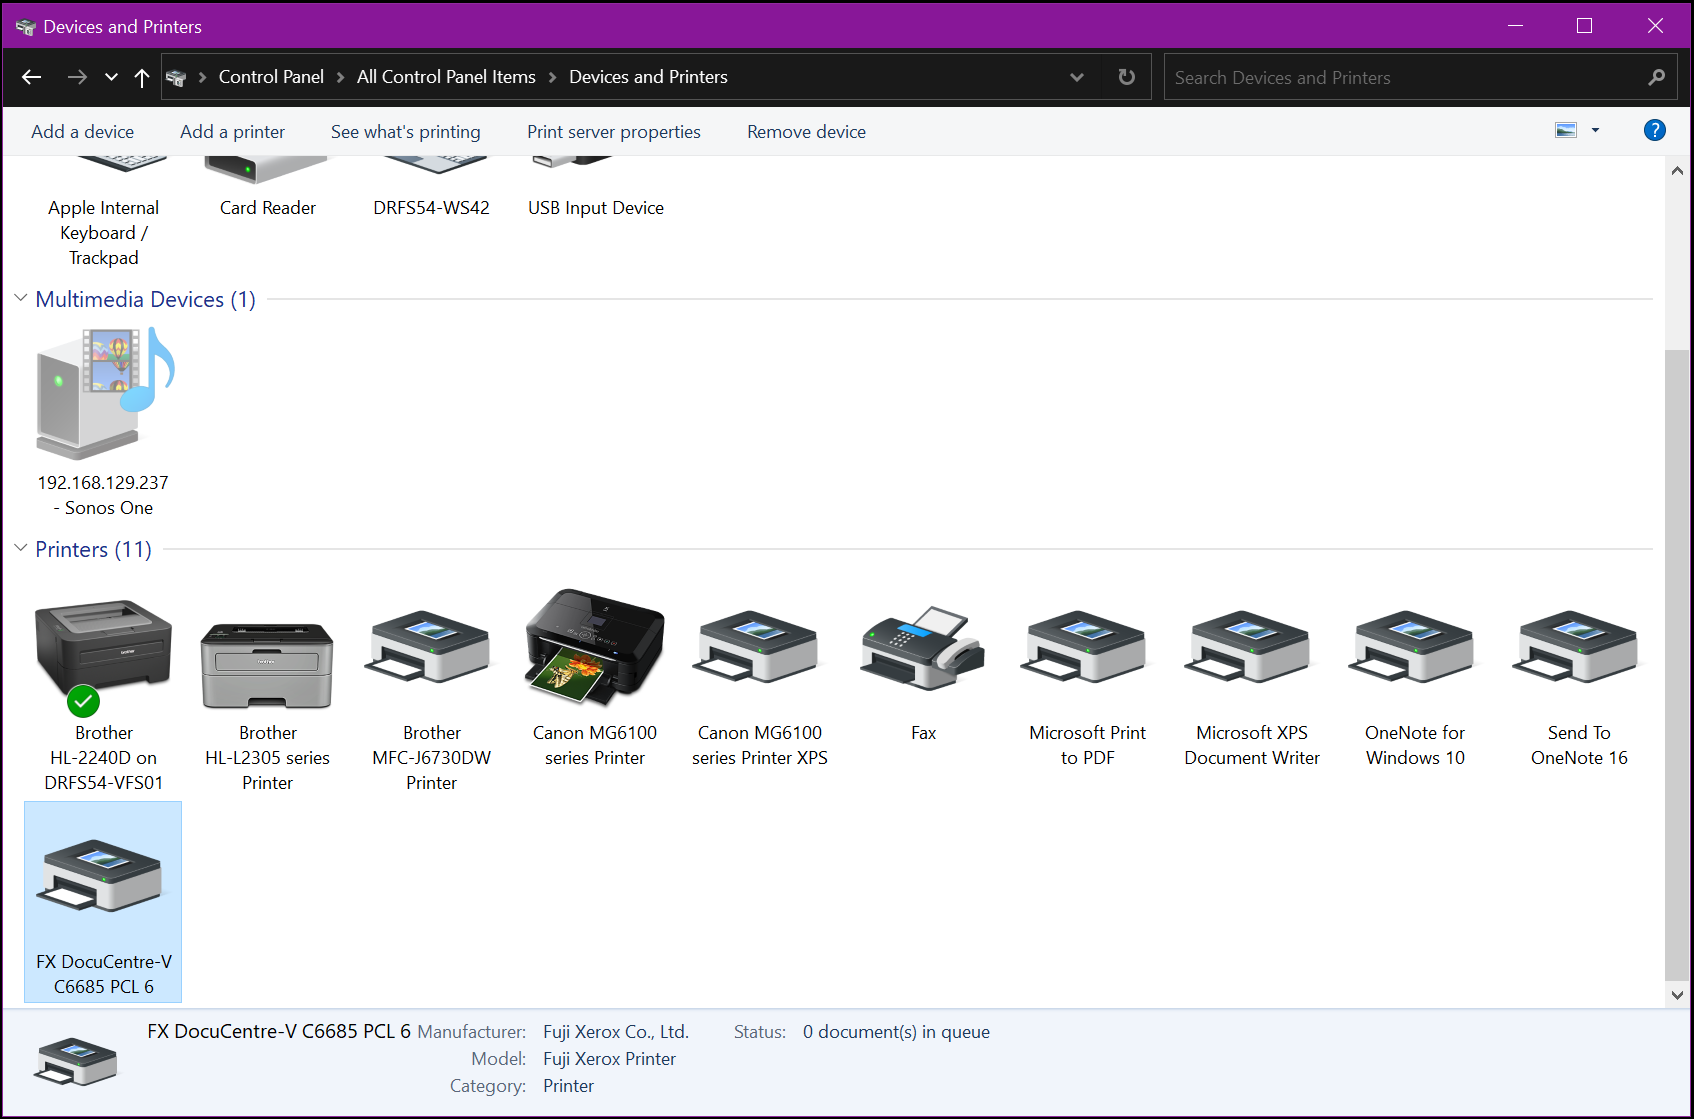
Returning to the Control Panel > Devices and Printers, you will now see the newly installed printer.
 

Now we want to install support for 32 bit Windows (and ARM64 if applicable / available). This is to ensure Windows 32 bit systems connecting to our server to access the printer will also receive automatic driver installation. Although 32 bit Windows is becoming far less common these days, doing this ensures in the long term, there’s little or no poor user experience or frustration when adding shared printers to their systems. It also helps when deploying printers via Group Policy that 32 bit Windows users don’t get prompted to install drivers on every logon until installed.

Right-click on the newly installed printer

Select Printer Properties from the contextual menu.
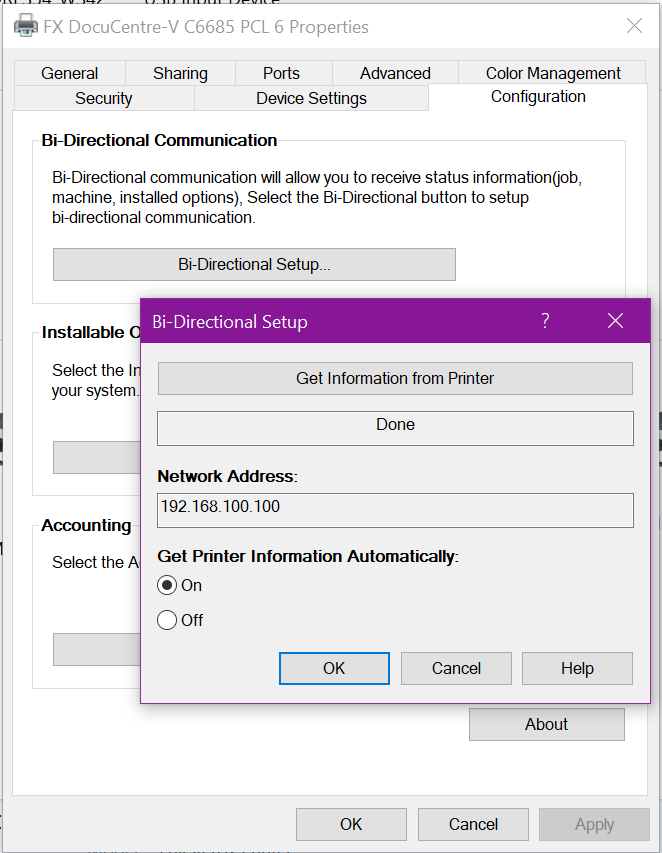
Many networked printers offer automatic device configuration in the form of two-way communication between the printer driver and the printer’s network stack. If this is an option, enable it and click the button appropriate to update the printer options.

In our FujiXerox example, this is called Bi-Directional setup – which is off by default, so turn this on, then click Get Information from Printer.

What this does: Tells the driver to communicate with the printer, requesting information such as: how many trays, what paper is in each tray, are their side car options or ‘finishers’, staplers, binders, folders, etc. The printer will respond to the driver and tell it what options are installed & available, and also consumable information such as paper & toner levels, etc. Once done, click Apply to save changes and update the configuration.
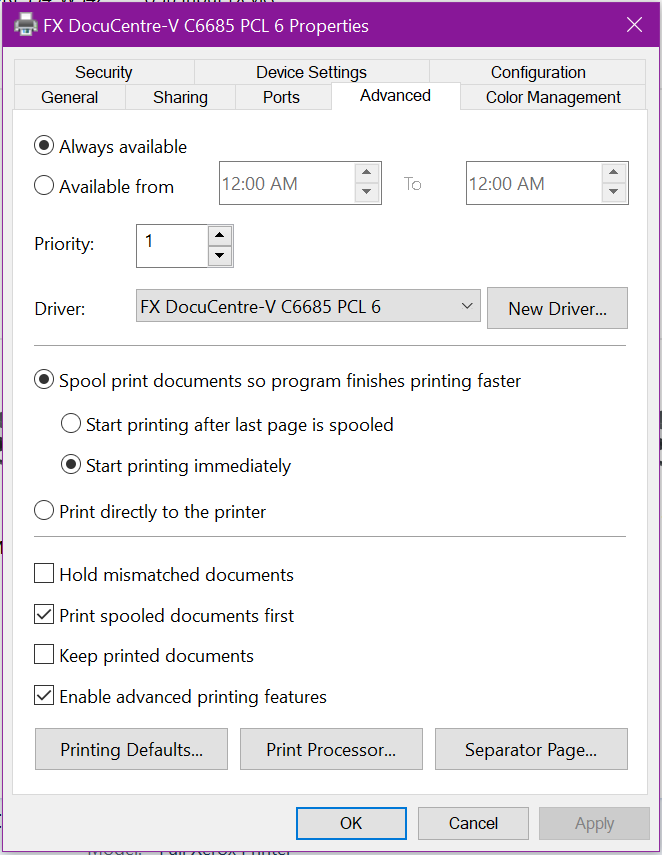
You can verify this worked by clicking Advanced, and Printing Defaults
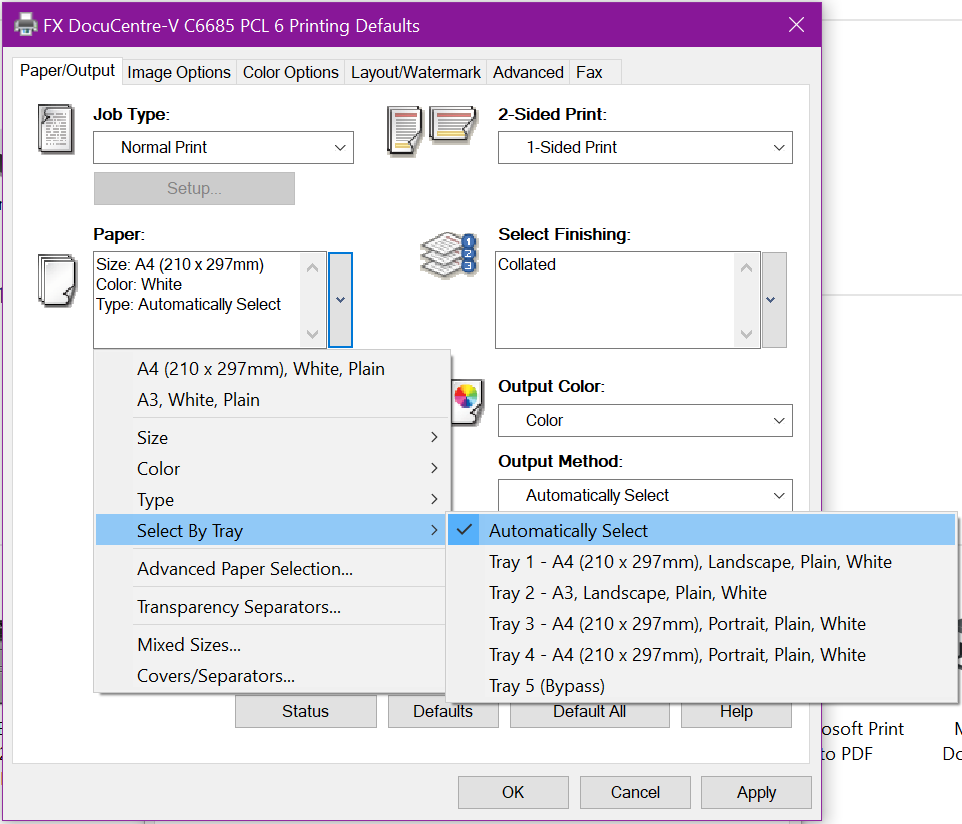
You’ll see tray options, paper sizes, color options, output options, etc.
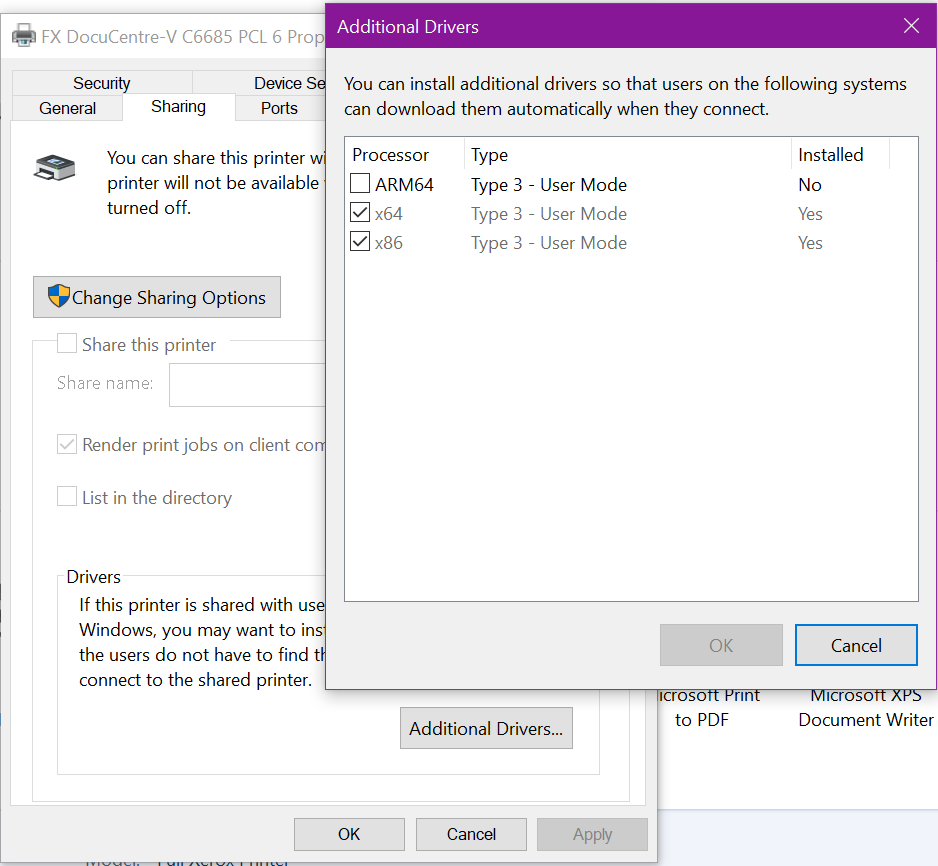
Now, head to the Sharing tab, click Additional Drivers.

Place a tick next to the additional drivers that you have downloaded (such as 32 bit) and click OK

This will prompt you to install them, like at the beginning, click browse to locate and install the appropriate drivers

Once located and selected, click OK
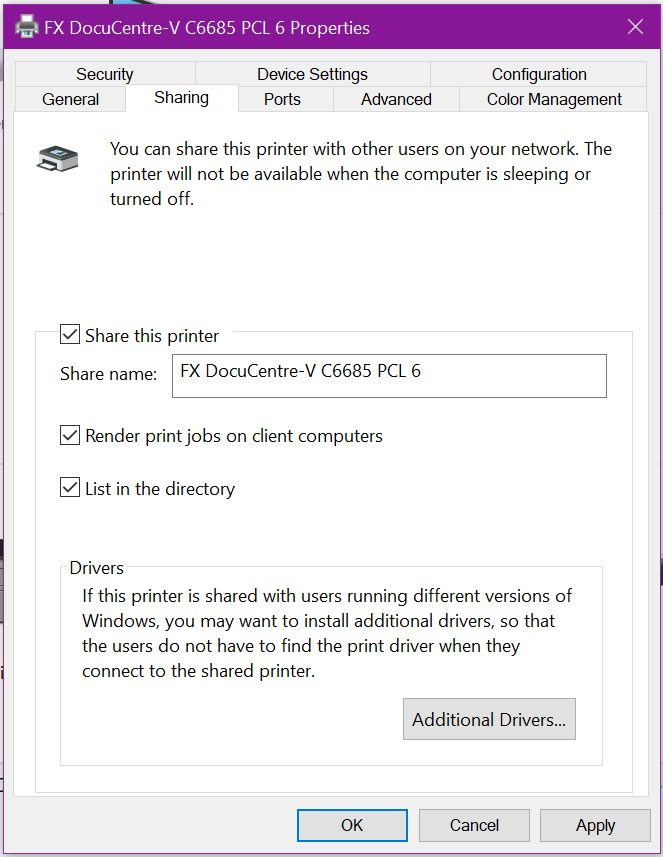
Finally, now you can Share out the printer. If the Windows PC or server sharing the printer is a member of Active Directory (or is the domain controller), tick the option to List in the directory – this will make is easier later in Group Policy to deploy.

Windows PC’s on the network (either AD authenticated, or pre-authenticated locally) can now browse the network share of this Windows Server and install the shared printer by simply double-clicking on it.