Setup Hyper-V Replication Between Hosts Not AD Domain Joined

Scope:

In this post, we cover the steps required to allow Hyper-V VM replication to occur between Hyper-V hosts that are not domain joined, not in a cluster, not managed by anything else, and are completely standalone.


Preparations:

Hostname Changes:

As Kerberos is only available in the active directory domain, we will need to use HTTPS / SSL certificates to authenticate the Hyper-V hosts with one another. We will do this using Self-Signed SSL certificates that are signed by a test CA.

First thing to do is to ensure that each host has a fully qualified domain name (FQDN) even if its a local FQDN, and is resolvable using DNS over IPv4.

Open a command prompt or powershell session, change directory to: C:\Windows\system32

Enter in:

control sysdm.cpl

This will launch the Control Panel’s System CPL file – the legacy version before modern versions of Windows swapped this out for the System page in the Settings app.

Under the Computer Name tab, click the Change button, the in the name change window, click the More button.

In this screen, add a local or private domain name & suffix to the system.
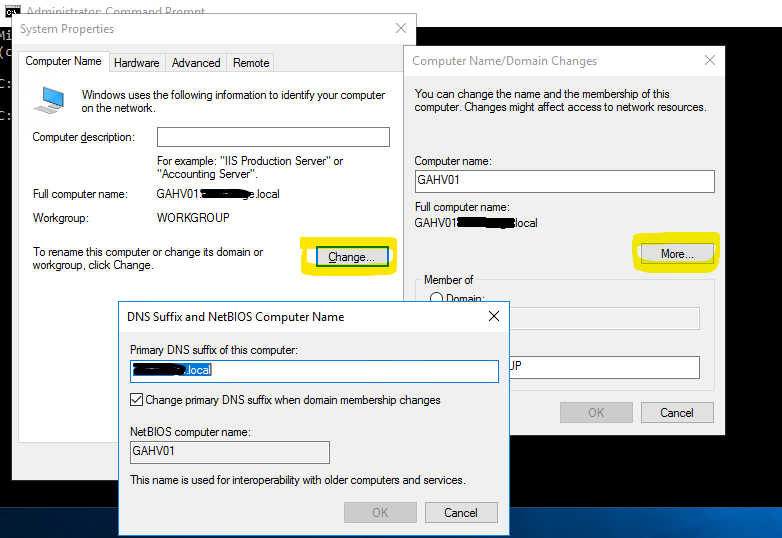
This will require a reboot of the Hyper-V host for the name change to take effect.

Repeat this on the other Hyper-V host(s). Ideally, you want the domain.tld to match across all hosts.

Ensure the ethernet adapters have this domain in the DNS search suffix list and that the local DNS server is aware of these FQDNs & has A records for each hosts entry.

Generate SSL Certificates:

The next step is to generate the SSL certificates for each host. Pick a host – just the one. Using PowerShell, issue the command:

New-SelfSignedCertificate -DnsName "host1.domain.local" -CertStoreLocation "cert:\LocalMachine\My" -TestRoot
  • The DnsName in quote marks should be reflective of the FQDN hostname of the server.
  • The CertStoreLocation tells the PS SSL generator where to place the generated certificate – we’re installing it in the Personal store on the Computer account.
  • The -TestRoot flag is really key to this, as we’re going to use the built in testing CA to co-sign the certs – which will need to be trusted also.

Repeat the same step on the same host to generate a certificate for each other Hyper-V host that you will be using in the replications, so:

New-SelfSignedCertificate -DnsName "host2.domain.local" -CertStoreLocation "cert:\LocalMachine\My" -TestRoot

Now launch mmc.exe

In the File menu select Add/Remove Snapin

Choose Certificates from the list and add

Choose Computer account when prompted
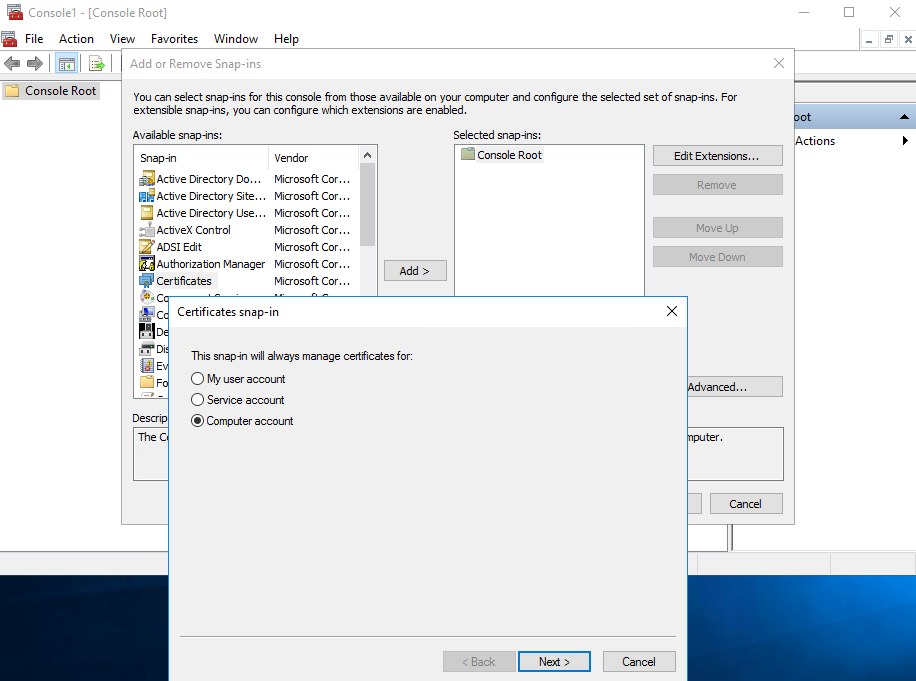
You will see the certs you created listed.

Double-clicking on these will show they’re not signed. This is because we need to move the CertReq Test Root certificate from the folder:

Intermediate Certificate Authorities > Certificates

To:

Trusted Root Certificate Authorities > Certificates

Now that you’ve done this, export each SSL certificate out from the Personal > Certificates folder as PFX files.

  • Right-click on each one, All Tasks > Export…
  • Yes to exporting the private key…
  • Export with all extended properties
  • Set a password and save the file.

Repeat for each of the certificates you generated.

Export the CertReq Test Root CA certificate as well – selecing the DER encoded binary X.509 format
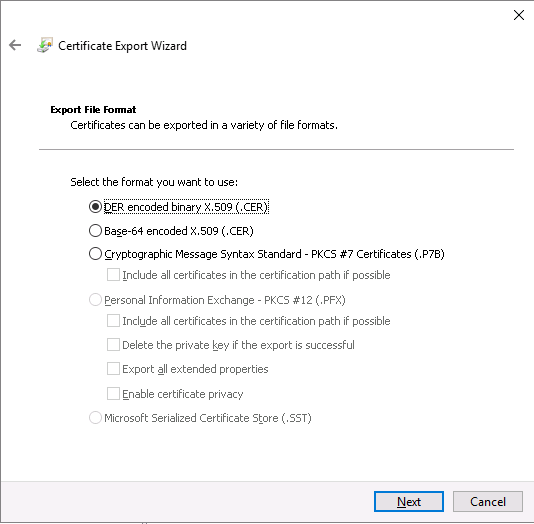
  • Copy these files to each of the other Hyper-V hosts
  • Import the CA into the same Trusted Root Certification Authorities > Certificates folder on each host
  • Import the SSL certificates into the Personal > Certificates folder on each server.

Remember, done from the Computer account, not service or personal accounts.

Opening the self-signed certificates on each host should show up as a valid SSL certificate.

Registry Changes:

We need to tell Hyper-V not to do any revocation checks on the SSL certificates

In an elevated Command Prompt or PowerShell session, enter in:

reg add “HKLM\SOFTWARE\Microsoft\Windows NT\CurrentVersion\Virtualization\Replication” /v DisableCertRevocationCheck /d 1 /t REG_DWORD /f


Enable HTTPS Hyper-V Replication:

Now we can enable Hyper-V replication on each of the Hyper-V hosts.

  • Open Hyper-V Manager, select the host, and click on Hyper-V Settings…
  • Select Replication Configuration
  • Tick to Enable this computer as a Replica server
  • Untick Use Kerberos
  • Tick Use certificate-based Authentication (HTTPS)
  • Click Select Certificate… and, if everything above was done correctly, the Specify certificate box will auto-populate with the details of the certificate of this server.
  • Click to allow replication from any authenticated server
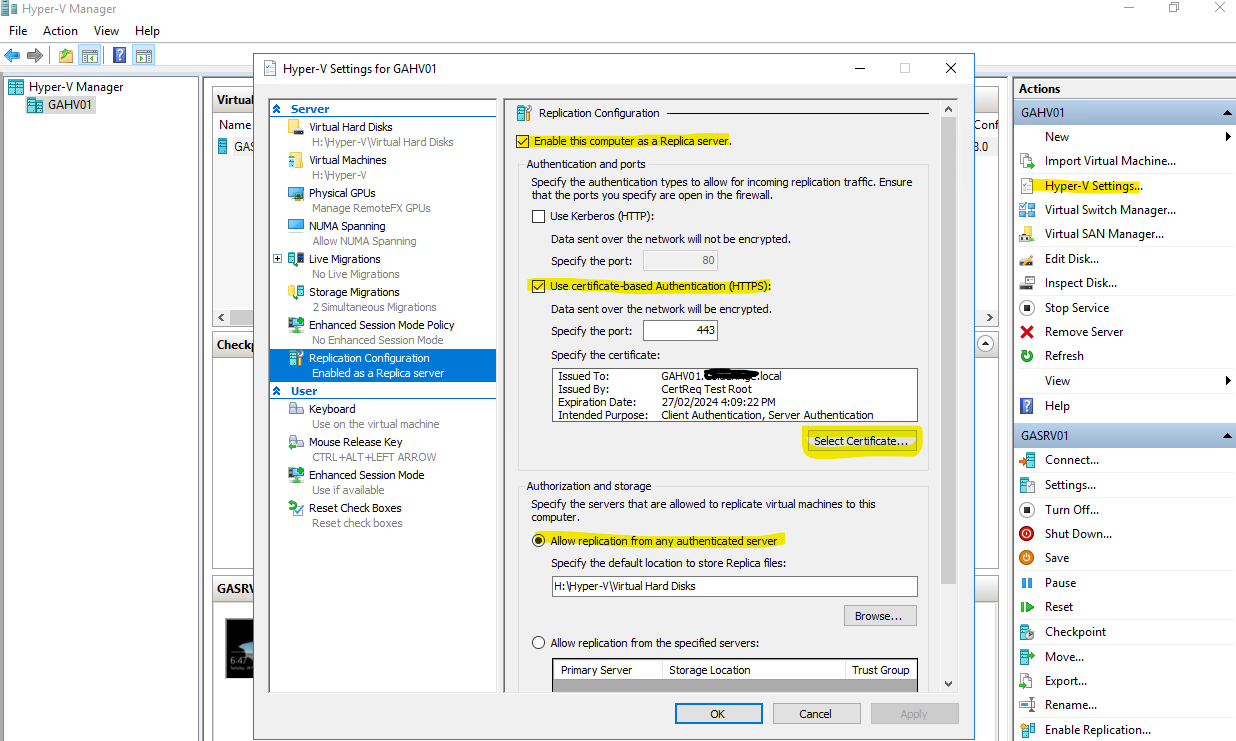
Repeat these steps on the other Hyper-V hosts


Configure Hyper-V Replication:

Right-click on the VM you need to replicate

Specify the replica server with its FQDN (ensure that you can first ping the replica server with its FQDN eg: ping host1.domain.local)

Next, choose certificate based authentication

Select the certificate and it should prompt to auto fill this data
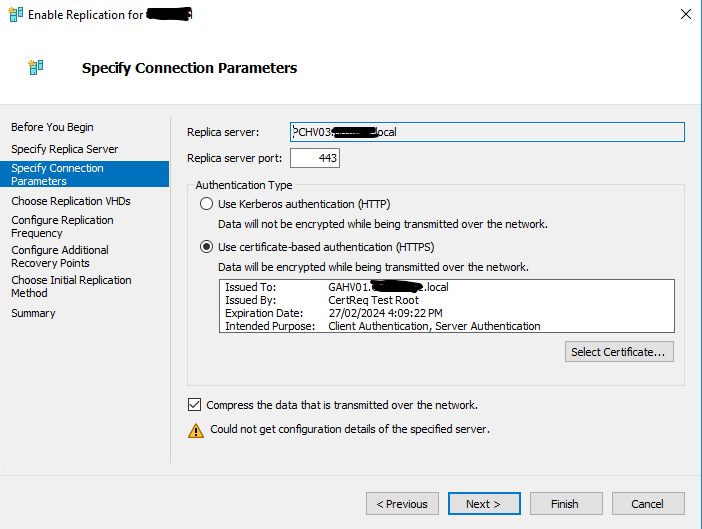
From here, the rest should be pretty straight forward – options such as choosing how often, how many versions to retain, etc.
 

Configure Windows NTP Servers in Active Directory Environment Using Group Policy

Scope:

Setup a fully functional & authorities time service across Active Directory to ensure all AD joined Windows systems are properly time-synced to the domain controller(s) and also to external sources when abroad.

The Primary Domain Controller:

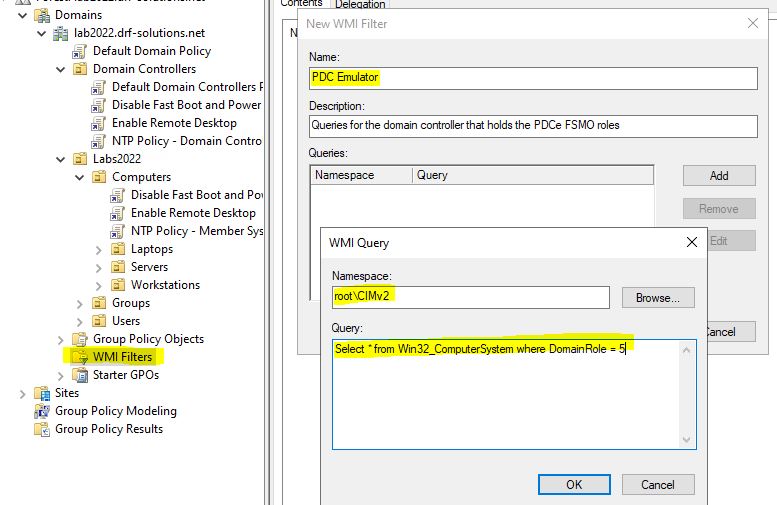
In Active Directory, the PDC Emulator should get the time from an external time source and then all member computers of this domain will get the correct time from the PDC. Since the PDC Emulator can move around, we make sure the GPO is applied only to the current PDC Emulator using a WMI filter.

Go to the WMI Filters section in GPMC and create a new filter like the following:

Here’s the query for you to copy’n’paste:

Select * from Win32_ComputerSystem where DomainRole = 5

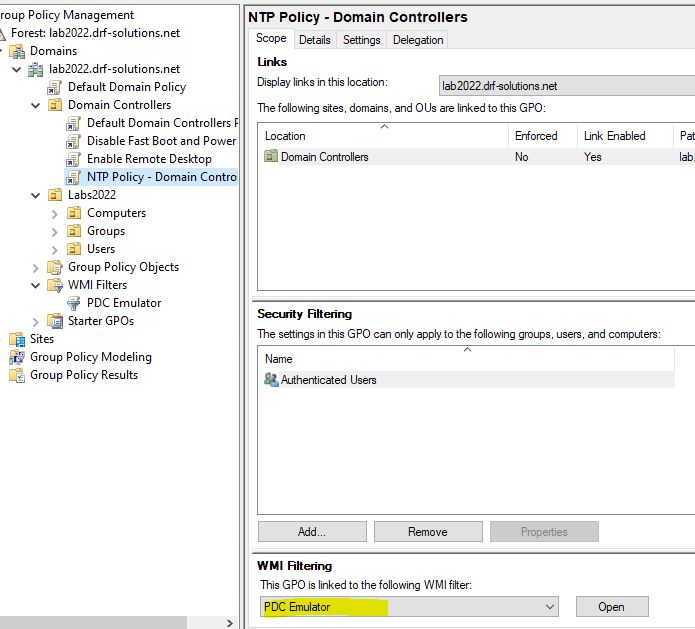
Create a GPO called NTP Policy – PDC and apply it to the Domain Controllers OU

Apply the WMI filter you created earlier

Drill down into:

Computer Configuration/Policies/Administrative Templates/System/Windows Time Service/Time Providers

Edit all three policy items in this folder:

Next, we need to allow the NTP requests to hit the domain controller, so drill down into:

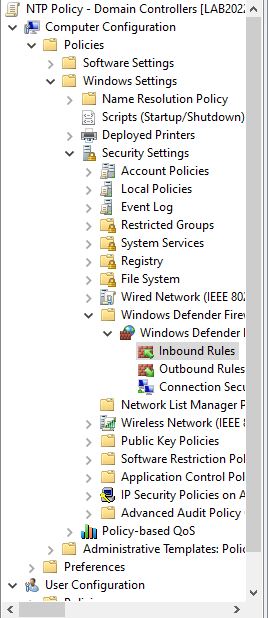
Computer Configuration\Policies\Windows Settings\Security Policies\Windows Defender Firewall with Advanced Security\Windows Defender Firewall with Advanced Security\Inbound Rules

Right-click on the Inbound Rules tree item and select New Rule…

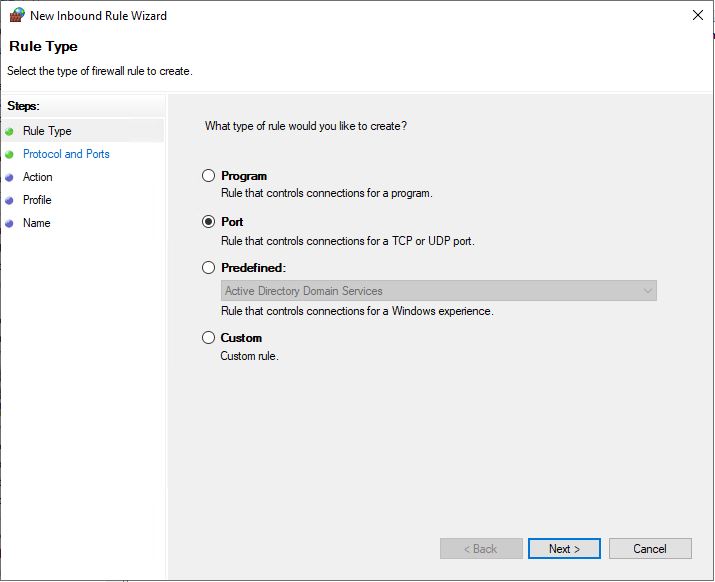
Choose Port and click Next

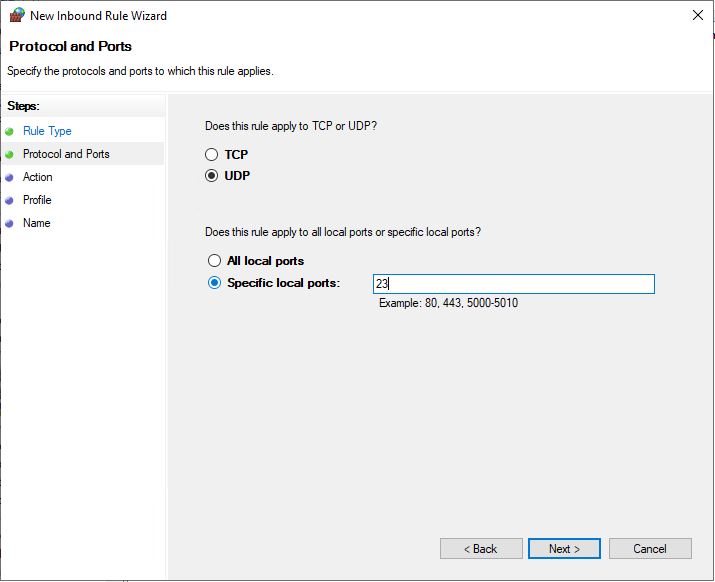
Select UDP and specify port 23. Click Next

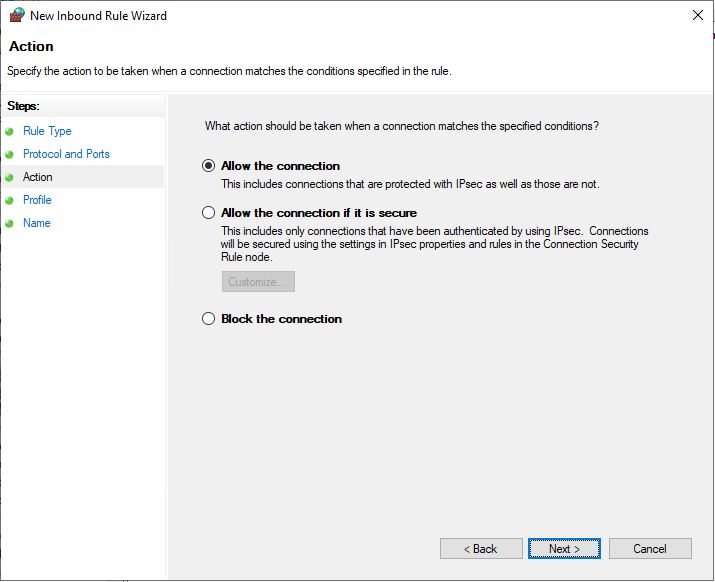
Select Allow the connection and click Next

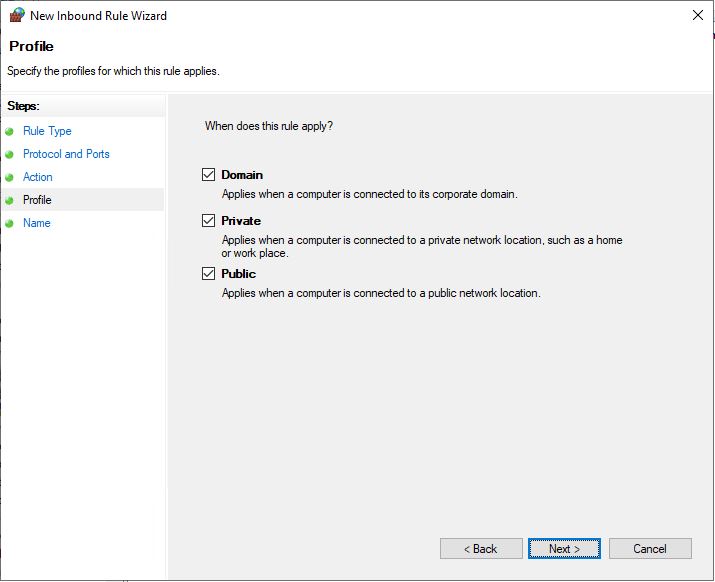
Ensure all network profiles are selected and click Next

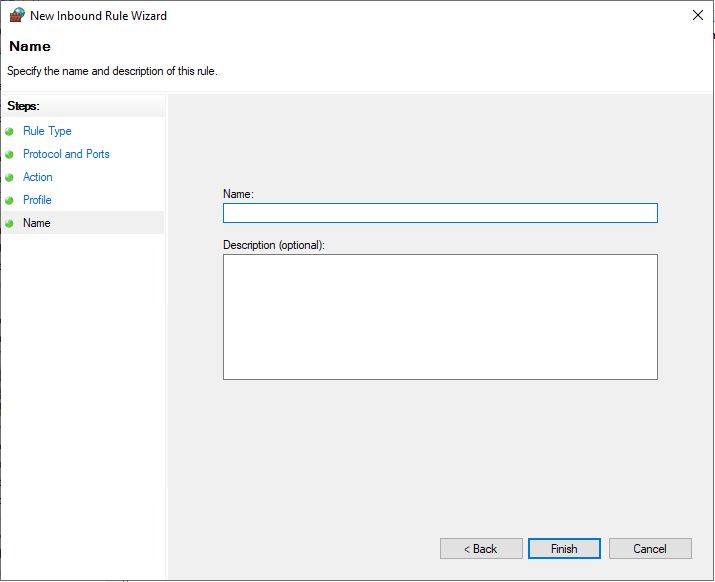
Give the rule a name, such as NTP-in and click Finish

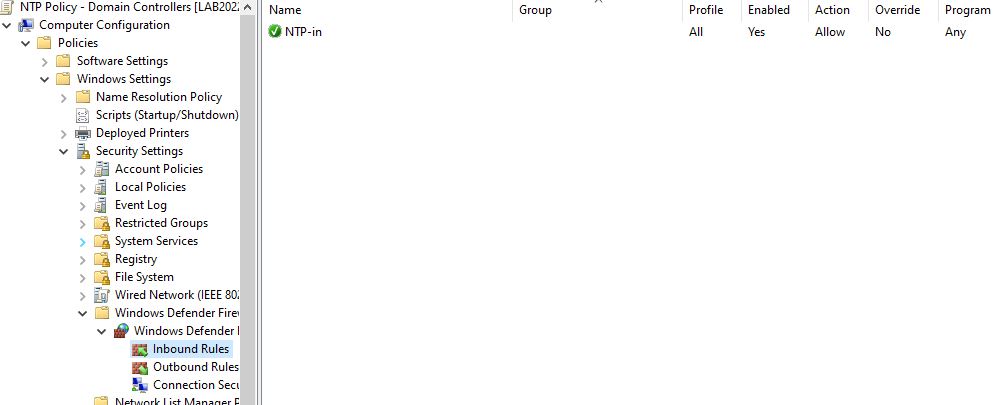
The final result will look something like this:

Additional Domain Controllers:

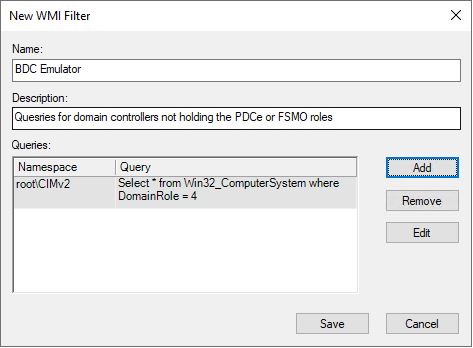
Now we need to create another WMI Filter called BDC Emulator and use the following query:

Select * from Win32_ComputerSystem where DomainRole = 4

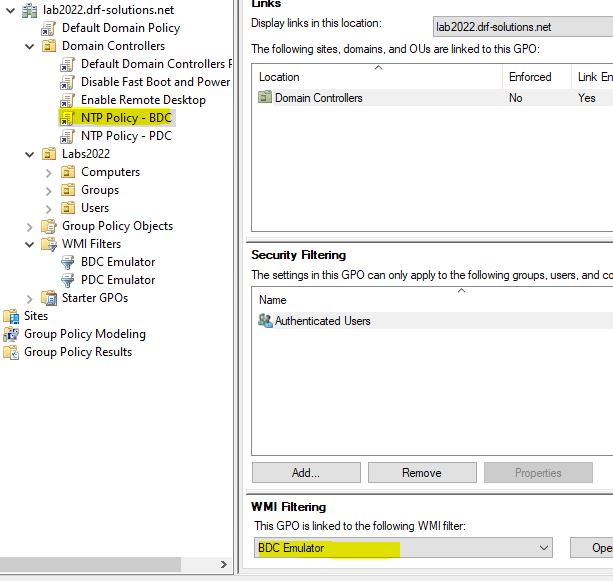
Create a new GPO in the Domain Controllers OU called NTP Policy – BDC

Link the WMI Filter for BDC Emulator

Now edit this GPO and drill down to:

Computer Configuration/Policies/Administrative Templates/System/Windows Time Service/Time Providers

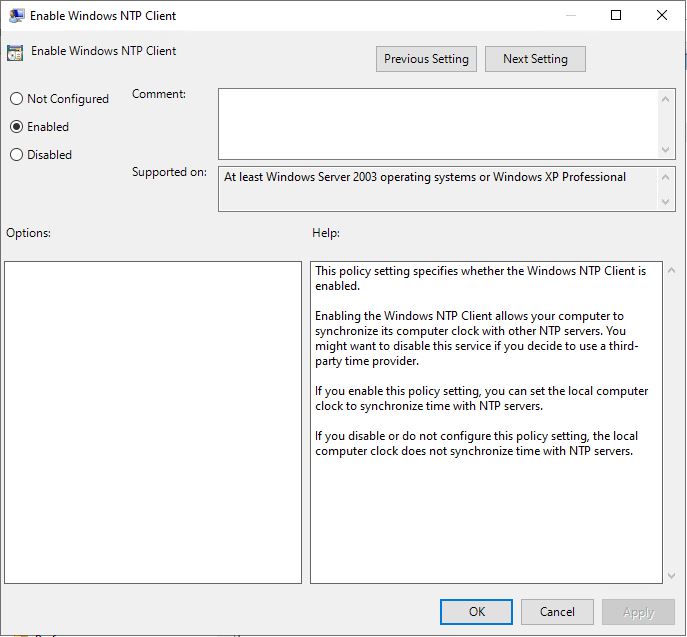
Double-click Enable Windows NTP Client

Set to Enabled and click OK

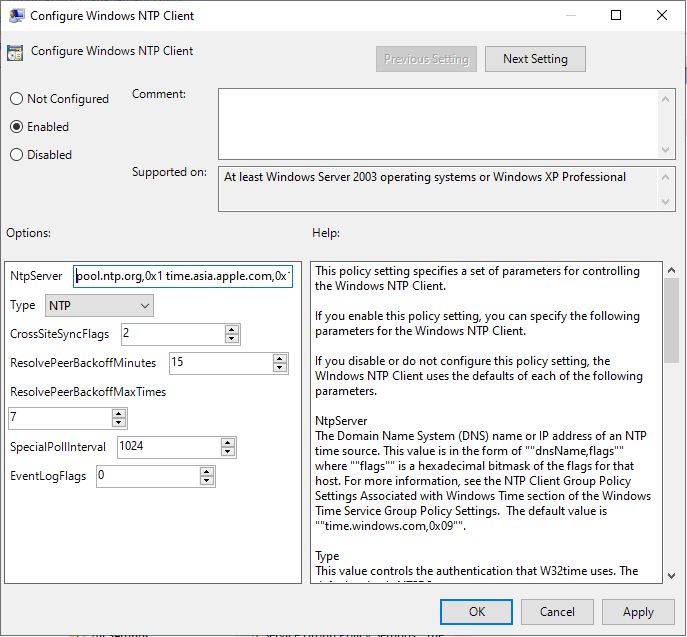
Double-click on Configure Windows NTP Client

Set Type to NTP

Set NtpServer to hold the PDC and also a couple of external time providers that match what you specified in the PDC GPO

Click OK and close that policy

Congratulations! You have configured the NTP GPOs for the domain controllers.

Now we need to configure NTP for the rest of the domain members

Configure NTP for Domain Member Systems:

Finally, create a new GPO and link it to the OU where member servers, laptops, and workstations reside

Call it something like NTP Policy – Member Systems

Again, drill down to:

Computer Configuration/Policies/Administrative Templates/System/Windows Time Service/Time Providers

Double-click Enable Windows NTP Client

Set to Enabled and click OK

Double-click on Configure Windows NTP Client

Set Type to NTP

Set NtpServer to hold the PDC and also a couple of external time providers that match what you specified in the PDC GPO

Click OK and close that policy

Congratulations! You should now have successfully configured full AD NTP sync across the network.

Perform a gpupdate on systems to ensure policies are applying, use gpresult to ensure the policies are being read & applied.

In some cases, you may need to restart the Windows Time Service or reboot systems.


NTP GPO details explained

So what all these settings mean.

Configuring Windows NTP Client: Enabled

NtpServer:

  • Here you specify which NtpServers to use separated by a space but also with a special NTP flag. I decided to use the public ntp.org pools:
0.se.pool.ntp.org,0x1 1.se.pool.ntp.org,0x1 2.se.pool.ntp.org,0x1 3.se.pool.ntp.org,0x1

The NtpFlags are explained in detail here but 0x1 means: “Instead of following the NTP specification, wait for the interval specified in the SpecialPollInterval entry before attempting to recontact this time source. Setting this flag decreases network usage, but it also decreases accuracy.” where SpecialPollInterval is specified in the GPO (in our, case 3600 seconds)

  • The rest of the settings are explained in the GPO Help.

Enable Windows NTP Client: Enabled

  • Is a must, otherwise the computer will not sync with other NTP serves since it’s disabled by default.

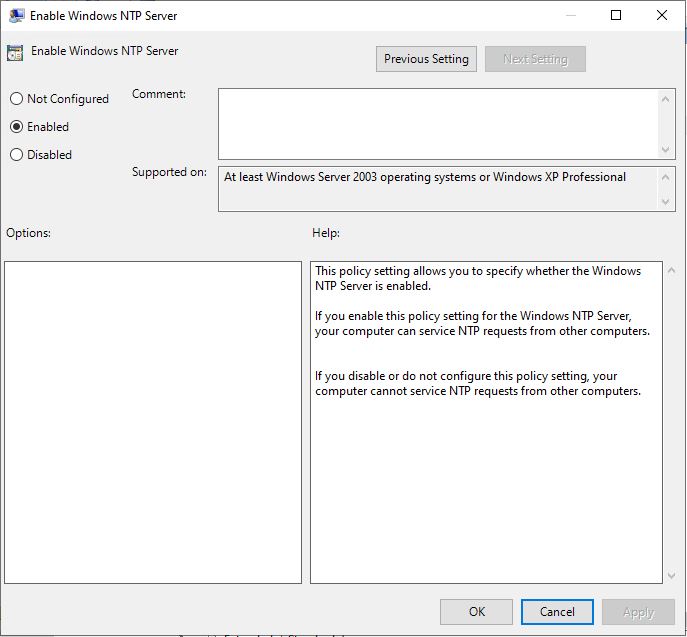
Enable Windows NTP Server: Enabled

  • Is a must, otherwise the computer will not allow other computers to sync with it since it’s disabled by default.

Where is the configuration stored?

First, never edit the registry for NTP. If something is not working, clear the configuration and start from scratch and configure NTP using GPO or W32tm.exe. Do this by running the following commands:

Stop-Service w32time

w32tm /unregister

w32tm /register

Start-Service w32time

Still, you might want to check where the configuration is. When using GPO, the configuration is stored here:

HKLM\SOFTWARE\Policies\Microsoft\W32Time\Parameters

Note that this is different if you’re using w32tm.exe, then the configuration is stored here:

HKLM\SYSTEM\CurrentControlSet\Services\W32Time\Parameters

Useful tools when troubleshooting NTP

W32tm is still your friend and here are my favorites:

w32tm.exe /resync /rediscover /nowait

Resynchronize the clock as soon as possible, disregarding all accumulated error statistics. It will not wait for resynchronization and will force redetection of sources.

w32tm /query /peers

Displays all configured peers you have configured

w32tm /query /source

Displays the currently used time source. Note that after a restart of the service, it might show Local CMOS Clock until everything has refreshed properly.

w32tm /query /status

Displays the current status

w32tm /query /configuration

Displays the configuration

w32tm /debug /enable /file:C:\Temp\w32tmdebug.log /size:10485760 /entries:0-300

If you really want to get dirty, enable the debug log

Troubleshooting

Many things can go wrong when configuring NTP. Here are some suggestions:

  • Don’t forget to allow NTP traffic (udp/123) in your firewall(s) – if you have 3rd party firewalls, check them also
  • Enable the debug log and check that the service actually tries to communicate with the NTP serves. You can lower the SpecialPollInterval to 30 seconds to speed up your troubleshooting.
  • Restart the service and maybe even the server, sometimes this has solved it.
  • Also monitor the event log since the service logs there too.
  • If the domain controller is a Hyper-V VM, disable Time Synchronization on the guest

Attachments

This attachment is a client script that can be used to force reconfiguration of the local sync setup of workstations and member servers…

clocksyncupdate.cmd

blk_update_request: I/O error, dev fd0, sector 0

Getting this message in the console of a Linux VM?

blk_update_request: I/O error, dev fd0, sector 0

This is because the Linux VM is trying to access the floppy drive, and can’t.

Issue these commands to block the system from trying to access the floppy disk:

sudo rmmod floppy
echo "blacklist floppy" | sudo tee /etc/modprobe.d/blacklist-floppy.conf
sudo dpkg-reconfigure initramfs-tools

From here you should be fine, a reboot may or may not be required.

An alternative if you have Hyper-V, is to shut the VM down, remove the floppy from the VM config and boot it up.

Hyper-V 2019 only using every second CPU Core or Thread

Issue: Hyper-V on Windows Server 2019 only using half the available CPU threads, and VM’s with larger CPU core counts often perform very poorly

image

Windows Server 2019, Hyper-V now defaults to a more secure “core scheduler” where previous versions used “classic scheduler” for CPU scheduling and isolation. What this means, is that when you migrate a VM over to Hyper-V on WS2019, you need to update the VM configuration and change some settings, or it will only use a single hardware thread per core, exhibiting the behavior you see above.

In Hyper-V on WS2016, the default setting for number of Hardware Threads per Core is “1”. What we want is to set this to “0” which will inherit the Host’s default configuration for this.

The below PowerShell commands will list all VM’s on the host, list their configuration versions, list the threads count per core, then set the new defaults to inherit settings from Hyper-V

Note: For the last command to work – setting the new defaults, affected VM’s need to be powered off.

#Get your Host supported VM guest configuration versions
Get-VMHostSupportedVersion
#Get your VM guest configuration versions
Get-VM | FT Name, Version
#Update all VMs configuration versions
Get-VM | Update-VMVersion
#Get the VM thread count per core setting
Get-VM | Get-VMProcessor | FT VMName,HwThreadCountPerCore
#Set the VM thread count per core setting
Get-VM | Set-VMProcessor -HwThreadCountPerCore 0

Now that the changes have been applied, here’s the task manager screen shot:

image

Note – this only impacts migrated VM’s. When a VM is created on Windows Server 2019 Hyper-V, this is not an issue as the VM’s inherits the default setting of the Host.