Author: David Florey

Tasks to be performed post SSL Certificate renewal on Hybrid Exchange server environments

Forward:

This guide is for environments where Exchange On-Premise 2013/2016/2019 is configured as a hybrid deployment with Microsoft 365 Exchange Online.

Requirements:

It assumes you have an administrator mailbox account that can login to both Exchange On-Premise as an Exchange Administrator and login to Microsoft Exchange 365 Online as a Global Admin.

You will also require an active, functional mailbox sitting in the mailbox database located in the Exchange On-Premise. This mailbox does not need to have any administrative rights, it doesn’t even have to be in use actively by a user, it just needs to exist for testing purposes.

The Exchange On-Premise needs to be externally accessible on ports: 25, 80, and 443.

Prerequisite Checks:

First, we need to check the health of the AD-Sync deployment. In the Microsoft 365 Admin Center, head to Health > Directory sync status

Check that Directory sync is on & healthy, no errors, and make sure password sync is also working.

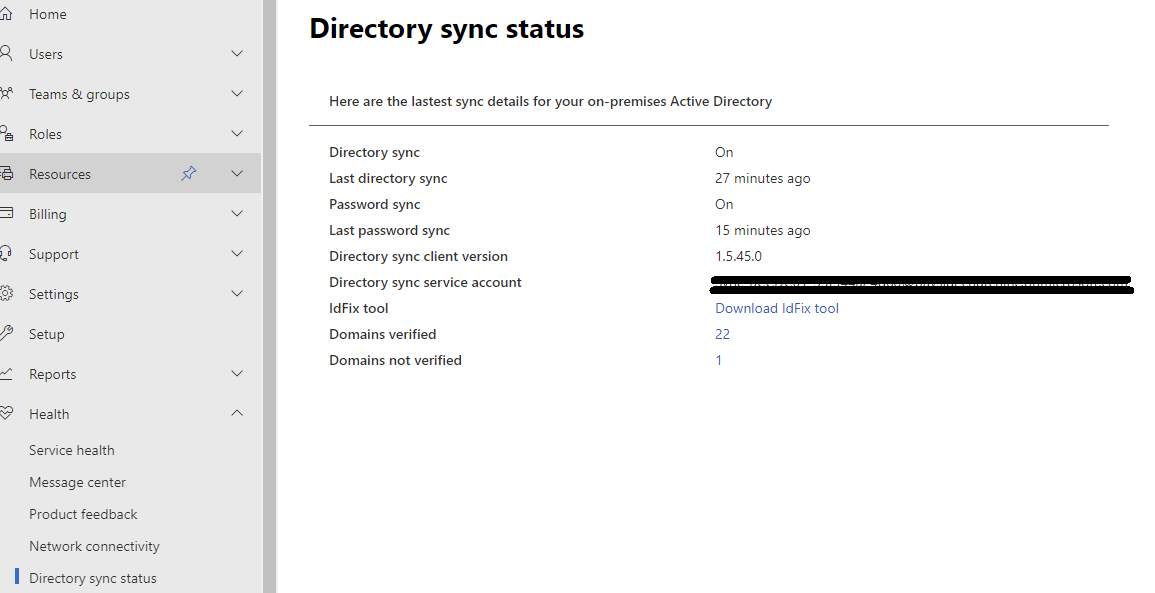
Ideally, recent syncs should be less that 40 minutes.

If AD Sync isn’t working properly, address this problem before continuing any further.

Microsoft has recently split off support for Microsoft Windows Server 2012 R2, so this version of Windows is less likely to receive any updates. If you’re in this situation, you may need to download Azure AD Connect version 1.6.16.0. More on the Azure AD Connect version history here. Please note, that as of August 2022, all Azure AD Connect versions 1.x.x.x will be retired as they use Microsoft SQL Server 2012 which will no longer be supported.

If you’re in an environment still operating on Windows Server 2012 R2, now is the time to start planning an upgrade – even if that upgrade means deploying a more modern version of Windows Server (2016/2019/2022) as a domain member or secondary domain controller, and configuring Azure AD Sync on this newer server instead.

Certificate Installation on On-Premise Exchange server:

You will need to already have your new certificate file(s) – ideally, you want the full stack certificate file in pfx format.

Login to your Exchange server’s desktop environment as a domain admin, copy the P12 PFX file to somewhere local on the Exchange Server.

Double-click the certificate file to launch the certificate installation wizard

Select Local Machine and click Next

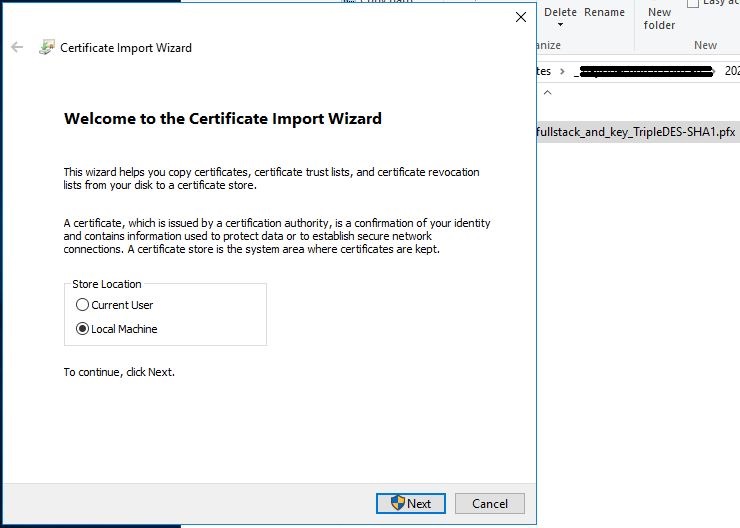
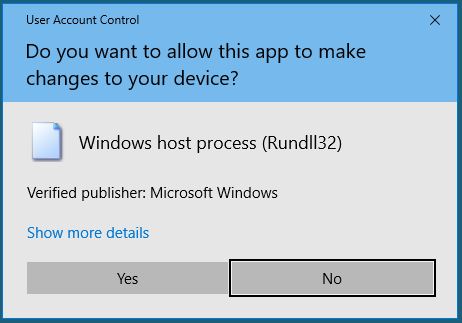
Confirm by clicking Yes if you are prompted with the UAC elevation prompt

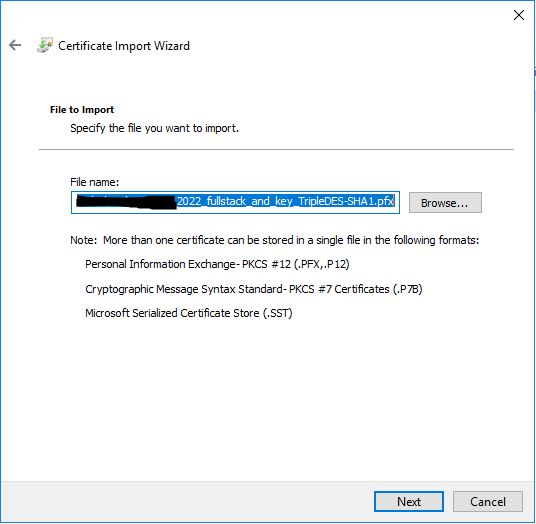
On the next screen, just click next

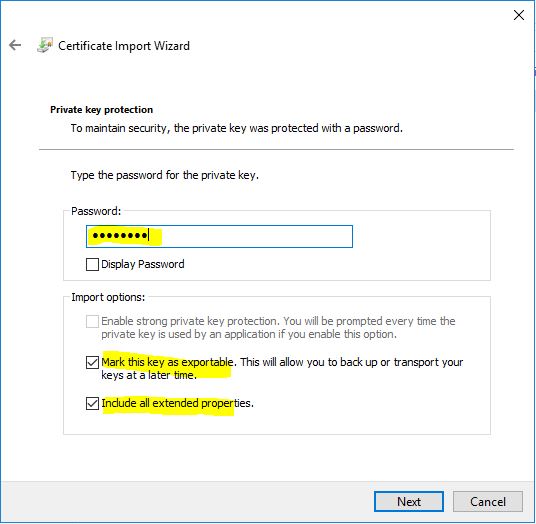
This next step is pretty crucial especially, if later you need to export the certificate for use elsewhere…

Enter in the password for the PFX file.

Ensure that both options are ticked for:

  • Mark this key as exportable
  • Include all extended properties

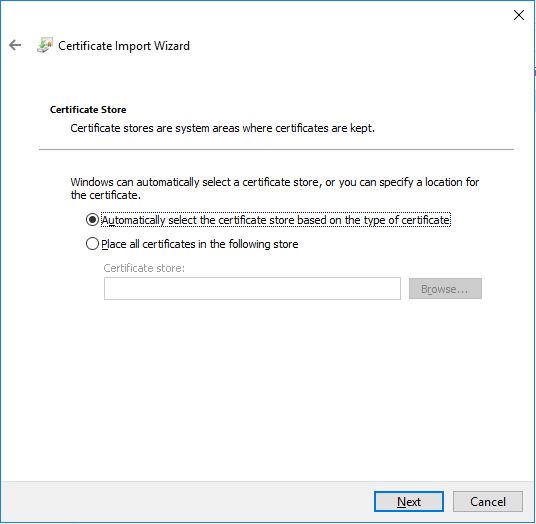
Now, if the certificate is properly formatted, the Automatic store selection should just work fine here. If not, select the Personal certificate store.

Now we need to check the certificate in the Certificates snap in for the local machine and ensure we give it a meaningful name

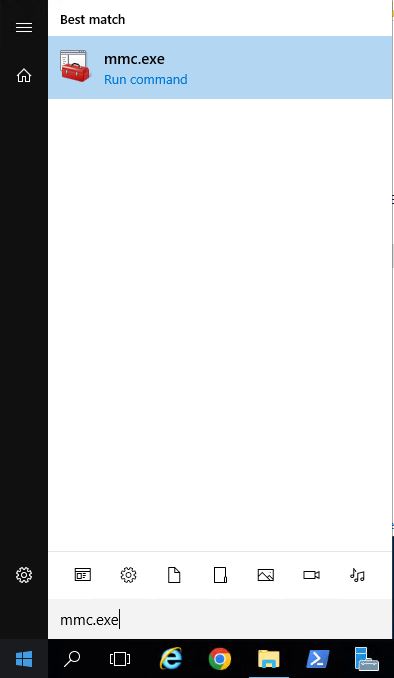
Click start, type in mmc.exe – once its listed, press enter (note: if UAC is on, you will be prompted to click Yes again).

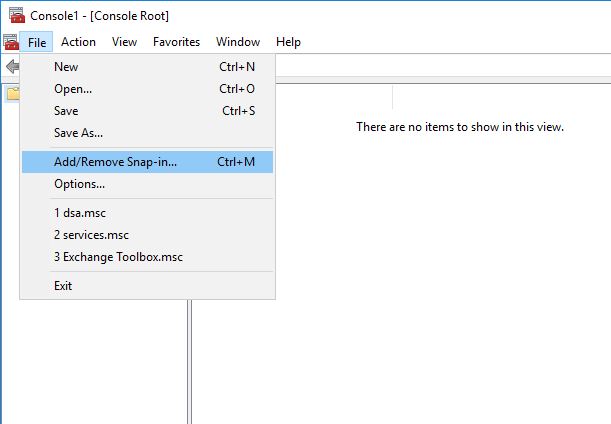
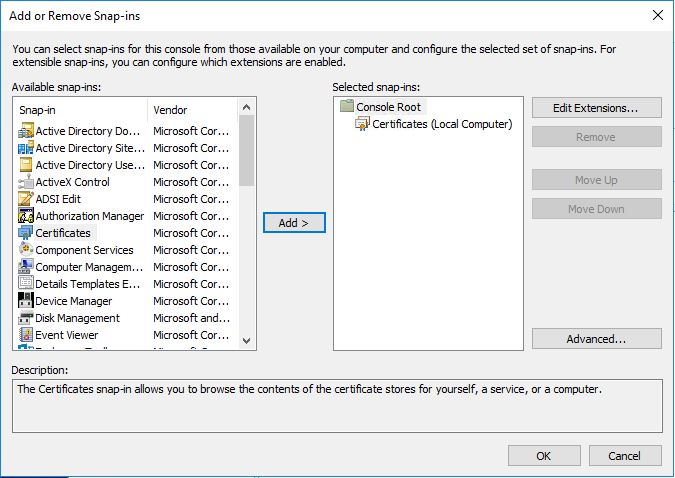
Click File > Add/Remove Snap-in…

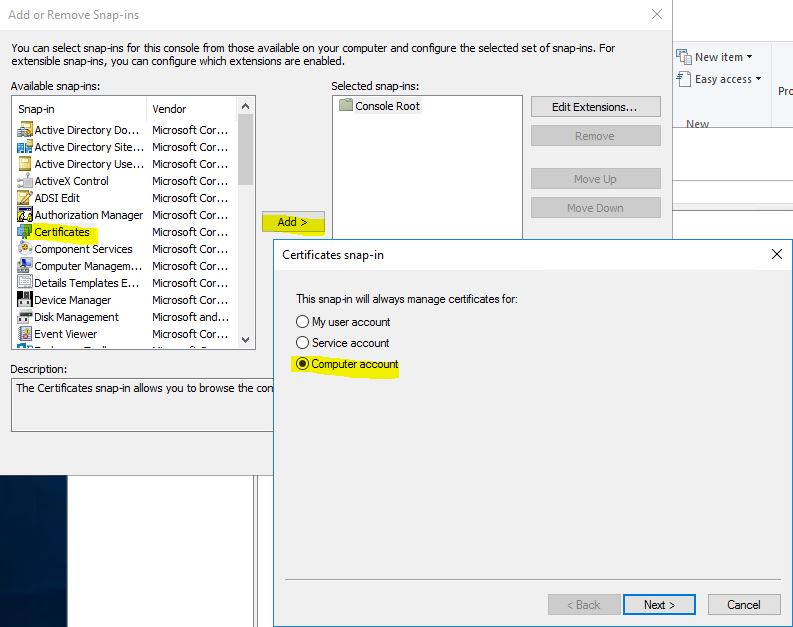
In the left box, choose Certificates, click the Add button

It will prompt you to select what certificates to manage – select Computer account and click Next

Select Local computer and click Finish
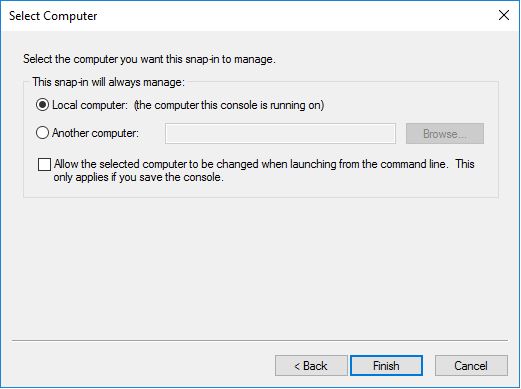
Click OK

Expand out Certificates > Personal > Certificates

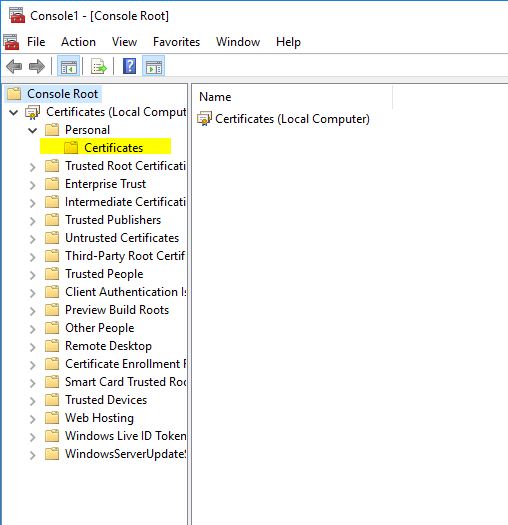
Click on the Certificates folder you revealed under Personal

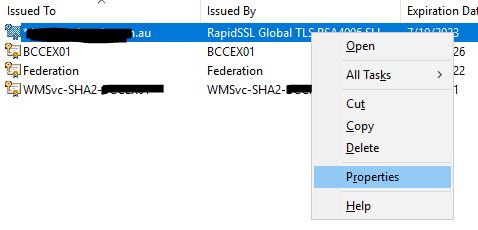
You will be presented with all the certificates

You will see both the expiring / expired certificate and the newly installed certificate. Note, neither of these have a ‘friedly name’ – we’re going to fix this now.

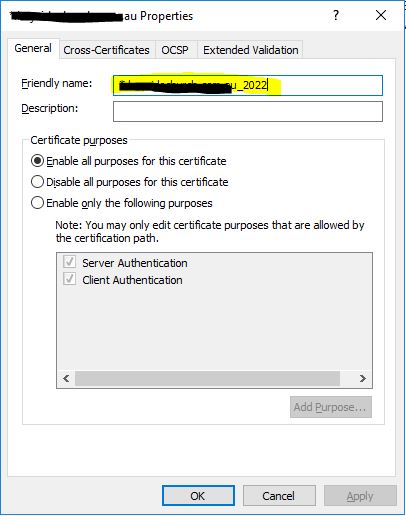
Right-click on the newly installed certificate and click Properties

In the properties window, give the certificate a friendly name – this is very helpful to identify this certificate when there are several with the same SAN. Ideally, I like to use the FQDN_YYYY at the very least which indicates the fully qualified domain name, and underscore, and the year the certificate was installed. Some techs will use the installation date or the expiry date. If you do this, maybe also add in the words installed or expires so the next time this is revisited, the date is more meaningful.

Once you have the name, click OK.

Update Bindings in IIS:

Now the friendly name filed in the certificates list will have the name you entered against that certificate. Go ahead and close the MMC certificates console.

Next we need to launch the IIS interface and expand out all the sites.

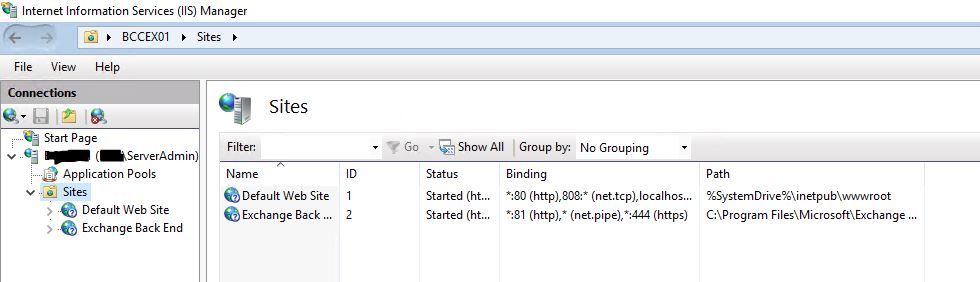
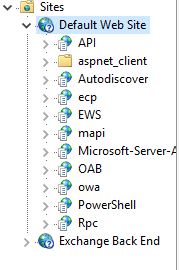
First click on the Default Web Site and expand it – this will likely have all the front end facing sites & services.

Now on the right side under the Actions menu, click Bindings…

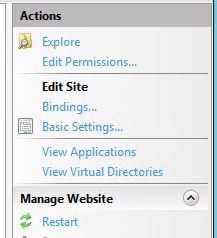
Any of the bindings in here that are on https need to have the new certificate applied

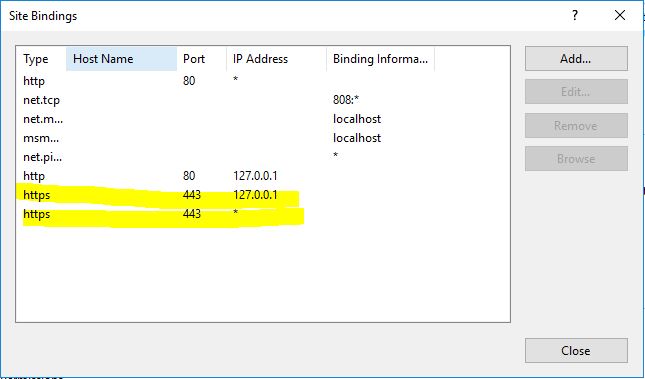
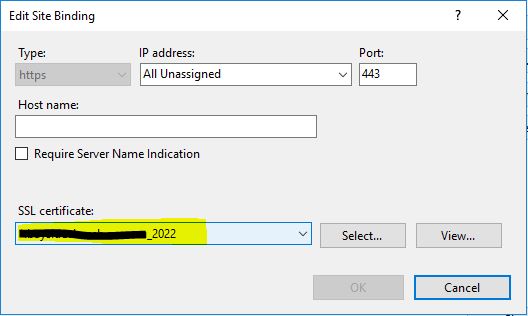
Double-click and set the new certificate for each one

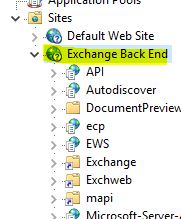
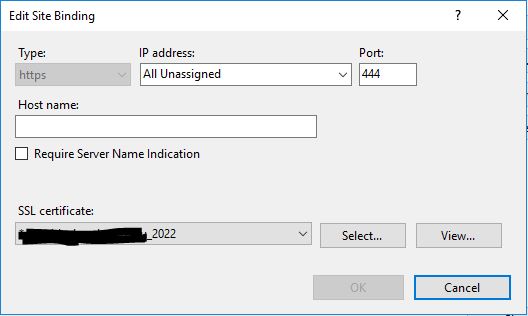
Once these are done, move onto the Exchange Back End pool

Again, on the right, click to edit the Bindings in the Actions menu

There’s usually only a single binding on https and uses port 444.

Note: This is almost always meant to use the default “Microsoft Exchange” certificate issued by the Exchange server, so don’t change this unless it for some reason already has the expiring signed SSL certificate or is required to have a 3rd party certificate!

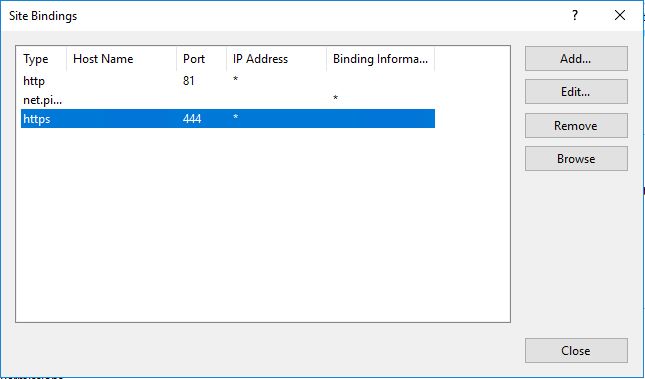
Again, edit this binding to use the new certificate

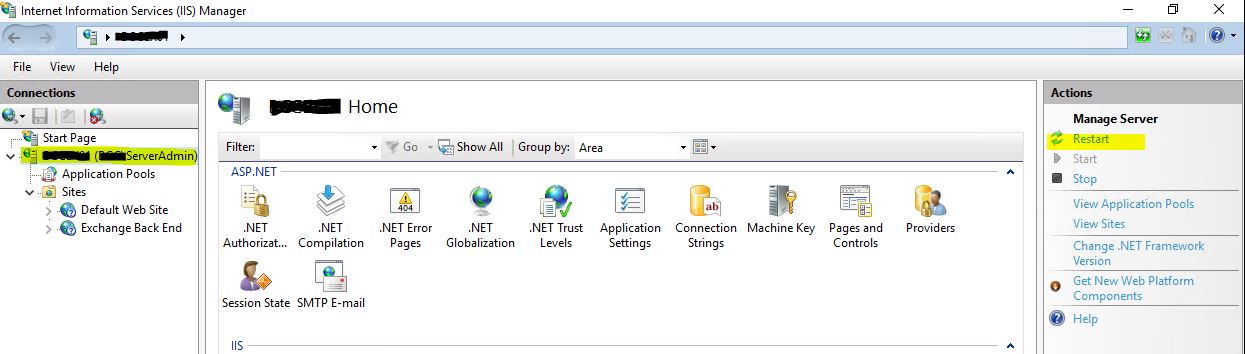
Once the bindings have all been updated, you may need to restart IIS – note this will disconnect any connected clients.

In the tree on the left, click on the server, then on the right under the Actions menu, click Restart – this may take a minute

Update Connectors in Exchange:

Login to the Exchange ECP Web UI with the administrator account.

While you’re at it, open another tab in the same browser and use this other tab to login to the Microsoft 365 Admin Center – using the same account credentials.

In the On-Premise Exchange ECP, head to Servers > Certificates

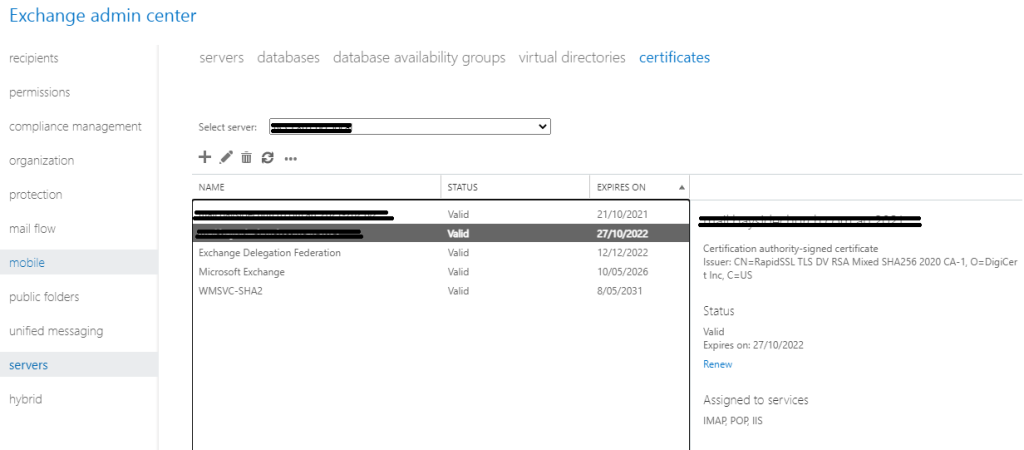
Double-click the new certificate

Locate the Thumbprint, copy and paste this into a notepad session (you’ll need this shortly)

You will need to select Services and then tick box:

  • SMTP
  • IMAP (optional, but not available for wildcard certificates)
  • POP (optional, but not available for wildcard certificates)
  • IIS

(Note that IMAP and POP are optional, but recommended to choose them if clients are connecting using these protocols)

Click Save

You may receive a Warning prompt about overwriting the existing default SMTP certificate, Choose Yes.


Update Default Send and Receive Connectors in Exchange On-Premise PowerShell:

Launch an Exchange PowerShell for the On-Premise Exchange server

Issue the command:

Get-ExchangeCertificate

This will list all of the installed SSL Certificates on the Exchange server

Note, the Thumbprints for each will be listed – confirm your new SSL Certificate’s Thumbprint should be listed there as well.

Let’s place the Thumbprint into the PowerShell session’s environment variables

$cert = Get-ExchangeCertificate -Thumbprint XXXXXX
$tlscertificatename = "<i>$($cert.Issuer)<s>$($cert.Subject)"

(The second line will be used a little further down)

Let’s enable secure SMTP using the new certificate:

Enable-ExchangeCertificate $cert -services SMTP

Note: Due to recent Exchange updates, if you get an error similar to the below running this, change the command to:

 Enable-ExchangeCertificate <thumbprint> -services SMTP

and it should work

Now let’s get the Send Connectors list and update the connector with the new certificate

Get-SendConnector

This will list all the send connectors, locate the connector used to connect with Office 365 – it will look something like:

"Outbound to Office 365"

Let’s set this connector to use the new certificate:

Set-SendConnector "Outbound to Office 365" -TlsCertificateName $tlscertificatename

Repeat for any other send connectors that are in use

Next, we need to do the same for the Receive Connector(s)

Issue the command:

Get-ReceiveConnector

to get the list of all the receive connectors

Identify which connector(s) are using secure protocols for incoming connection (incl. from Office 365). Eg:

<ExchServer>\Default Frontend <ExchServer>
<ExchServer>\Client Frontend <ExchServer>
<ExchServer>\Client Proxy <ExchServer>

Where <ExchServer> is the local host name of the Exchange server.

You may have multiple receive connectors that require updating, so the below will need to apply to these as well.

Set-ReceiveConnector "<ExchServer>\Default Frontend <ExchServer>" -TlsCertificateName $tlscertificatename

Update the Office 365 receove connector as well.

You can now delete the expiring SSL certificate from the Exchange server (via IIS or Certificate manager).

Head back to Exchange ECP > Mail Flow > Send Connectors

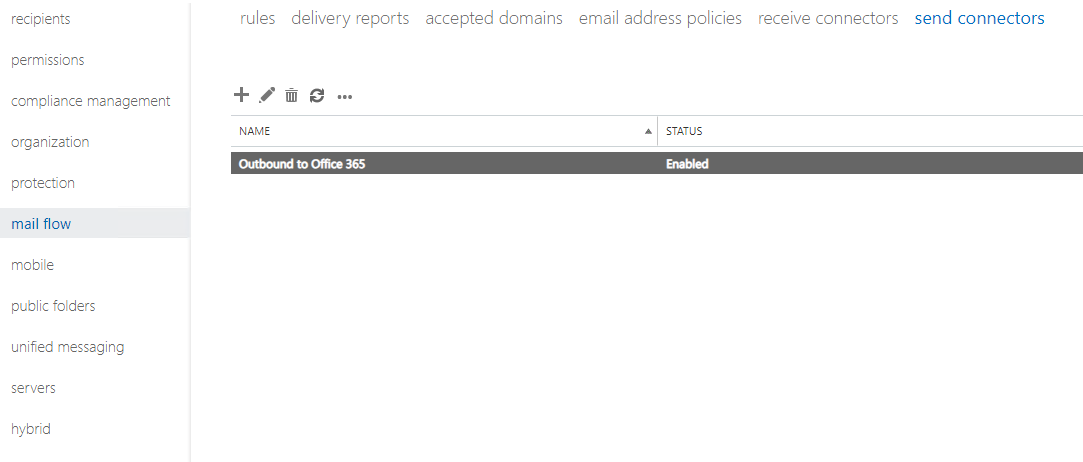
Edit the Send Connector used by Office 365 to note down the following settings:

Delivery > mail routing (MX or Smart Host)

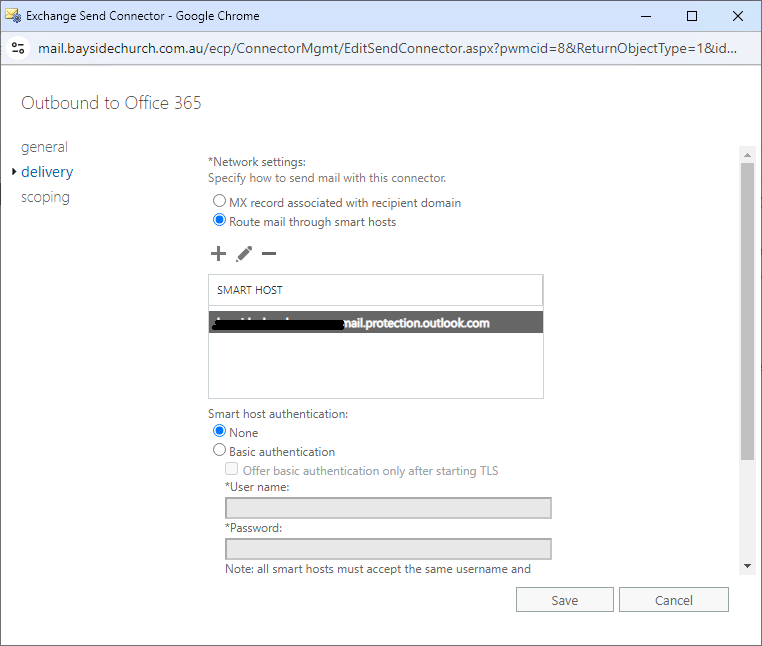
Scoping > Address Space

Again, note these settings down as the Hybrid Configuration Wizard will overwrite them and mail break some mail flow.


Re-Validate the Hybrid Configuration:

The below process has been completely re-written as the process has changed extensively. Migrations are no longer performed on the on-premise Exchange server.

From the desktop of the Exchange server launch the Microsoft Office 365 Hybrid Configuration Wizard:

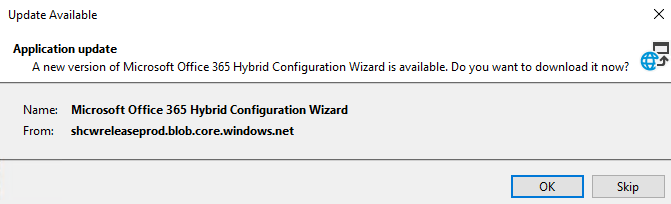
Its likely an update will be offered, so please proceed with the update installation

Once all updated and installed, click Next at the Welcome screen

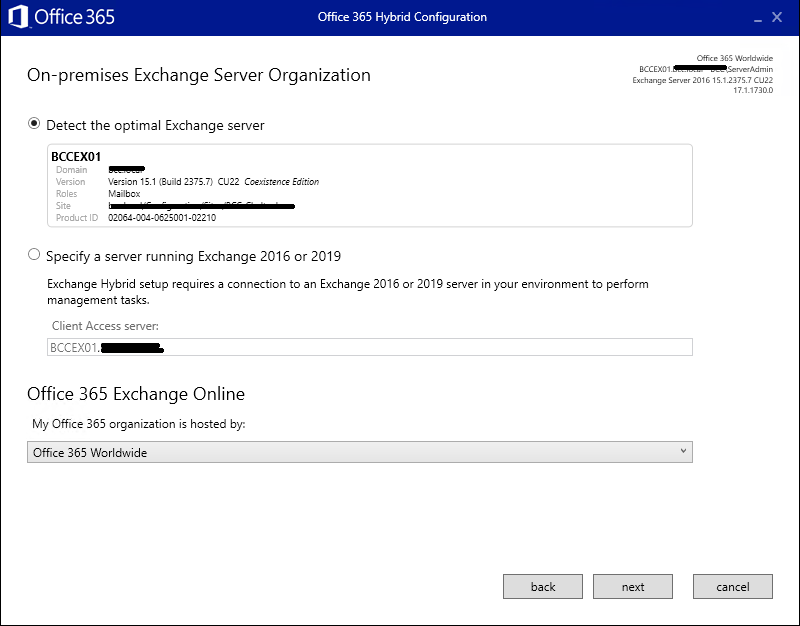
Wait for the wizard to perform its initial detection task – once done, it should show the correct Exchange server and have Office 365 Worldwide selected. Click Next

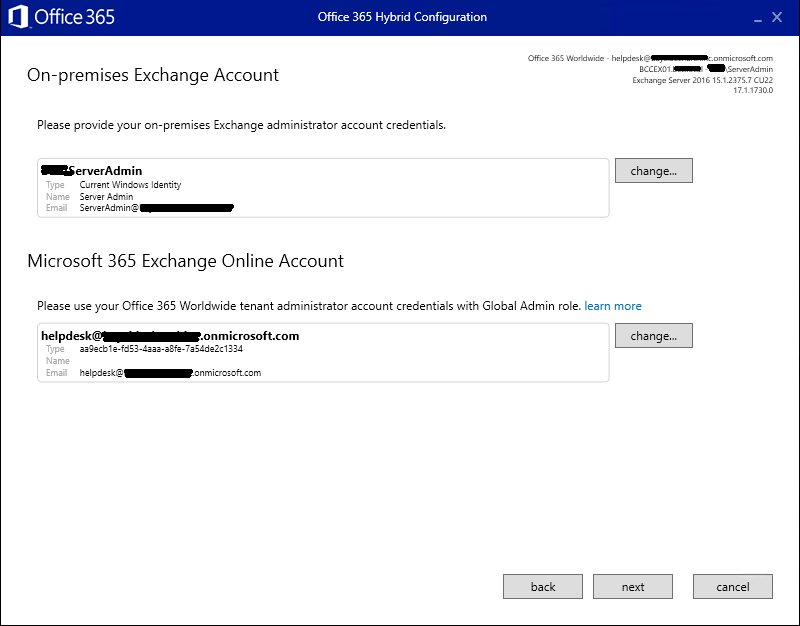
Ensure a domain admin account has been auto selected for the on-premise Exchange server.

Click Sign in for the 365 tenant admin account and authenticate as usual

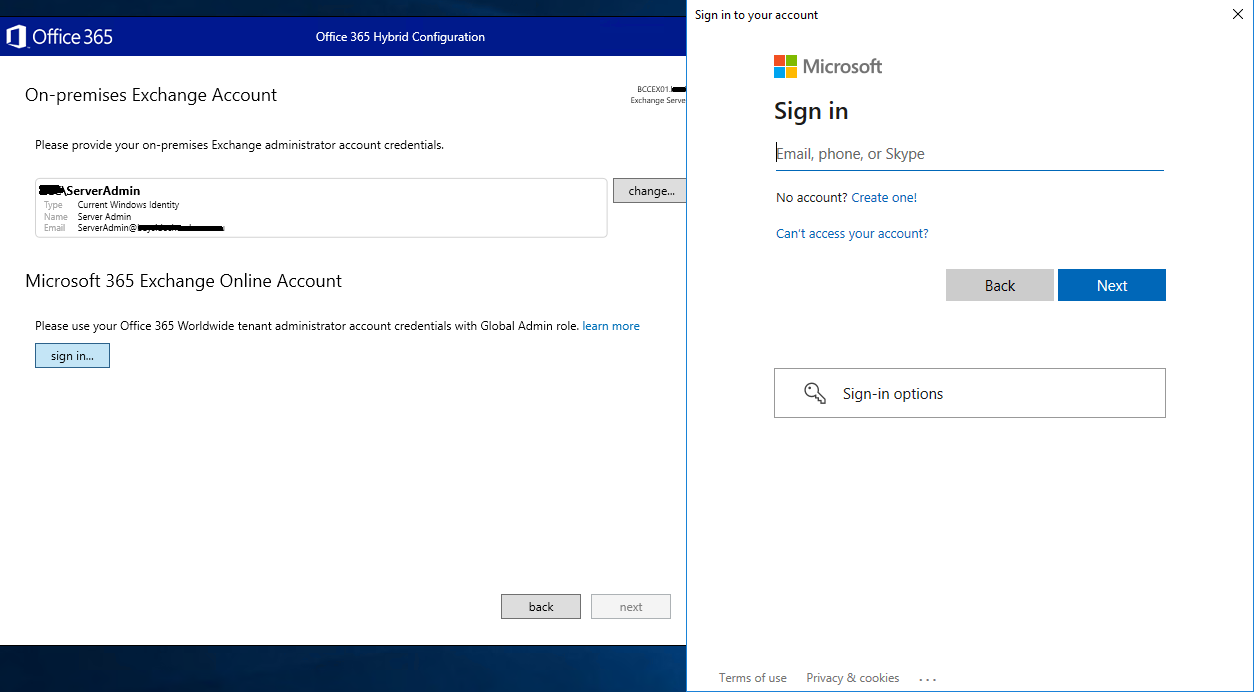
Once signed in for on-prem and 365, it should look like the below – click Next

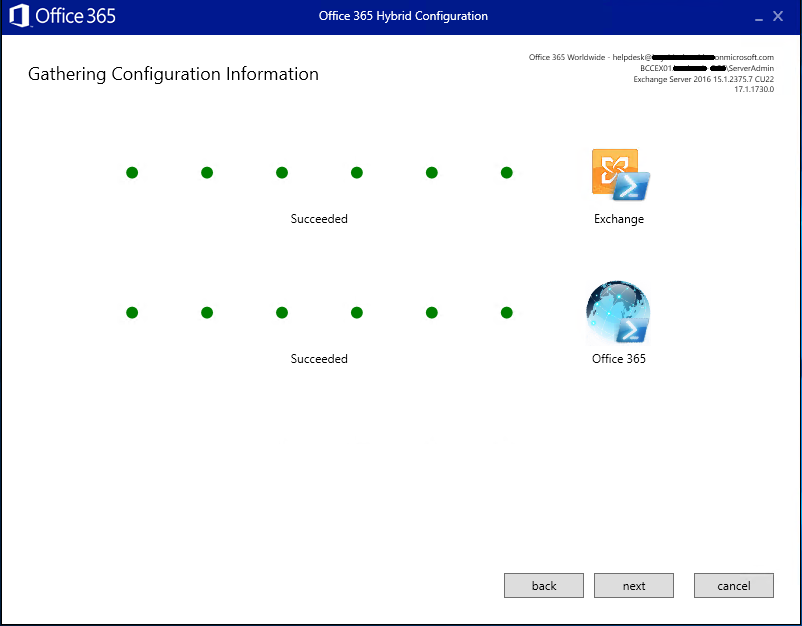
The wizard will spend some time ‘gathering information’

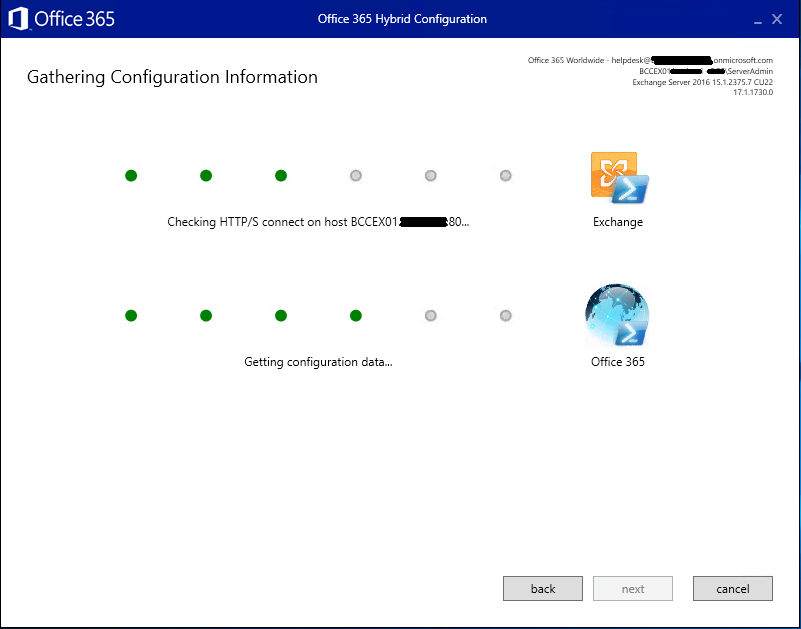
Sometimes issues do crop up here, usually if the configuration is broken of very old, or if certain parts of Exchange aren’t working properly.

You’ll need to spend some time addressing the concerns raised before you get a successful result on both on-prem and 365:

Its likely that Full Hybrid Configuration will be selected, and Minimal Hybrid is greyed out – this is fine

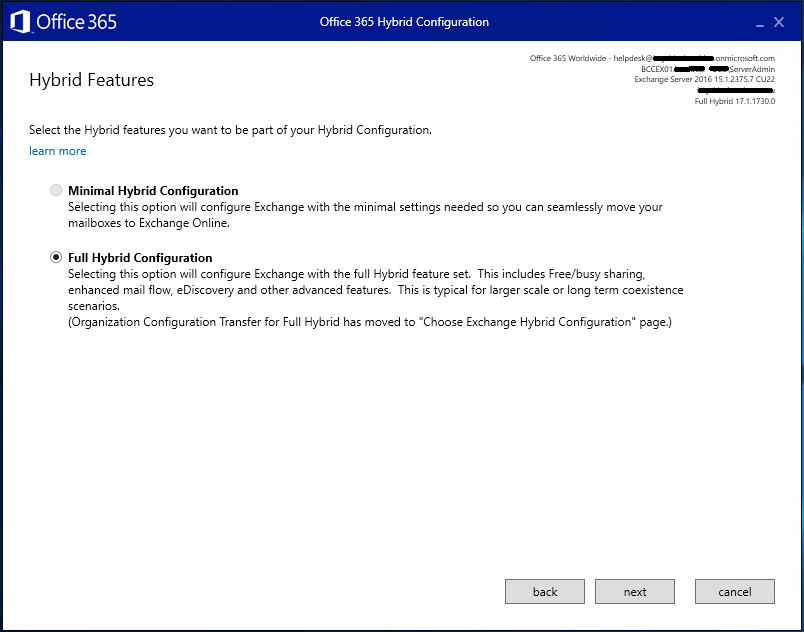
In the event that Minimal is selected, discuss with the lead tech for this client to clarify this is correct as usually we setup Full Hybrid Configuration.

The next screen will present the domain names present and selected.

If unsure, discuss with the lead tech, but in most cases, all domains will be selected

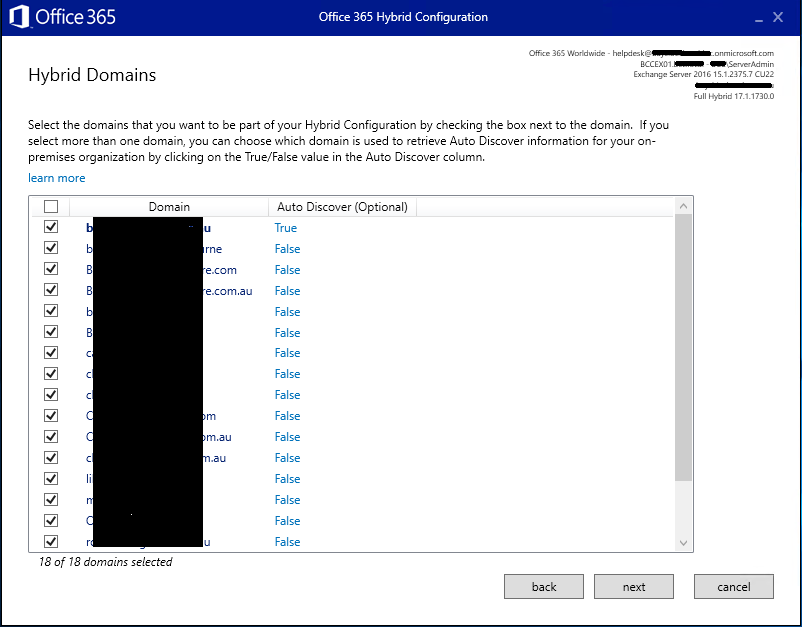
(some clients have way too many domain names)

At this time, where Hybrid Sync is configured with Class Hybrid Technology we’re still using this, but in the future we’ll likely migrate to Modern Hybrid Technology (likely when pushed by Microsoft to do so)
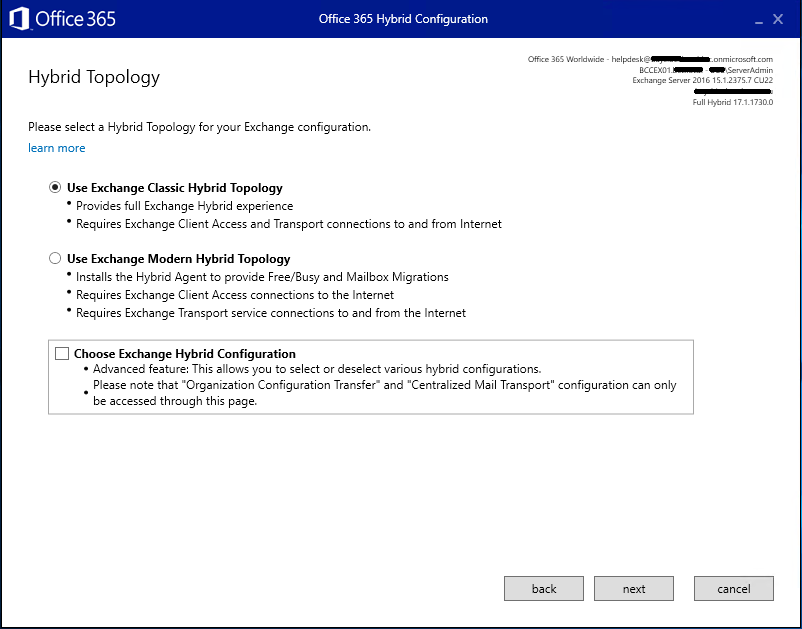
Click Next

This next screen will usually be smart enough to figure out if the on-premise Exchange server is using CAS/MBX or EDGE connector roles – but be sure to double check – especially with larger Exchange deployments

The next two screens just asks you to confirm which Exchange server to use for hosting Receive Connectors and Send Connectors – 99.99% of the time, same on-premise Exchange server, so click Next for each

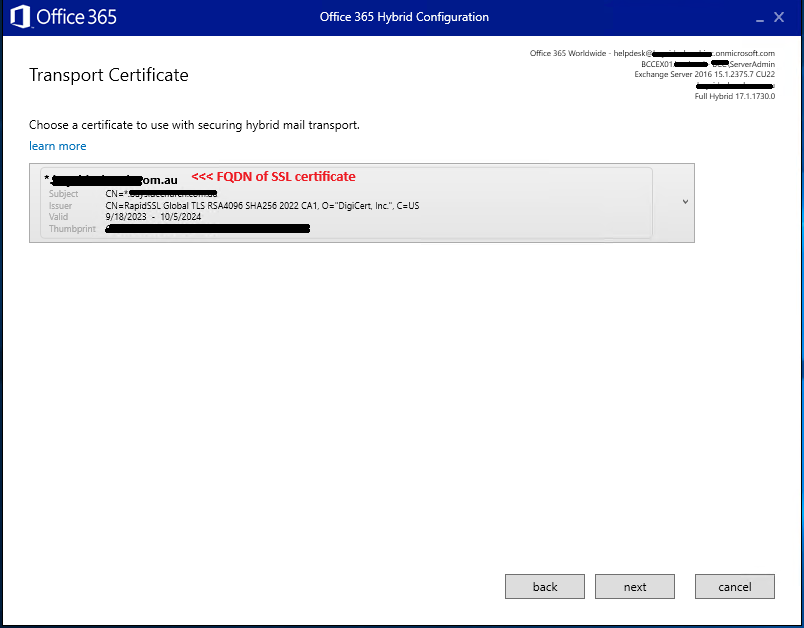
After this you will be asked to choose and confirm the correct SSL certificate to be used for communication between Exchange on-prem and Office 365 – ideally, this is the same SSL certificate used on the Exchange for the Send & Receive connectors and Web Front Ends as installed earlier in the guide. Ensure the current SSL has been auto selected and no old / expired signed certificates exist – if they do, you need to stop and fix this up before re-running the Hybrid Configuration Wizard!

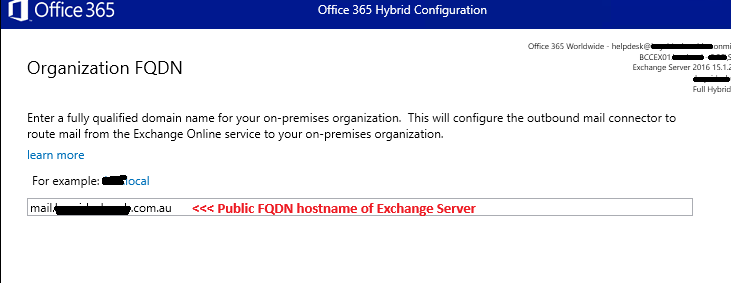
The next screen just confirms the public FQDN on the on-premise Exchange server as configured on the connectors – click Next if correct (365 will connect using this)

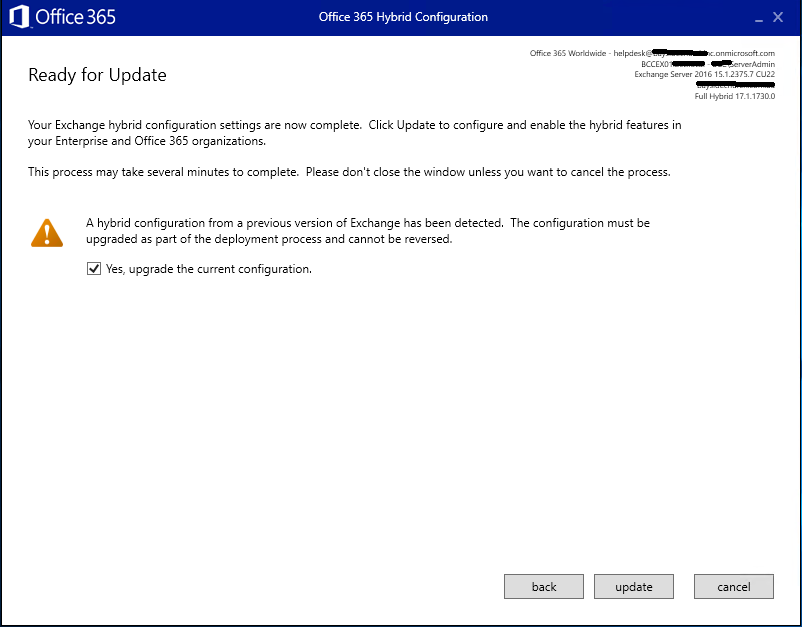
The wizard is now at the final stage and is ready to update the configuration, so tick Yes to upgrade and click Next

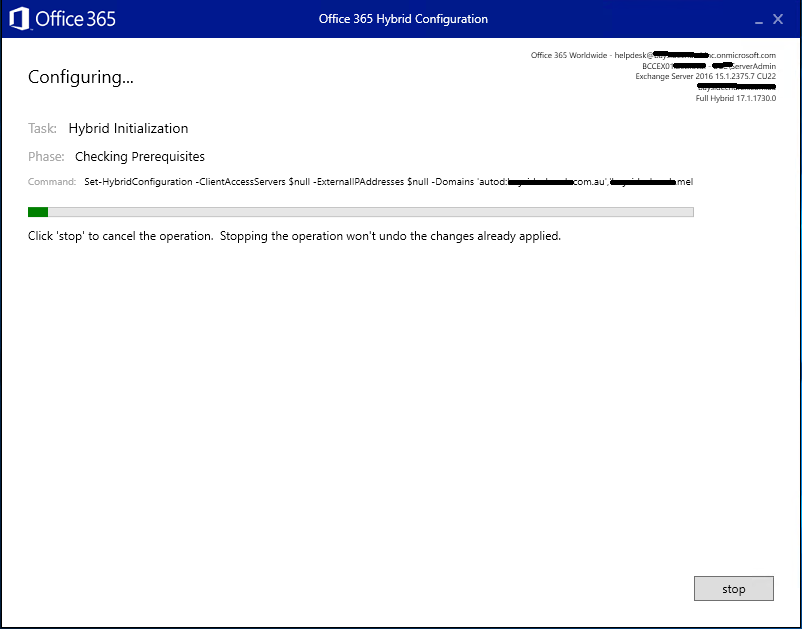
The process should only take up to 5 mins on a relatively standard & healthy environment (running Exchange 2016 or 2019)

At the end of the wizard, you should be presented with a Congratulations screen with the welcoming green tick, click Close.

Now return to Exchange ECP > Mail Flow > Send Connectors

Edit the send connector for Office 365

Using the settings you noted down earlier, adjust the connector back to what you have noted down.

Don’t go away, we’re almost done, but not yet… Now we need to test & confirm its working properly…

Test Hybrid Exchange Configuration

To test we need two things – an on-premise Exchange mailbox and to be logged into the admin as the tenant admin

The on-premise mailbox needs to be fully generated – one that has been logged into and has at least one mail item in its mailbox

In the Admin Center, head to Exchange > Migration https://admin.exchange.microsoft.com/#/migrationbatch

In the upper right corner, click on Endpoints and ensure the on-premise Exchange server is present and looks correct. If not, delete it – we can re-add it during the next steps below…

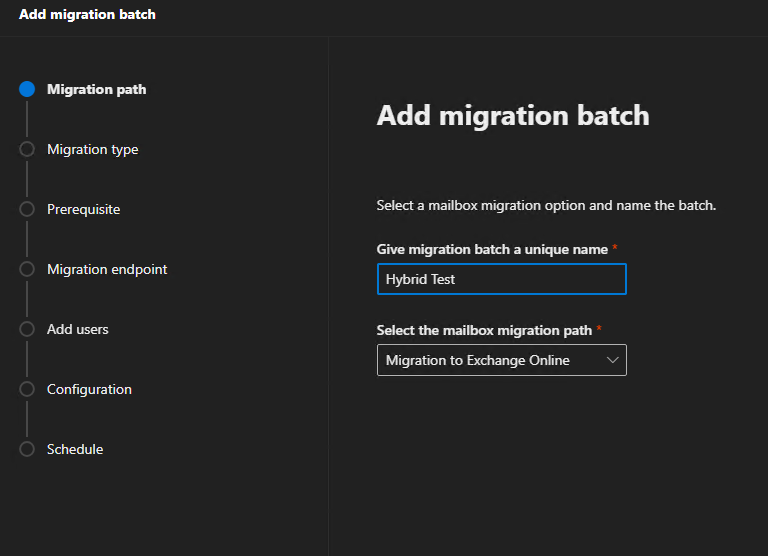
Click to Add Migration Batch and follow the wizard steps:

Name: Hybrid Test

Path: Migration to Exchange Online

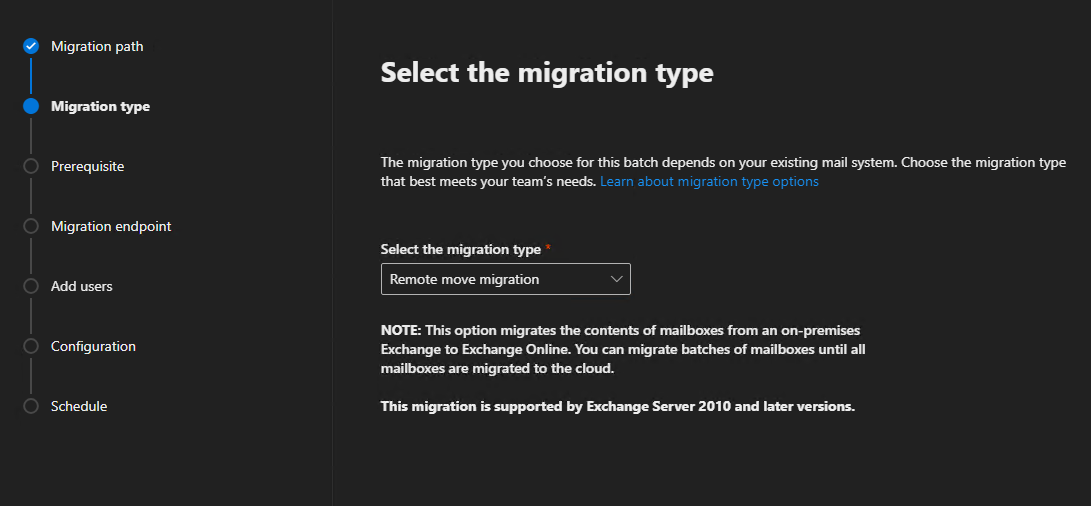
Type: Remote move migration

Select or add the on-premise Exchange server as your endpoint

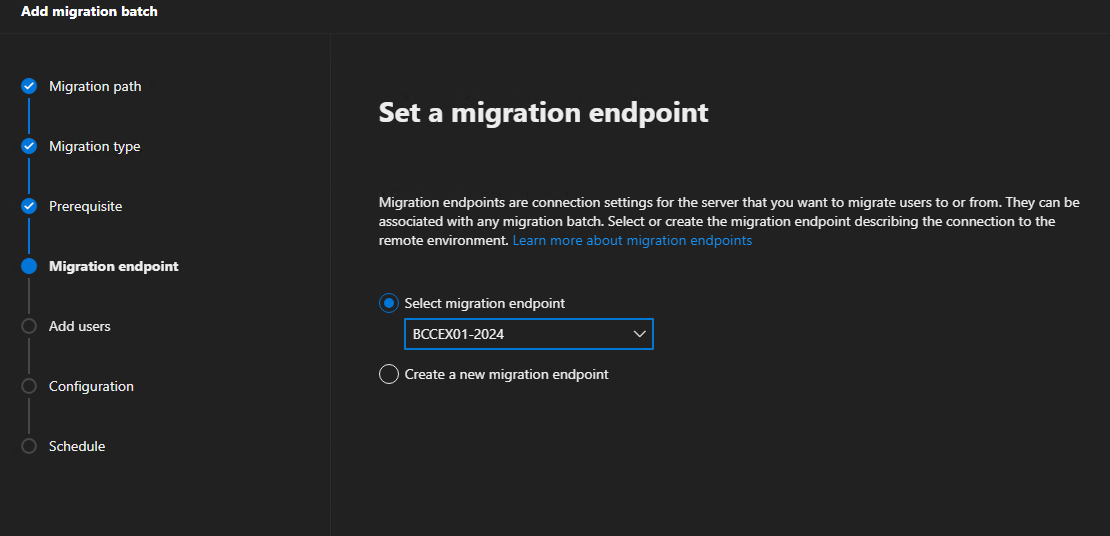
(note: if needing to re-add, please see the appendix at end of this guide on what that looks like, but it should be pretty straight forward)

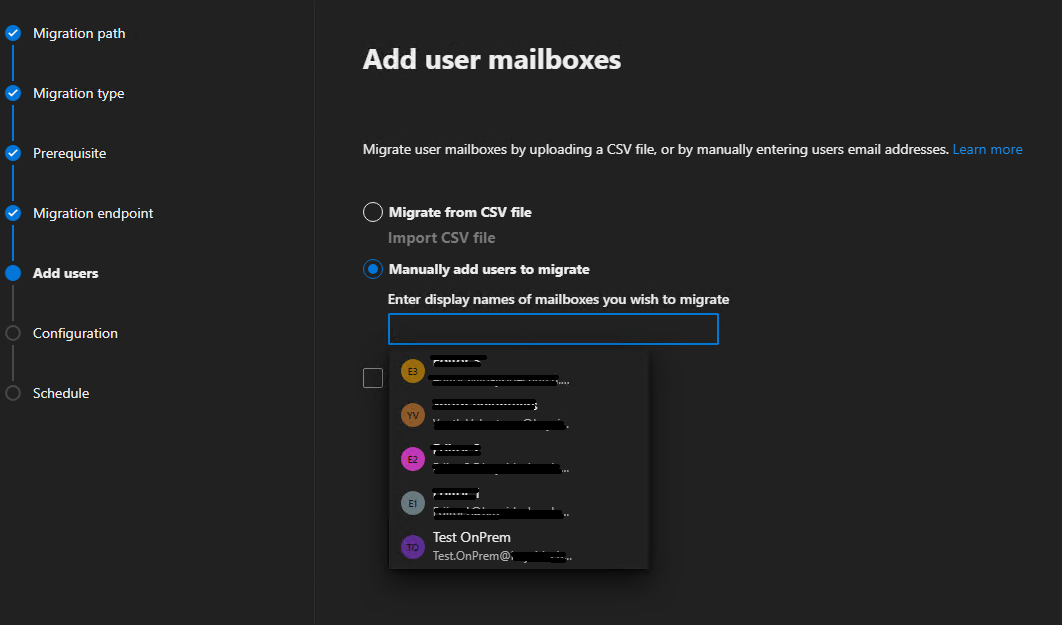
Select to Manually add users to migrate and select the test on-prem mailbox from the list when you click in the text entry field

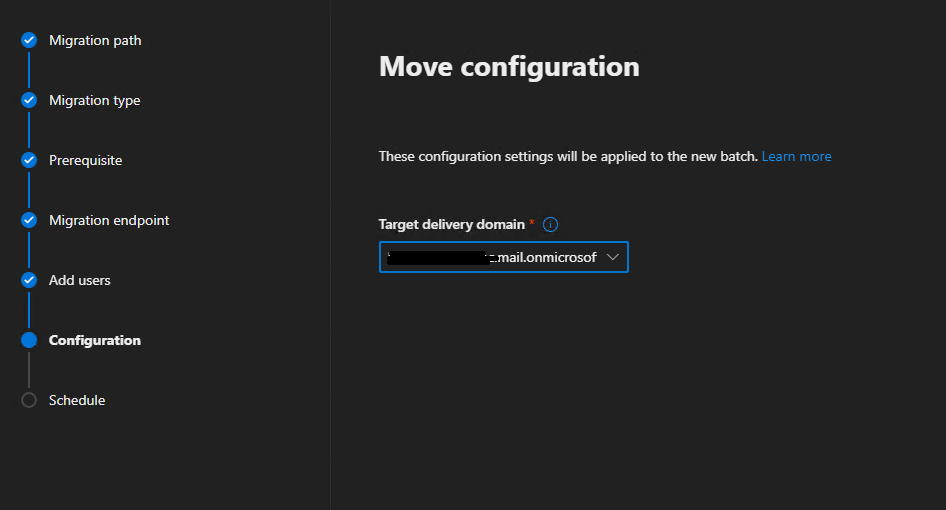
Select the target delivery domain (note: the test account must have this same domain as an alias address in its AD proxyAddresses attribute / as a mail alias)

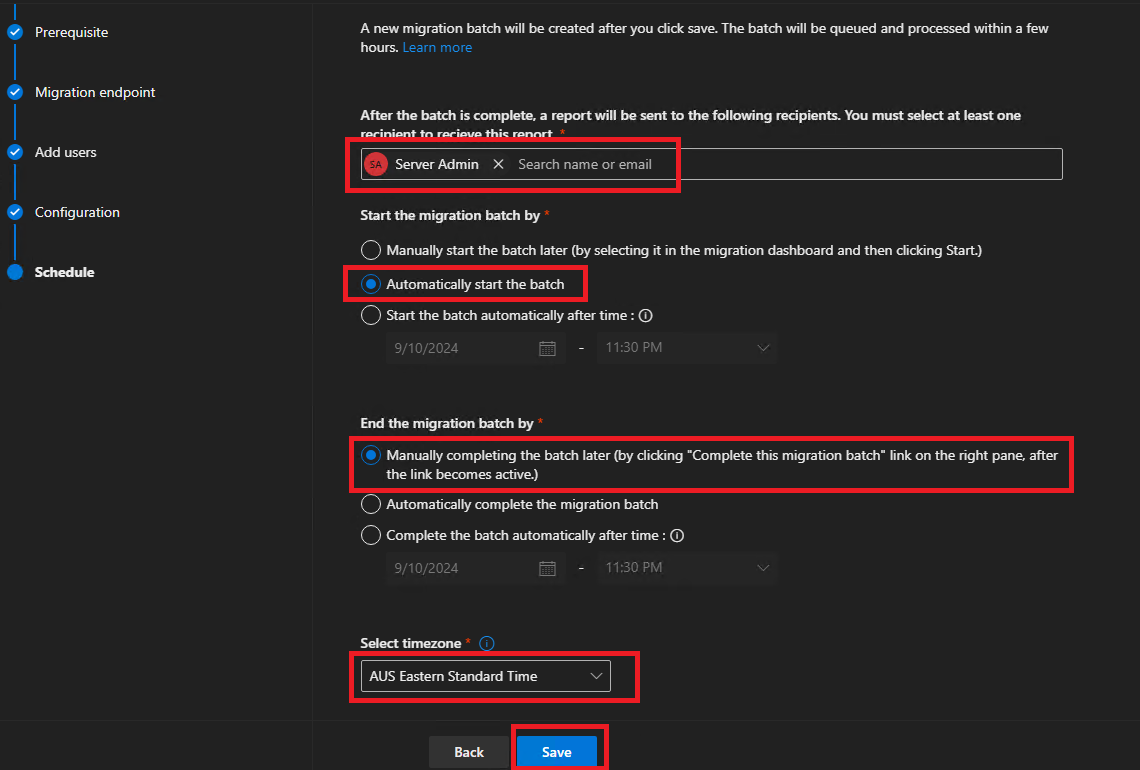
The final screen here will need to be set to:

Auto start the batch

Manually complete the batch (as we don’t actually intend on completing the batch)

Send email to the admin mailbox or a mailbox you have access to if you need to review the alerts
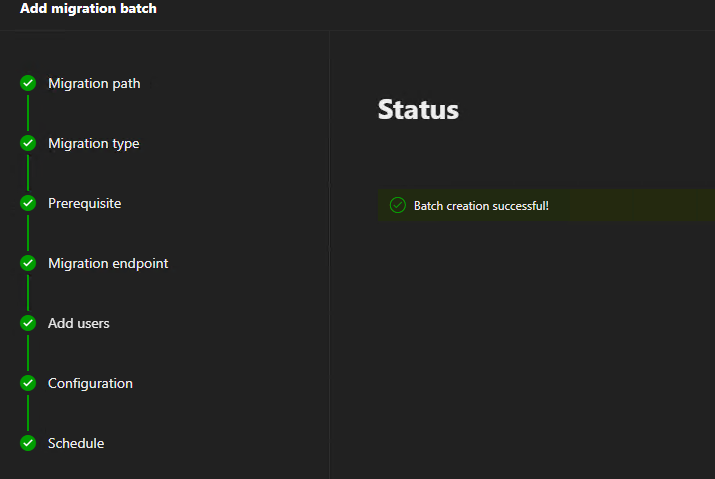
Click Save

Click Done

Now sit pretty and monitor the migration batch

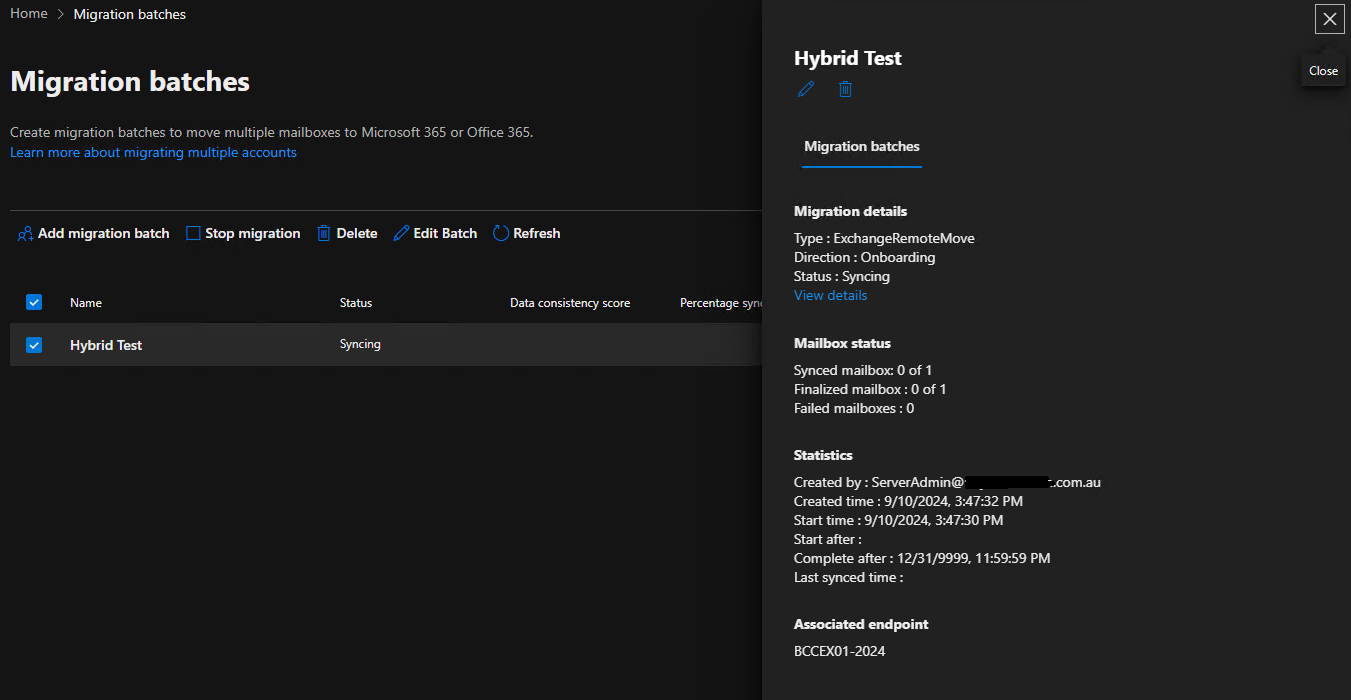
Once the Syncing status has changed to Synced we know its working. A small mailbox should be done within 15 mins. Once its synced, you can simply stop and delete the batch – job done – close ticket!

If there are errors, you’ll need to troubleshoot and fix – we can’t leave it in a broken state as the Hybrid Exchange is used for creating new user accounts.

This is what a synced batch job looks like:

Synced, 100% not finalized and not failed.

Select, stop, wait until stopped, then delete once at this stage.

Appendix:

Creating a new Exchange Endpoint:

Give the endpoint a meaningful, short name, ending in the year – if its old, likely we’ll see that and need to recreate it anyway.

The account name ideally will be a domain admin account that also has an on-premise mailbox, but the mailbox isn’t mandatory.

Remote MRS proxy server is the public FQDN of the Exchange server, eg: mail.domain.com

Don’t skip verification – we need confirmation that 365 can communicate with the on-premise server with the specified account

Once validated, continue on with the batch job creation as per above steps.
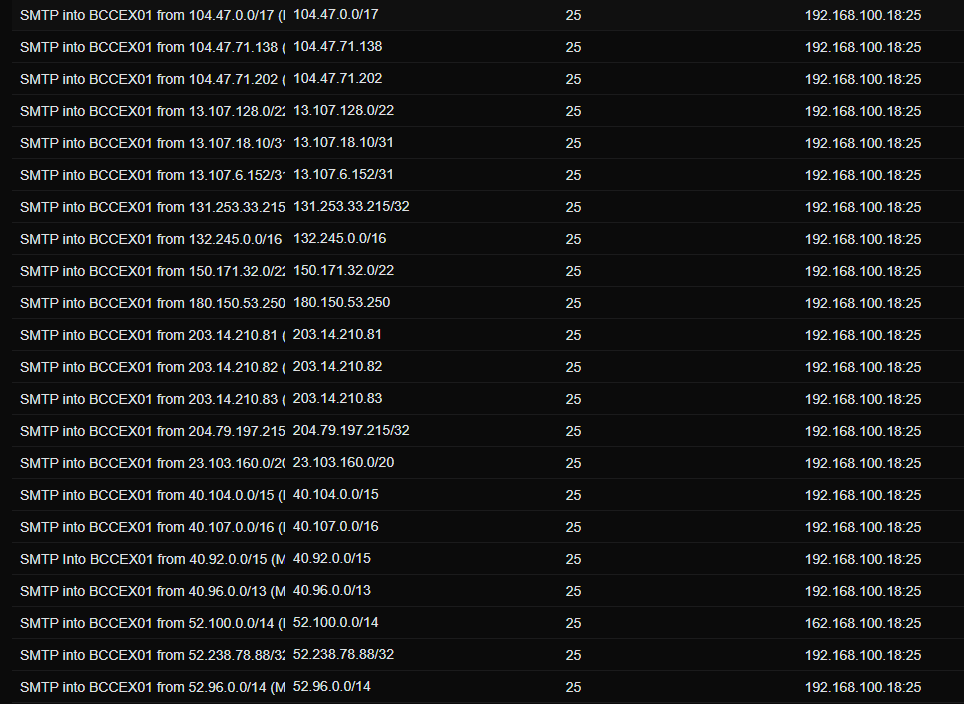
Firewall:

If the on-premise Exchange server isn’t being accessed by general users externally, as all mailboxes are in 365, then its best to restrict access to the Exchange on-prem HTTP, HTTPS and SMTP traffic to only IP addresses that require access (such as us, customer website if using SMTP) and to Microsoft 365.

This is the link for the IP addresses / network addresses that Microsoft has published for creating an ACL / whitelist on the customer firewall: https://learn.microsoft.com/en-us/microsoft-365/enterprise/urls-and-ip-address-ranges?view=o365-worldwide

Below is a sample firewall port forward / ACL for SMTP traffic allow list (using IPv4 IP/Networks):


Enable external USB boot on T2-enabled Intel Macs

To boot a T2 security chip enabled Mac from external USB media such as recovery & macOS installers, you first need to edit the T2 security settings in recovery mode to enable this.

By default, T2 enabled Macs are configured out of the box to prevent boot from external media.

Connect all required cables to the Mac (if desktop). Power on the Mac and either hold down the left Option/Alt key OR hold down Command+R.

If you chose to use the Option/Alt key, then you should be presented with a screen similar to this:

From here, you should be able to hold down Command and press R. Once it starts to boot into the recovery mode, release the Command key.

Once in Recovery Mode, the Mac should request the login details of the admin user account. Authenticated as and when prompted.

When at the recovery screen, use the menu bar at the top of the screen, select the Utilities menu and select Startup Security Utility.

Enter the admin password when prompted again

At the below screen, change the External Boot setting to Allow booting from external media.

Exit out of the Startup Security Utility.

Restart the Mac, and return to the boot drive selector when you hear the chime by holding the Option/Alt key

Connect the external USB boot media, select it to boot from it.

blk_update_request: I/O error, dev fd0, sector 0

Getting this message in the console of a Linux VM?

blk_update_request: I/O error, dev fd0, sector 0

This is because the Linux VM is trying to access the floppy drive, and can’t.

Issue these commands to block the system from trying to access the floppy disk:

sudo rmmod floppy
echo "blacklist floppy" | sudo tee /etc/modprobe.d/blacklist-floppy.conf
sudo dpkg-reconfigure initramfs-tools

From here you should be fine, a reboot may or may not be required.

An alternative if you have Hyper-V, is to shut the VM down, remove the floppy from the VM config and boot it up.

VMWare ESXi v6.5.x & v.6.7.x – Change Hostname & Domain Name

A step-by-step on changing the VMWare ESXi v.6.5 & v6.7 hostname

1. Login to the Web Client interface.

2. Browse to the Networking menu.

3. Select Default TCP/IP Stack

4. At the Actions button, select Edit settings.

5. Click on Manually configure the settings for this TCP/IP stack

    Edit the [Host name][Domain name] and any other settings you’ve wanted.

6. Once completed, click the Save button.

How to open a port in the firewall on CentOS or RHEL

Out of the box, enterprise Linux distributions such as CentOS or RHEL come with a powerful firewall built-in, and their default firewall rules are pretty restrictive. Thus if you install any custom services (e.g., web server, NFS, Samba), chances are their traffic will be blocked by the firewall rules. You need to open up necessary ports on the firewall to allow their traffic.
On CentOS/RHEL 6 or earlier, the iptables service allows users to interact with netfilter kernel modules to configure firewall rules in the user space. Starting with CentOS/RHEL 7, however, a new userland interface called firewalld has been introduced to replace iptables service.
To check the current firewall rules, use this command:
$ sudo iptables -L
Now let’s see how we can update the firewall to open a port on CentOS/RHEL.

Open a Port on CentOS/RHEL 7

Starting with CentOS and RHEL 7, firewall rule settings are managed by firewalld service daemon. A command-line client called firewall-cmd can talk to this daemon to update firewall rules permanently.
To open up a new port (e.g., TCP/80) permanently, use these commands.
$ sudo firewall-cmd --zone=public --add-port=80/tcp --permanent
$ sudo firewall-cmd --reload
Without “–permanent” flag, the firewall rule would not persist across reboots.
Check the updated rules with:
$ firewall-cmd --list-all

Open a Port on CentOS/RHEL 6

On CentOS/RHEL 6 or earlier, the iptables service is responsible for maintaining firewall rules.
Use iptables command to open up a new TCP/UDP port in the firewall. To save the updated rule permanently, you need the second command.
$ sudo iptables -I INPUT -p tcp -m tcp --dport 80 -j ACCEPT
$ sudo service iptables save
Another way to open up a port on CentOS/RHEL 6 is to use a terminal-user interface (TUI) firewall client, named system-config-firewall-tui.
$ sudo system-config-firewall-tui
Choose “Customize” button in the middle and press ENTER.
If you are trying to update the firewall for any well-known service (e.g., web server), you can easily enable the firewall for the service here, and close the tool. If you are trying to open up any arbitrary TCP/UDP port, choose “Forward” button and go to a next window.
Add a new rule by choosing “Add” button.
Specify a port (e.g., 80) or port range (e.g., 3000-3030), and protocol (e.g., tcp or udp).
Finally, save the updated configuration, and close the tool. At this point, the firewall will be saved permanently.

Call Direct CDCS – CDM-780 & CDM-882 Password Reset Procedure

1. Open a telnet session to the CDM Router’s IP Address, usually 192.168.1.50.
Note if the IP address of the unit is not the default (192.168.1.50) please use the correct address instead.
2. A black box will appear with the line “cdcs login:” displayed.
Enter the following credentials:
cdcs login: root
Password: gronk
3. Next type in “cat /etc/httpd.conf” and press the enter key. This retrieves the current password and displays it on screen. The password shown the the example figure above is password.
4. Once you have the current password log into the web configuration page by navigating to http://192.168.1.50 in a web browser.
Select the LAN tab on the top left hand side of the page.
Note if the IP address of the unit is not the default (192.168.1.50) please use the correct IP address instead.
5. Next under the Remote Administration section type in the new admin password you wish to use and press the Save button.
The password has now been changed.
Download PDF document here

PreDelay Xsan Mount on Macs running OS X El Capitan (10.11.x) connected via Promise SanLink2

It has been noted that Macs running El Capitan will attempt to auto mount Xsan volume(s) on startup only once. If the volume(s) fail, unlike previous versions of OS X, the system will not re-attempt to auto mount any Xsan volumes.
It has also been noted that the Promise SanLink2 FC units, although faster and more stable, are slower at startup initialisation and LUN scanning also takes longer that say internal PCIe cards or first-generation SanLink units.
With the two above combinations, users are forced to manually mount the Xsan volume via a terminal command, or create a shell script with the terminal command inserted and placed in the user’s startup items folder. Terminal command is:
sudo xsanctl mount voluneName
(volumeName is the actual Xsan volume name that appears when mounted, can also work without sudo)
A set of scripts have been developed (and are attached to this article) which force the Xsan service (xsand) to delay auto mount until it appears to the system that LUN information has stopped changing.
To install the scripts, download the file to say your downloads folder.
Open a Terminal window and enter in:
sudo tar xvzpf ~/Downloads/xsandelay.tgz -C /
You will see output very similar to the below, you can ignore the errors:
x ./
x ./._Library
x ./Library/: Can't set user=0/group=0 for Library
x ./usr/: Can't set user=0/group=0 for usrCan't update time for usr
x ./usr/local/
x ./usr/local/libexec/
x ./usr/local/libexec/xsandelay.py
x ./Library/LaunchDaemons/
x ./Library/LaunchDaemons/com.apple.support.ht205706.xsandelay.plist
tar: copyfile unpack (./Library) failed: Operation not permitted
Then we need to activate the script with:
sudo launchctl load -w /Library/LaunchDaemons/com.apple.support.ht205706.xsandelay.plist
Once this has been done, reboot the system, login, and wait 30-60 seconds. As the SanLink2 performs LUN scanning (as indicated by the amber LED), the Xsan auto mount will be delayed until the LUN information has stopped changing for a small amount of time, then the Xsan volume(s) should auto mount to the Desktop / Finder.
Download xsandelay.tgz

Xsan CVADMIN Man Page

CVADMIN

Section: Maintenance Commands (8) Updated: August 2015

NAME

cvadmin – Administer a StorNext File System

SYNOPSIS

cvadmin [-H FSMHostName] [-F FileSystemName] [-M] [-f filename] [-e command1 -e command2…] [-x]

DESCRIPTION

cvadmin is an interactive command used for general purposeadministration of a StorNext File System including:
1. displaying file system and client status
2. activating a file system currently in stand-by mode
3. viewing and modifying stripe group attributes
4. enabling File System Manager (FSM) tracing
5. displaying disk and path information for the local system
6. forcing FSM failover
7. fetching FSM usage and performance statistics
8. temporarily enabling or disabling global file locking
9. generating a report of open files
10. listing currently held file locks
11. starting, restarting and stopping of daemon processes
12. resetting RPL information

OPTIONS

Invoke cvadmin to start the interactive session and list the running File System Managers (FSMs). (Note: StorNext system services must be started prior to running cvadmin. In particular, the local fsmpm(8) process must be active.)
Then (optionally) use the select command described below to pick an FSM to connect to. Once connected, the command will display basic information about the selected file system and prompt for further commands.
Note that a few commands such as pathsdisksstart, and stop require information obtained from the local fsmpm(8) only, so there is is no need to select an FSM prior to using them.

USAGE

-H FSMHostName
Connect to the FSM located on the machine FSMHostName. By default cvadmin will attempt to connect to an FSM located on the local machine.
-F FileSystemName
Automatically set the file system FileSystemName as the active file system in cvadmin.
-M
When listing file systems with the select command, display [managed] next to each file system with DataMigration enabled. This option is currently only intended for use by support personnel.
-f filename
Read commands from filename
-e command
Execute command(s) and exit
-x
Enable extended commands.

COMMANDS

The cvadmin commands can be used to display and modify the SNFS active configuration. When a modification is made, it exists only as long as the FSM is running. More permanent changes can be made in the configuration file. Refer to the snfs_config(5) man page for details. The following commands are supported.
activate file_system_name [hostname_or_IP_address]
Activate a file system file_system_name. This command may cause an FSM to activate. If the FSM is already active, no action is taken.
activate file_system_name number_of_votes
Quantum Internal only. Bypass the election system and attempt to activate the fsm on this node.
debug [[+|–] flag [ … ]]
View or set the File System Manager’s debugging flags. Entering the command with no flag will return current settings, the location of the FSM log file and a legend describing what each setting does. By entering the command with a flag list, the FSM Debugging Flags will be set accordingly. Each flag can be either a name or numeric value. Names will be mapped to their numeric value, and may be abbreviated as long as they remain unique. Numeric values are specified using a standard decimal or hexadecimal (0x) value of up to 32 bits. Using ‘+‘ or ‘‘ enables (‘+‘) or disables (‘‘) only the selected flags, leaving all other flags unchanged.NOTE – Setting Debugging Flags will severely impact the FSM‘s performance! Do this only when directed by an Quantum specialist.
disks [refresh]
Display the StorNext disk volumes local to the system that cvadmin is attached to. Using the optional refresh argument will force the fsmpm to re-scan all volumes before responding. If the fsmpm’s view of the disks in any file system changes compared with the FSM’s view of that client’s disks as a result of the refresh, a disconnect and reconnect to the FSM will take place to resynchronise the file system state.
disks [refresh] fsm
Display the StorNext meta-data disk volumes in use by the fsm. If the optional refresh argument is used, additional paths to these volumes may be added by the fsm.
down groupname
Down the stripe group groupname. This will down any access to the stripe group.
fail [file_system_name|index_number]
Initiate an FSM Failover of file system file_system_name. This command may cause a stand-by FSM to activate. If an FSM is already active, the FSM will shut down. A stand-by FSM will then take over. If a stand-by FSM is not available the primary FSM will re-activate after failover processing is complete.
files
Report counts of files, directories, symlinks and other objects which are anchored by a user type inode. These include named streams, block and character device files, fifos or pipes and named sockets. If the file system is undergoing conversion to StorNext 5.0, conversion progress is displayed and counters reflect the count of converted objects.
fsmlist [file_system_name] [ on hostname_or_IP_address]
Display the state of FSM processes, running or not. Optionally specify a single file_system_name to display. Optionally specify the host name or IP address of the system on which to list the FSM processes.
filelocks
Query cluster-wide file/record lock enforcement. Currently cluster-wide file locks are automatically used on Unix. Windows file/record locks are optional.If enabled, byte-range file locks are coordinated through the FSM, allowing a lock set by one client to block overlapping locks by other clients. If disabled, then byte-range locks are local to a client and do not prevent other clients from getting byte-range locks on a file, however they do prevent overlapping lock attempts on the same client.
help (?)
The help or ? command will display a command usage summary.
latency-test [index_number|all] [seconds]
Run an I/O latency test between the FSM process and one client or all clients. The default test duration is 2 seconds.
metadata
Report metadata usage. Also provide an estimate on the value of bufferCacheSize that will allow all metadata to be cached.
metadump { status | rebuild | suspend | resume }
Manage the metadump functionality of the selected FSM.The status command prints the progress of the current metadump activity, if any. If capturing a new metadump or restoring an existing one, the percentage complete will be displayed. Otherwise, the current update backlog is displayed.
The rebuild command will force the FSM to discard the existing metadump and capture a new one. This is performed online.
The suspend and resume commands are used internally to facilitate backups of the metadump files. They should not be invoked manually except under direction from support.
multipath groupname {balance|cycle|rotate|static|sticky}
StorNext has the capability of utilizing multiple paths from a system to the SAN disks.This capability is referred to as “multi-pathing”, or sometimes “multi-HBA support”. (HBA := Host Based Adaptor).
At “disk discovery” time, for each physical path (HBA), a scan of all of the SAN disks visible to that path is initiated, accumulating information such as the SNFS label, and where possible, the disk (or LUN) serial number.
At mount time, the visible set of StorNext labeled disks is matched against the requested disks for the file system to be mounted.
If the requested disk label appears more than once, then a “multi-path” table entry is built for each available path.
If the disk (or LUN) device is capable of returning a serial number, then that serial number is used to further verify that all of the paths to that StorNext labeled device share the same serial number.
If the disk (or LUN) device is not capable of returning a serial number then the device will be used, but StorNext will not be able to discern the difference between a multi-path accessible device, and two or more unique devices that have been assigned duplicate StorNext labels.
The presence of serial numbers can be validated by using the “cvlabel -ls” command. The “-s” option requests the displaying of the serial number along with the normal label information.
There are five modes of multi-path usage which can also be specified in the filesystem config file. In cases where there are multiple paths and an error has been detected, the algorithm falls back to the rotate method. The balance and cycle methods will provide the best aggregate throughput for a cluster of hosts sharing storage.
balance
The balance mode provides load balancing across all the available, active, paths to a device. At I/O submission time, the least used HBA/controller port combination is used as the preferred path. All StorNext File System I/O in progress at the time is taken into account.
cycle
The cycle mode rotates I/O to a LUN across all the available, active, paths to it. As each new I/O is submitted, the next path is selected.
rotate
The rotate mode is the default for configurations where the operating system presents multiple paths to a device.In this mode, as an I/O is initiated, an HBA controller pair to use for this I/O is selected based on a load balance method calculation.
If an I/O terminates in error, a “time penalty” is assessed against that path, and another “Active” path is used. If there are not any “Active” paths that are not already in the “error penalty” state, then a search for an available “Passive” path will occur, possibly triggering an Automatic Volume Transfer to occur in the Raid Controller.
static
The “default” mode for all disks other than Dual Raid controller configurations that are operating in Active/Active mode with AVT enabled.
As disks (or LUNs) are recognized at mount time, they are statically associated with an HBA in rotation.i.e.   given 2 HBA’s, and for disks/LUNs:
disk 0 -> HBA 0
disk 1 -> HBA 1
disk 2 -> HBA 0
disk 3 -> HBA 1

and so on...
sticky
In this mode, the path to use for an I/O is based on the identity of the target file. This mode will better utilize the controller cache, but will not take advantage of multiple paths for a single file.
The current mode employed by a stripe group can be viewed via the “cvadmin” command “show long”, and modified via the “cvadmin” command “multipath”.Permanent modifications may be made by incorporating a “MultiPathMethod” configuration statement in the configuration file for a stripe group.
In the case of an I/O error, that HBA is assessed an “error penalty”, and will not be used for a period of time, after which another attempt to use it will occur.
The first “hard” failure of an HBA often results in a fairly long time-out period (anywhere from 30 seconds to a couple of minutes).
With most HBA’s, once a “hard” failure (e.g. unplugged cable) has been recognized, the HBA immediately returns failure status without a time-out, minimizing the impact of attempting to re-use the HBA periodically after a failure. If the link is restored, most HBA’s will return to operational state on the next I/O request.
paths
Display the StorNext disk volumes visible to the local system. The display is grouped by <controller> identity, and will indicate the “Active” or “Passive” nature of the path if the Raid Controller has been recognized as configured in Active/Active mode with AVAT enabled.
proxy [long]
Display Disk Proxy servers and optionally display the disks they serve for this file system.
proxy who hostname
The “who” option displays all proxy connections for the specified host.
qos
Display per-stripe group QOS statistics. Per-client QoS statistics are also displayed under each qos-configured stripe group.
quit
This command will disconnect cvadmin from the FSM and exit.
ras enq event “detail string”
Generate an SNFS RAS event. For internal use only.
ras enq event reporting_FRU violating_FRU “detail string”
Generate a generic RAS event. For internal use only.
repfl
Generate a report that displays the file locks currently held. Note: this command is only intended for debugging purposes by support personnel. In future releases, the format of the report may change or the command may be removed entirely. Running the repfl command will write out a report file and display the output filename.
repof
Generate a report that displays all files that are currently open on each StorNext client. Only file inode numbers and stat information are displayed, filenames are not displayed. Running the repof command will write out a report file and display the output filename. In future releases, the format of the report may change.
resetrpl [clear]
Repopulate Reverse Path Lookup (RPL) information. The optional clear argument causes existing RPL data to be cleared before starting repopulation. Note: resetrpl is only available when cvadmin is invoked with the -x option. Running resetrpl may significantly delay FSM activation. This command is not intended for general use. Only run resetrpl when recommended by Technical Support.
restartd daemon [once]
Restart the daemon process. For internal use only.
select [file_system_name|N]
Select an active FSM to view and modify. If no argument is specified, a numbered list of FSMs and running utilities will be displayed. If there is only one active file system in the list, it will automatically be selected.When a running utility is displayed by the select command, it will show the following information. First the name of the file system is displayed. Following that, in brackets “[]”, is the name of the utility that is running. Third, a letter indicating the access type of the operation. The options here are (W) for read-write access, (R) for read-only access and (U) for unique access. Finally, the location and process id of the running utility is displayed.
If file_system_name is specified, then cvadmin will connect to the current active FSM for that file system. If N (a number) is specified, cvadmin will connect to the Nth FSM in the list. However, only active FSMs may be selected in this form.
show [groupname] [long]
Display information about the stripe groups associated with the selected file system. If a stripe group name groupname is given only that stripe group’s information will be given. Omitting the groupname argument will display all stripe groups associated with the active file system. Using the long modifier will additionally display detailed information about the disk units associated with displayed stripe groups.
start file_system_name [on hostname_or_IP_address]
Start a File System Manager for the file system file_system_name. When the command is running on an MDC of an HA cluster, the local FSM is started, and then an attempt is made to start the FSM on the peer MDC as identified by the /usr/cvfs/config/ha_peer file. When the optional hostname_or_IP_address is specified, the FSM is started on that MDC only. The file system’s configuration file must be operational and placed in /usr/cvfs/config/<file_system_name>.cfgx before invoking this command. See snfs_config(5) for information on how to create a configuration file for an SNFS file system.
startd daemon [once]
Start the daemon process. For internal use only.
stat
Display the general status of the file system. The output will show the number of clients connected to the file system. This count includes any administrative programs, such as cvadmin. Also shown are some of the static file-system-wide values such as the block size, number of stripe groups, number of mirrored stripe groups and number of disk devices. The output also shows total blocks and free blocks for the entire file system.
stats client_IP_address [clear]
Display read/write statistics for the selected file system. This command connects to the host FSMPM who then collects statistics from the file system client. The ten most active files by bytes read and written and by the number of read/write requests are displayed. If clear is specified, zero the stats after printing.
stop file_system_name [on hostname_or_IP_address]
Stop the File System Manager for file_system_name. This will shut down the FSM for the specified file system on every MDC. When the optional hostname or IP address is specified, the FSM is stopped on that MDC only. Further operations to the file system will be blocked in clients until an FSM for the file system is activated.
stopd daemon
Start the daemon process. For internal use only.
up groupname
Up the stripe group groupname. This will restore access to the stripe group.
who
Query client list for the active file system. The output will show the following information for each client.SNFS I.D. – Client identifier Type – Type of connection. The client types are: FSM – File System Manager(FSM) process ADM – Administrative(cvadmin) connection CLI – File system client connection. May be followed by a CLItype character: S – Disk Proxy Server C – Disk Proxy Client H – Disk Proxy Hybrid Client. This is a client that has been configured as a proxy client but is operatingas a SAN client. Location – The clients hostname or IP address Up Time – The time since the client connection was initiated License Expires – The date that the current client license will expire

EXAMPLES

Invoke the cvadmin command for FSM host cornice, file system named default.
spaceghost% cvadmin -H k4 -F snfs1
StorNext File System Administrator

Enter command(s)
For command help, enter "help" or "?".

List FSS

File System Services (* indicates service is in control of FS):
1>*snfs1[0]         located on k4:32823 (pid 3988)

Select FSM "snfs1"

Created           :    Fri Jul 25 16:41:44 2003
Active Connections:    3
Fs Block Size     :    4K
Msg Buffer Size   :    4K
Disk Devices      :    1
Stripe Groups     :    1
Mirror Groups     :    0
Fs Blocks         :    8959424 (34.18 GB)
Fs Blocks Free    :    8952568 (34.15 GB) (99%)
Show all the stripe groups in the file system;
snadmin (snfs1) > show
Show stripe group(s) (File System "snfs1")

Stripe Group 0 [StripeGroup1] Status:Up,MetaData,Journal
  Total Blocks:8959424 (34.18 GB) Free:8952568 (34.15 GB) (99%)
  MultiPath Method:Rotate
    Primary Stripe 0 [StripeGroup1] Read:Enabled Write:Enabled
Display the long version of the RegularFiles stripe group;
snadmin (snfs1) > show StripeGroup1 long
Show stripe group "StripeGroup1" (File System "snfs1")

Stripe Group 0 [StripeGroup1] Status:Up,MetaData,Journal
  Total Blocks:8959424 (34.18 GB) Free:8952568 (34.15 GB) (99%)
  MultiPath Method:Rotate
  Stripe Depth:1 Stripe Breadth:16 blocks (64.00 KB)
  Affinity Set:
  Realtime limit IO/sec:0 (~0 mb/sec) Non-Realtime reserve IO/sec:0
    Committed RTIO/sec:0 Non-RTIO clients:0 Non-RTIO hint IO/sec:0
  Disk stripes:
    Primary Stripe 0 [StripeGroup1] Read:Enabled Write:Enabled
      Node 0 [disk002]
Down the stripe group named stripe1;
snadmin (snfs1) > down stripe1
Down Stripe Group "stripe1" (File System "snfs1")

Stripe Group 0 [stripe1] Status:Down,MetaData,Journal
  Total Blocks:2222592 (8682 Mb) Free:2221144 (8676 Mb) (99%)
  Mirrored Stripes:1 Read Method:Sticky
    Primary Stripe 0 [stripe1] Read:Enabled Write:Enabled

FILES

/usr/cvfs/config/*.cfgx

SEE ALSO

cvfs(8), snfs_config(5), fsmpm(8), fsm(8), mount_cvfs(8)

Upgrading Server Services post Mac OS X Upgrade hangs on Updating Wiki Service

If you’re willing to give up your Wiki service data or if you’ve never even used it in the first place, the solution is easy, just delete the /Library/Server/Wiki folder. For example you can issue the Terminal command:
sudo rm -r /Library/Server/Wiki
and then reboot the computer. You may have to force-kill the Server.app process to be able to reboot.
Run the Server App again to restart the configuration process. You’ll end up with all services intact and Server App will create a new default wiki configuration for you.

DNS – Stop and Start DNS services in MacOS X

DNS – Stop and Start DNS services in OS X Yosemite
All versions of Mac OS X from 10.0.0 to 10.9.5 have utilised the open source DNS helper daemon called mDNSResponder. As of OS X 10.10.0 Yosemite, this was removed in favour of Apple’s own in-house DNS helper daemon called discoveryd.
This decision was then reverted back with the introduction of OS X Yosemite 10.10.3 onwards as mDNSResponder was reintroduced.
Commands to restart said services in OS X Yosemite are
Command for discoveryd service:
sudo launchctl unload -w /System/Library/LaunchDaemons/com.apple.discoveryd.plist
sudo launchctl load -w /System/Library/LaunchDaemons/com.apple.discoveryd.plist
Command for mDNSResponder service:
sudo launchctl unload -w /System/Library/LaunchDaemons/com.apple.mDNSResponder.plist
sudo launchctl load -w /System/Library/LaunchDaemons/com.apple.mDNSResponder.plist