This guide assumes the server(s) are running Windows Server 2008 R2 / SBS 2011 or newer and the overall steps in this sections will consist of the following:
- Back up the current AD CS server CA database and configuration.
- Back up the current AD CS server registry key.
- Remove the AD CS role from the current Windows Server.
- Install the AD CS role on your new Windows Server.
- Restore the backup configuration and registry key on the new AD CS server.
1. Back up the current AD CS database and configuration:
The process to back up your current AD CS server CA database and configuration is straightforward. It can be accomplished using the AD CS management console or the certutil command-line utility in Windows Server 2008 R2.. In the console, under Administrative Tools > Certification Authority, right-click the server name and select All Tasks > Back up CA.

Select this option to start the Certification Authority Backup Wizard. Click Next

On the next screen, select the items to back up. Select the Private key and CA certificate and the Certificate database and certificate database log options. Finally, enter a path in the Back up to this location box.

You will see a dialog box asking to create the directory. Click OK. Note, if the directory already exists it must be an empty location.
Enter a password to secure the private key and the CA certificate file.

The AD CS backup wizard is completed successfully.

Note: if for some reason, the old server is having issues running through this process using the GUI, you can also use the command prompt to achieve the same steps using:
certutil -backup c:\<pathToBackup>

2. Back up the AD CS server registry key:
The next step is to back up the CertSvc key located at:
HKEY_LOCAL_MACHINE\SYSTEM\CurrentControlSet\services\CertSvc
Why is this necessary if we have backed up the private key and the certification authority database? The registry key contains the Certification Authority configuration settings, such as the CRL and AIA locations. To back up the registry key, open regedit and perform the following steps:
Navigate to the key HKEY_LOCAL_MACHINE\SYSTEM\CurrentControlSet\services\CertSvc.

Right-click CertSvc and select Export.
3. Remove the AD CS role from the current Windows Server
This step is pretty self-explanatory:

4. Install the AD CS role on your new Windows Server:
Add the role called Active Directory Certificate Services

Add the role features Certificate Authority and Certificate Authority Web Enrollment

You’ll then be prompted to select roles for IIS – just run with the defaults that are already selected

Once installed, you’ll need to perform the required post-deployment configuration


You won’t be able to configure services other than the Certification Authority. So you must first configure the Certification Authority and then go back and configure the Web Service

On the next couple of screens choose:
Enterprise CA:

Root CA:

Here, select Use existing private key

Select your existing private key created in your legacy AD CS server backup. Copy this to your server beforehand so you have access to the key. Click Import.

Browse to the key. Enter the password used to back up the key and AD CS configuration.

Click the certificate name. You can also select the “Allow administrator interaction when the private key is accessed by the CA” option as a security enhancement. This checkbox enables strong private key protection. With this selected, you will have to enter administrator credentials each time a private key is used, when a new certificate or CRL is issued, or when the service starts.

Choose the location for the CA database.

Next, review & complete the configuration.
You will be prompted to finish an additional post-deployment configuration. You can go back into the post-configuration wizard and configure the web services portion of the new server.

5. Restore the backup configuration and registry key on the new AD CS server:
Now, let’s restore the backup taken from the Windows Server 2008 R2 server. Stop the AD CS service to restore the AD CS backup.

Choose Restore CA.

This begins the Restore Wizard.
Select the checkboxes for Private key and CA certificate and Certificate database and certificate database log. In addition, choose the folder from which to restore.

Provide the password used during backup. On the summary screen click Finish
Back at the main CA screen, click No to the prompt that will come up asking to start the service as we need to restore the registry key first.

Browse to the registry key backup you created from the original AD CS server. Right-click and select Merge.

After the registry merge is successful, start the AD CS service.

At this point, you should be able to see the new Active Directory Certificate Services server running without issue, as well as your issued certificates and other information as it was before the server migration. Due to the restore, the CA configuration will retain the CA name of the former server.

Ideally, we should allow incoming traffic through to the new server via Windows Firewall:
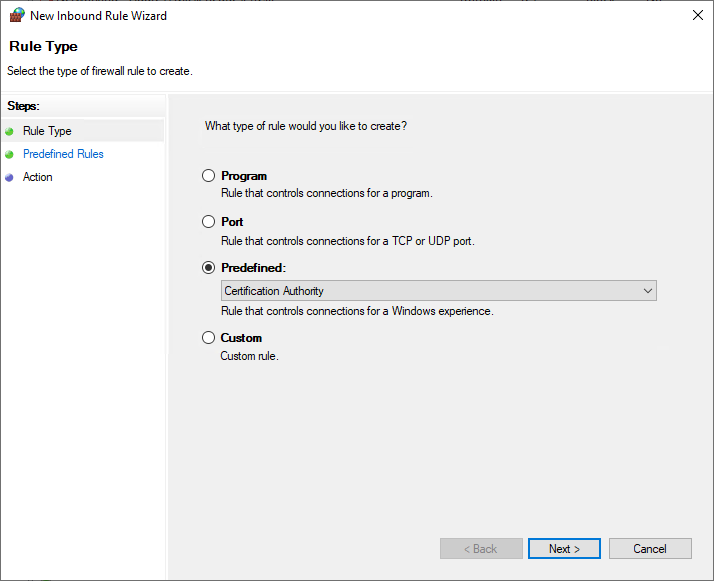
Create a new Inbound rule and select Predefined > Certificate Authority
Select all options for the new rule
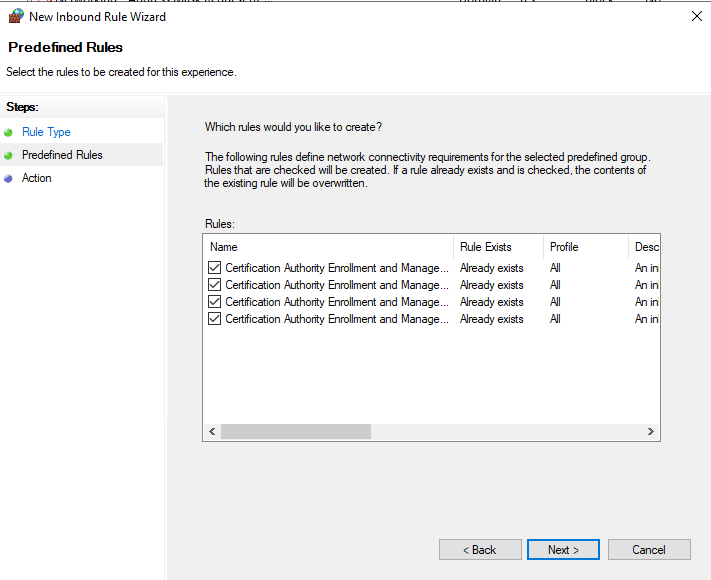
Complete the new rule and you’re done!