This post briefly describes the process to enable & configure the Let’s Encrypt SSL Certificate certbot functionality built into the Sophos SG / UTM firewall.
Country Blocking:
If you have Country Blocking enabled & configured in the firewall, you will need to add some exclusions for Let’s Encrypt services to pass through
There will need to be three exclusions added for Let’s Encrypt services:
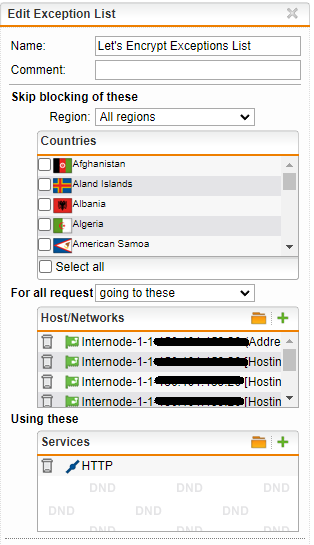
First exclusion will be setup with:
- No countries selected
- For all requests going to (any WAN interfaces that will be used for Let’s Encrypt and / or will have SSL protected services behind them)
- Using services: HTTP
The next exclusion:
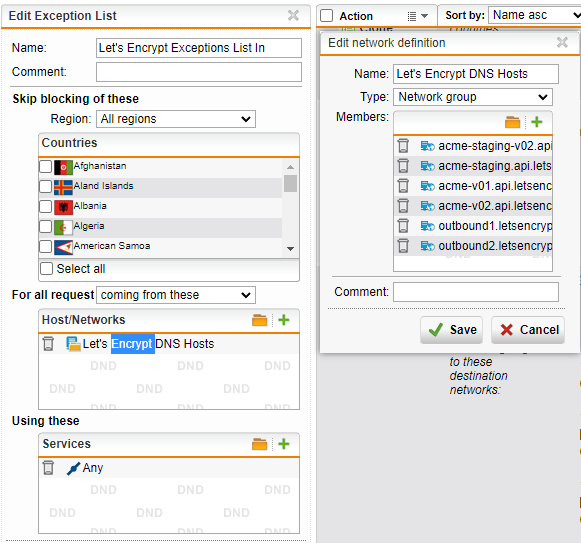
- No countries selected
- For all requests coming from:
- Create a new Network Group and add in the following DNS Hosts:
- acme-staging-v02.api.letsencrypt.org
- acme-staging.api.letsencrypt.org
- acme-v01.api.letsencrypt.org
- acme-v02.api.letsencrypt.org
- outbound1.letsencrypt.org
- outbound2.letsencrypt.org
- Create a new Network Group and add in the following DNS Hosts:
- Using these services: Any
The final country blocking exception:
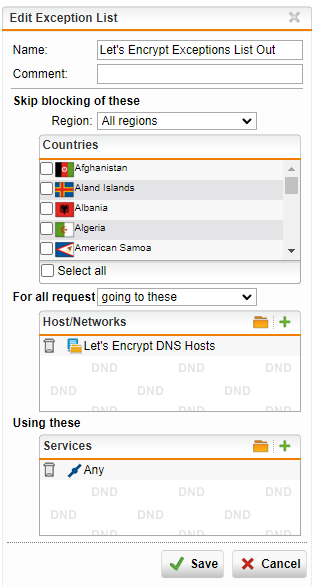
- No countries selected
- For all requests coming from: use the same Network Group you created in the previous rule
- Using these services: Any
Finally, ensure all three new rules are switched on.
Certbot:
Now we need to configure & enable the Let’s Encrypt certbot built into Sophos UTM.
Head to Webserver Protection > Certificate Management
Click on the Advanced tab
Ensure the four fields in the Regerate Signing CA box are filled in and click Apply
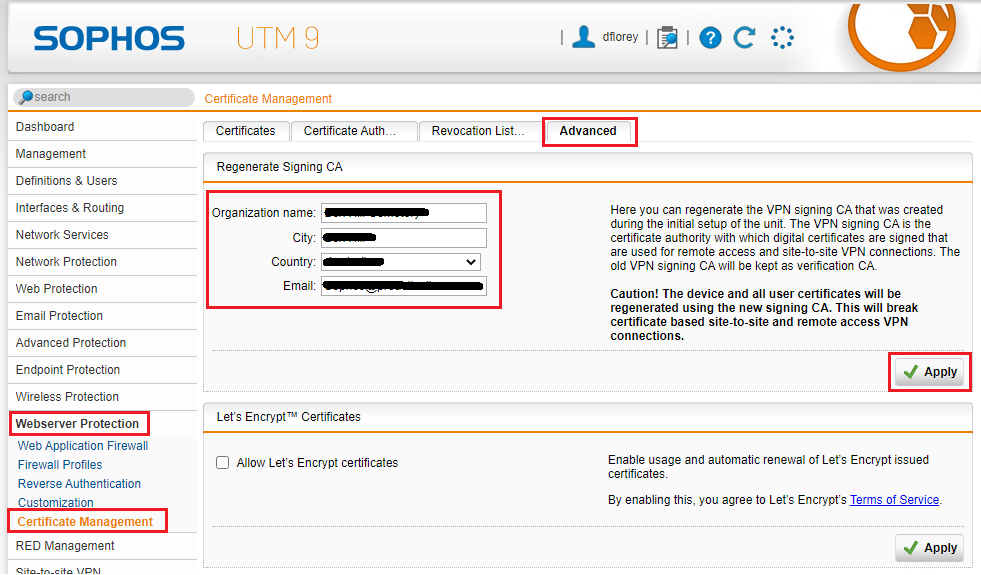
Click to place a check in the Allow Let’s Encrypt certificates checkbox and click Apply
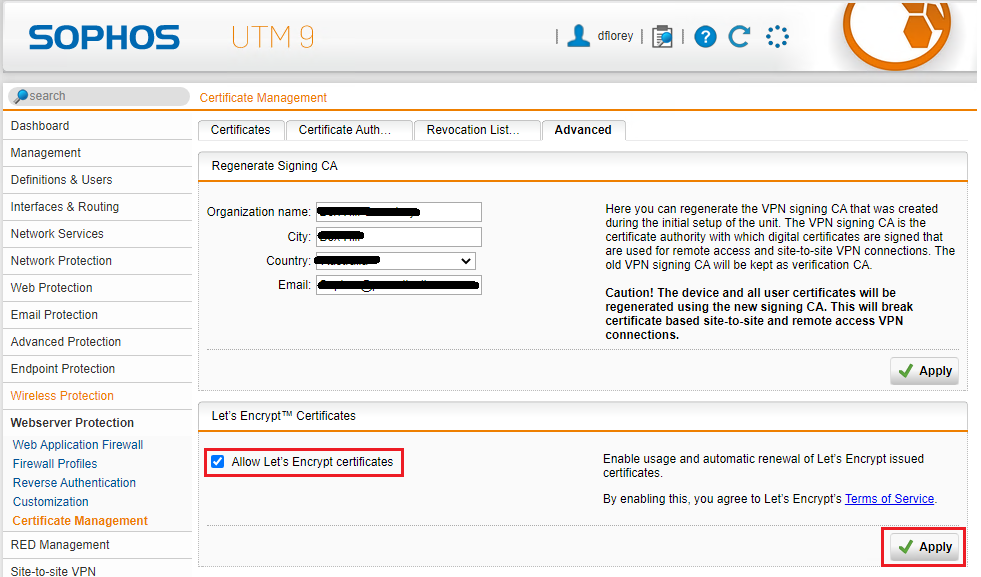
This process will take a minute or two as the account is setup with Let’s Encrypt…
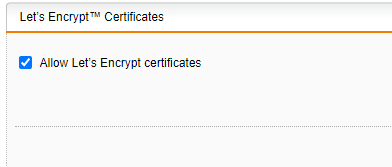
Click the Advanced tab a couple of times until the status changes from:
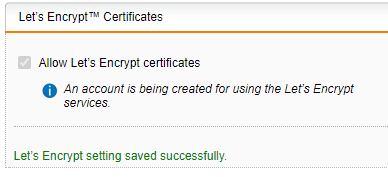
to:
Generate New Certificates:
Now for each certificate you want to create with Let’s Encrypt, you will need to ensure that the FQDN is pointing to the public IP address of the Sophos WAN connection, as this is how the certificates are validated & authorised by LE’s servers and the Sophos certbot.
Once this is done, click on the Certificates tab
Click on the New Certificate button

Change the method from Generate to Let’s Encrypt
- Set the Name to match the FQDN (this makes it easier to identify later on)
- Set the Interface to the WAN interface that the required FQDN resolves to
- Add the FQDN to the domains list
- Click save
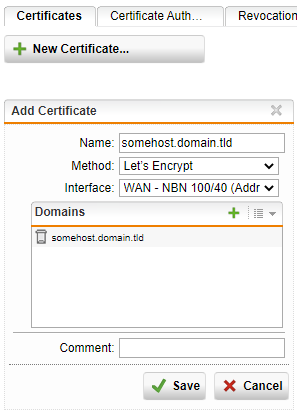
This process can take 2-5 mins. Click the Certificates tab to refresh to get the status of the certificate.
Once the certificate is green and has a valid expiry date, that certificate can now be used for services as required (such as WebAdmin, User Portal, or services in the Webserver Protection).
Troubleshooting:
If you get an error regarding Let’s Encrypt failed to retrieve the current terms of service link, then there are a couple of possibilities:

Ensure you’re running the latest or very recent build of the UTM – update if not
Check the Certificate Authorities tab for anything expired, invalid, etc. and remove them.
Delete the ISRG X1-Root CA (so that only the current R3 certificate is present).
Temporarily turn off country blocking
Ensure DNS resolution on the Sophos is working
Ensure that port 80 isn’t blocked by something else – especially in a double NAT scenario
Enable the SSH access, and execute:
/var/mdw/scripts/httpproxy restart
One thought on “Sophos SG UTM – Enable & Configure Let’s Encrypt for SSL Certificate services”