This guide covers the process to enabling a T2 security enabled Mac to boot from external media such as USB drives for purposes of reinstall or data recovery & diagnostics.
Applies to:
T2 security enabled Macs include macs below and newer versions thereof:
- iMac (Retina 5K, 27-inch, 2020)
- iMac Pro
- Mac Pro (2019)
- Mac Pro (Rack, 2019)
- Mac mini (2018)
- MacBook Air (Retina, 13-inch, 2020)
- MacBook Air (Retina, 13-inch, 2019)
- MacBook Air (Retina, 13-inch, 2018)
- MacBook Pro (13-inch, 2020, Two Thunderbolt 3 ports)
- MacBook Pro (13-inch, 2020, Four Thunderbolt 3 ports)
- MacBook Pro (16-inch, 2019)
- MacBook Pro (13-inch, 2019, Two Thunderbolt 3 ports)
- MacBook Pro (15-inch, 2019)
- MacBook Pro (13-inch, 2019, Four Thunderbolt 3 ports)
- MacBook Pro (15-inch, 2018)
- MacBook Pro (13-inch, 2018, Four Thunderbolt 3 ports)
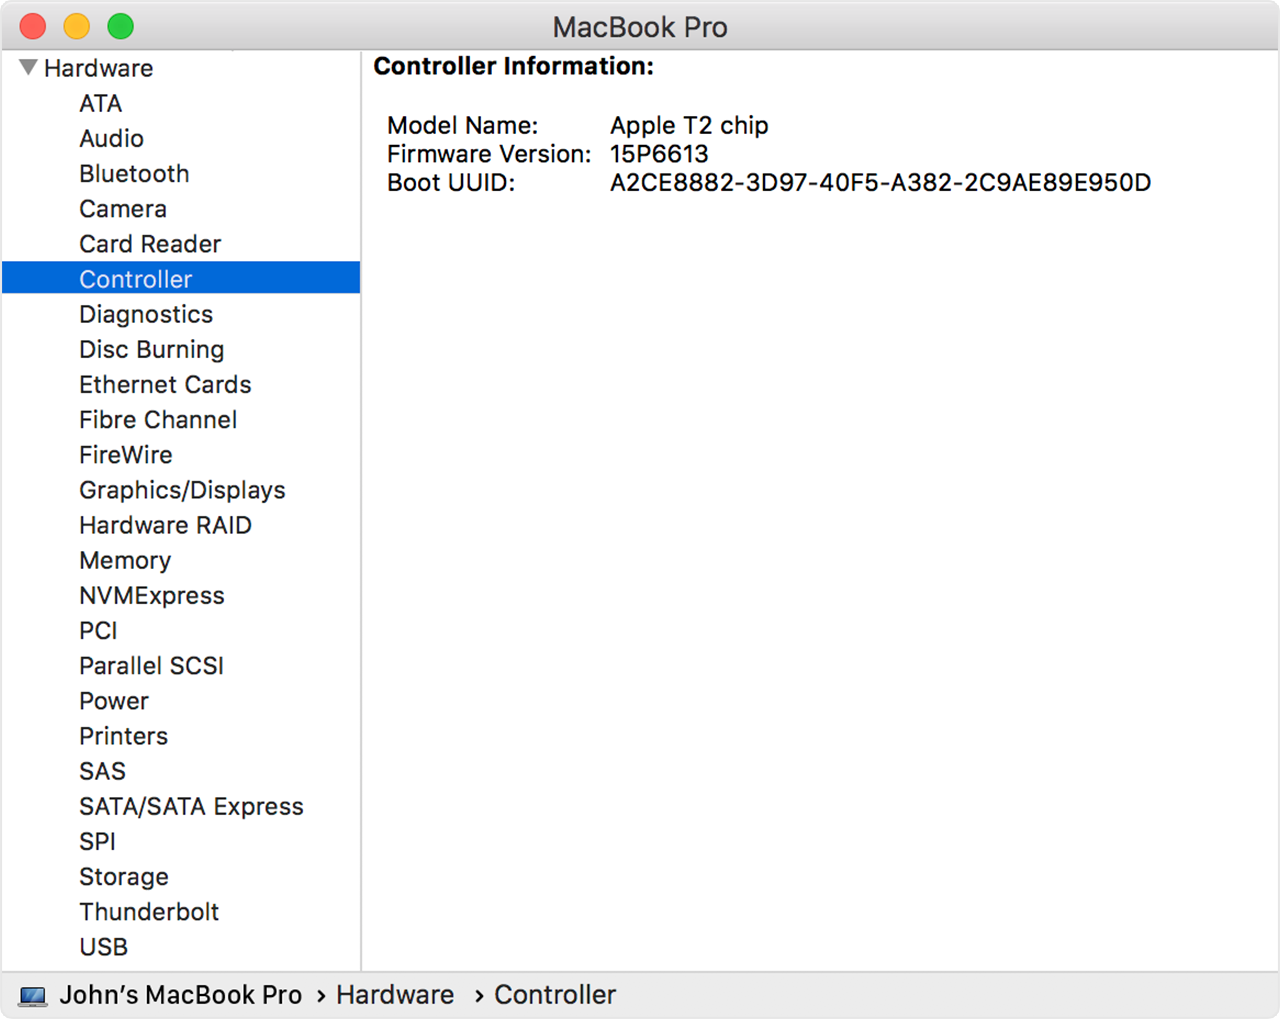
How to confirm if the Mac you’re working on is T2-enabled:
Click the Apple logo top-left > About This Mac > System Information / System Report…

What does T2 actually do?
In short, it provides additional security at a hardware level for the Mac. It provides additional security encryption levels for the OS Disk reducing CPU resources required for the same tasks, helps to prevent malicious code from being injected into the OS core, enhances secure boot, and provides certification of the OS at boot time.
Preparation:
Time required to perform steps outlined: 10-30 mins depending on the Mac and internet speed.
If the Mac already has a firmware password enabled, you will need to know what this is in order to boot into recovery mode & access system utilities.
You will also need to know the password to at least one admin level user account on the system
Steps to complete:
Shutdown the Mac
Power on the Mac holding down the left Alt/Option key
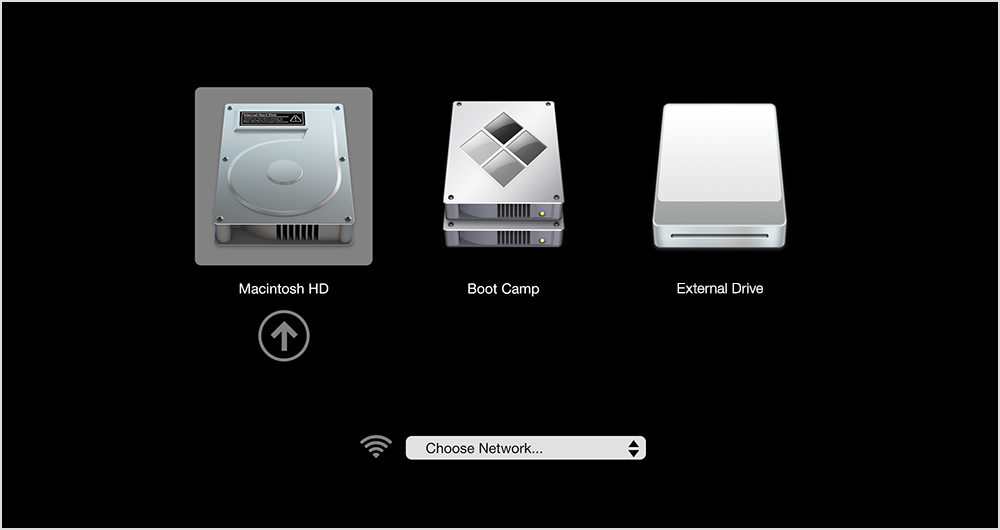
If successful and no firmware password present, you should see a screen similar to the boot screen below:

If prompted for a password first, then this will be the firmware password.
At the boot selector screen, hold down the Command key and press R
This will start to boot into recovery mode. If the recovery mode OS is on the local disk, it will verify & boot from here, if not, it will download a copy from the Internet.
Once you reach the recovery environment, select the language, and then you should reach the recovery mode screen

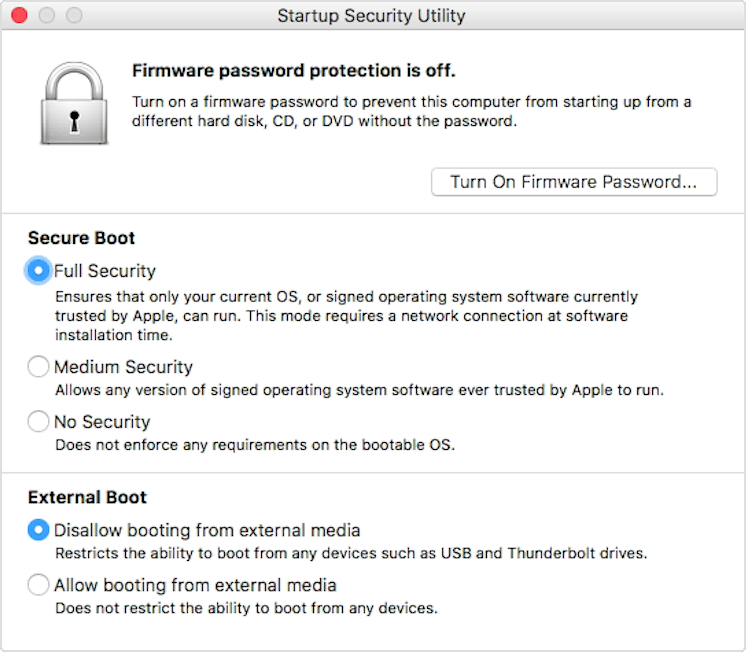
From the Utilities menu at the top of the screen, select Startup Security (or similar, depending on OS / recovery mode version).
You should reach the below screen:

Under External Boot, select the radio option for Allow booting from external media
Use Command+Q to quit back to the main screen
Use Command+Q to quit recovery mode, select reboot
Now when you boot up the Mac holding down the Alt/Option key to access the boot menu, inserting external bootable media will show up in the boot menu and allow the Mac to be booted from it.
Additional info:
If these steps still prevent booting from external media, you may need to go back into Startup Security and change the Secure Boot from: Full Security to: Medium Security – especially if the OS wasn’t recently signed by Apple on this Mac.